


The allure of a perfect, long-lasting manicure that withstands daily life is undeniable. Hybrid nail polishes offer a salon-quality finish that you can achieve in the comfort of your own home. Creating your own starter kit is the first exciting step on this journey. A well-curated collection of tools and products not only ensures a beautiful result but also prioritises the health and safety of your nails. Let's explore how to build your ideal set and master your first stunning hybrid manicure.
What Should Your Starter Hybrid Manicure Kit Contain?
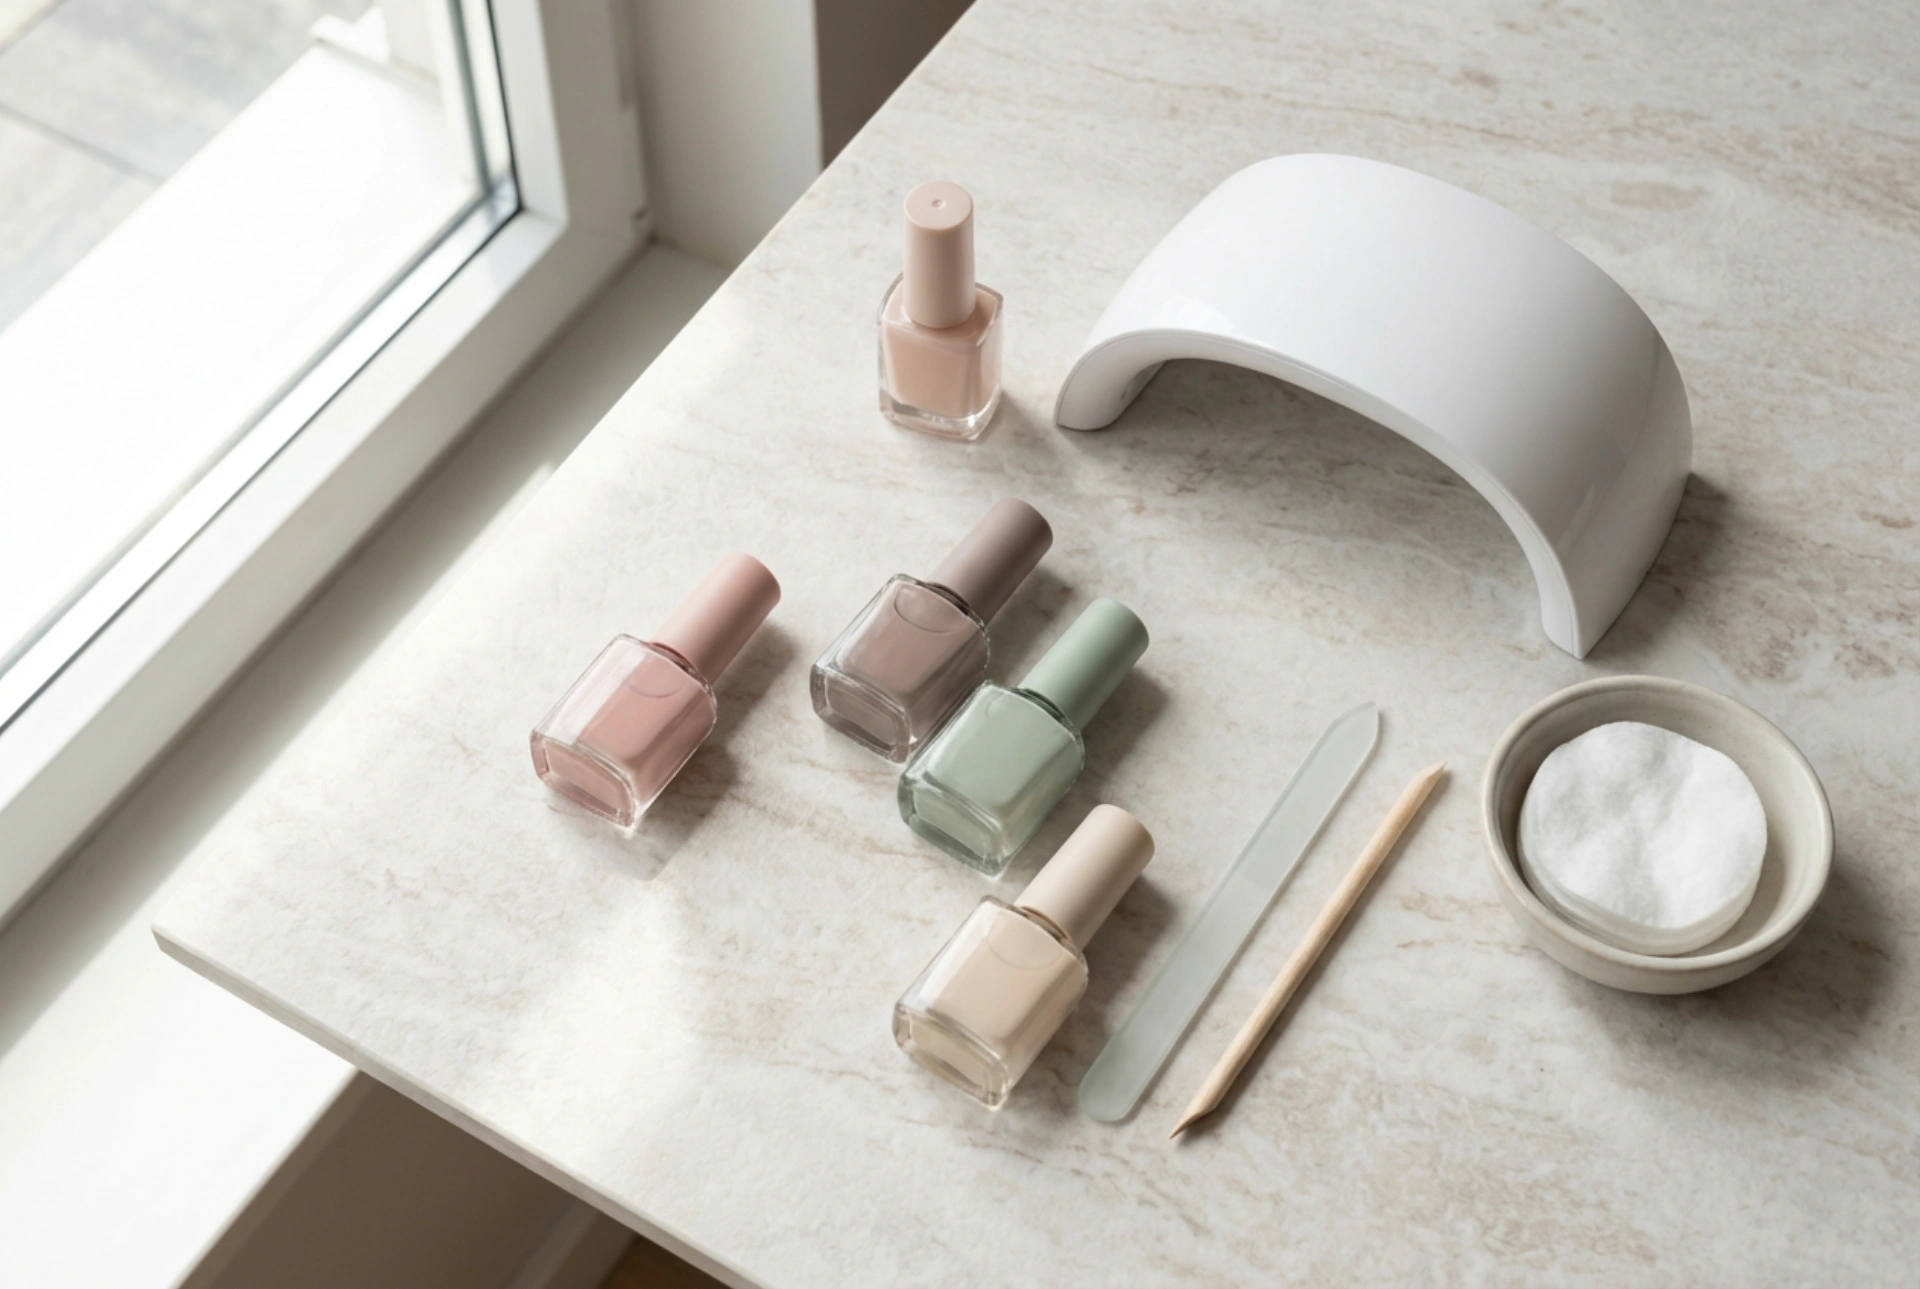
Assembling a complete kit may seem daunting, but it boils down to a few key categories. Focusing on quality essentials will set you up for success. You don't need every gadget available, just the core components to prepare, apply, and finish your manicure properly.
Essential Liquids and Preparations
These fluids are the chemical foundation of a durable hybrid manicure. Each plays a specific role in ensuring adhesion and a flawless finish.
- Nail Cleaner/Degreaser: An alcohol-based solution used to remove dust, oils, and moisture from the nail plate before application and to wipe off the sticky inhibition layer at the end (if your top coat requires it).
- Acid-Free Primer: This optional step acts like double-sided tape, enhancing the bond between the natural nail and the base coat. An acid-free version is gentler and recommended for home use.
- Base Coat: This is a crucial protective layer that prevents the coloured polish from staining your natural nail. It also provides the primary surface for the colour to adhere to.
- Coloured Hybrid Polish: Start with one or two versatile shades you love. The consistency is thicker than traditional polish and requires curing under a lamp to harden.
- Top Coat: This final layer seals in the colour, provides a high-gloss or matte finish, and protects the manicure from chipping and scratching. 'No-wipe' versions are popular as they don't leave a sticky residue after curing.
Tools and Accessories
The right hardware is just as important as the polishes themselves. These tools help you shape, prepare, and cure your manicure professionally.
- LED Lamp: This is the most critical piece of equipment. It emits light at a specific wavelength to cure or harden the hybrid polish. LED lamps are faster and more energy-efficient than older UV models, making them the standard choice for home use.
- Nail Files and Buffers: You'll need a medium-grit file (around 180) to shape your nails and a fine-grit buffer (240 or higher) to gently remove the shine from the nail plate, which is essential for adhesion.
- Cuticle Pusher or Wooden Sticks: Use these to gently push back your cuticles. This creates a clean, larger surface for polish application and prevents the polish from lifting.
- Lint-Free Wipes: Essential for use with the nail cleaner. They don't leave behind tiny fibres that could get trapped in your polish.
Safety First: Preparing for Your At-Home Manicure
Working with professional-grade products at home requires care and attention. Following safety best practices will protect your nails and the skin around them.
Always work in a well-ventilated area to minimise inhalation of fumes. Before using any new product for the first time, it's wise to perform a patch test on a small area of skin to check for any adverse reactions. Avoid applying hybrid polish to damaged, weak nails or irritated skin. Give your nails time to recover if they feel sensitive. When preparing your nails, gently push back cuticles but avoid cutting them, as this can lead to injury and create an entry point for bacteria. Finally, be precise during application to avoid getting polish on your skin. Cured polish on the skin can be difficult to remove and is a common cause of skin sensitivity over time.
Your First Hybrid Manicure: A Step-by-Step Guide
With your kit assembled and safety precautions in mind, you're ready for your first application. Work on one hand at a time, taking your time with each step for the best results.
Step 1: Nail Preparation
Start by removing any old polish. Use your nail file to shape the free edge of your nails as desired. Next, take the buffer and gently rub the entire surface of each nail plate until it is completely matte. Use a cuticle pusher or wooden stick to carefully push back your cuticles. Finally, saturate a lint-free wipe with nail cleaner and thoroughly wipe down each nail to remove all dust and oils.
Step 2: Applying the Base and Colour
If using, apply a very thin layer of acid-free primer and let it air dry for about 60 seconds. Next, apply a thin, even layer of the base coat, being careful to avoid touching your cuticles or sidewalls. 'Cap' the free edge by running the brush along the tip of the nail. Cure it under the LED lamp for the time specified by the manufacturer (usually 30-60 seconds). Now, apply your first thin layer of coloured polish, again avoiding the skin and capping the free edge. Cure it under the lamp. Apply a second coat of colour for full opacity and cure again.
Step 3: Sealing the Look
To finish, apply a thin layer of top coat over the entire nail, once more capping the free edge to seal everything in. Cure for the recommended time, which may be slightly longer for the top coat. If you used a no-wipe top coat, you're done! If not, take a fresh lint-free wipe with nail cleaner and wipe away the sticky layer to reveal your high-shine, durable manicure.
Common Mistakes to Avoid
A few common pitfalls can trip up beginners. Keep these in mind to ensure a perfect finish every time.
- Applying layers that are too thick: This is the most frequent mistake. Thick layers do not cure properly, leading to wrinkling and a manicure that peels off quickly. Always apply thin, even coats.
- Flooding the cuticles: Getting polish on the skin around your nail will cause the manicure to lift prematurely as your nail grows. It can also lead to skin irritation.
- Improper nail preparation: Skipping the buffing or degreasing steps will compromise adhesion, causing the polish to chip or peel within days.
- Aggressive removal: Never peel or scrape off your hybrid manicure. This tears away layers of your natural nail, leaving it weak and damaged. Always use a proper removal method with a dedicated remover and foils.


