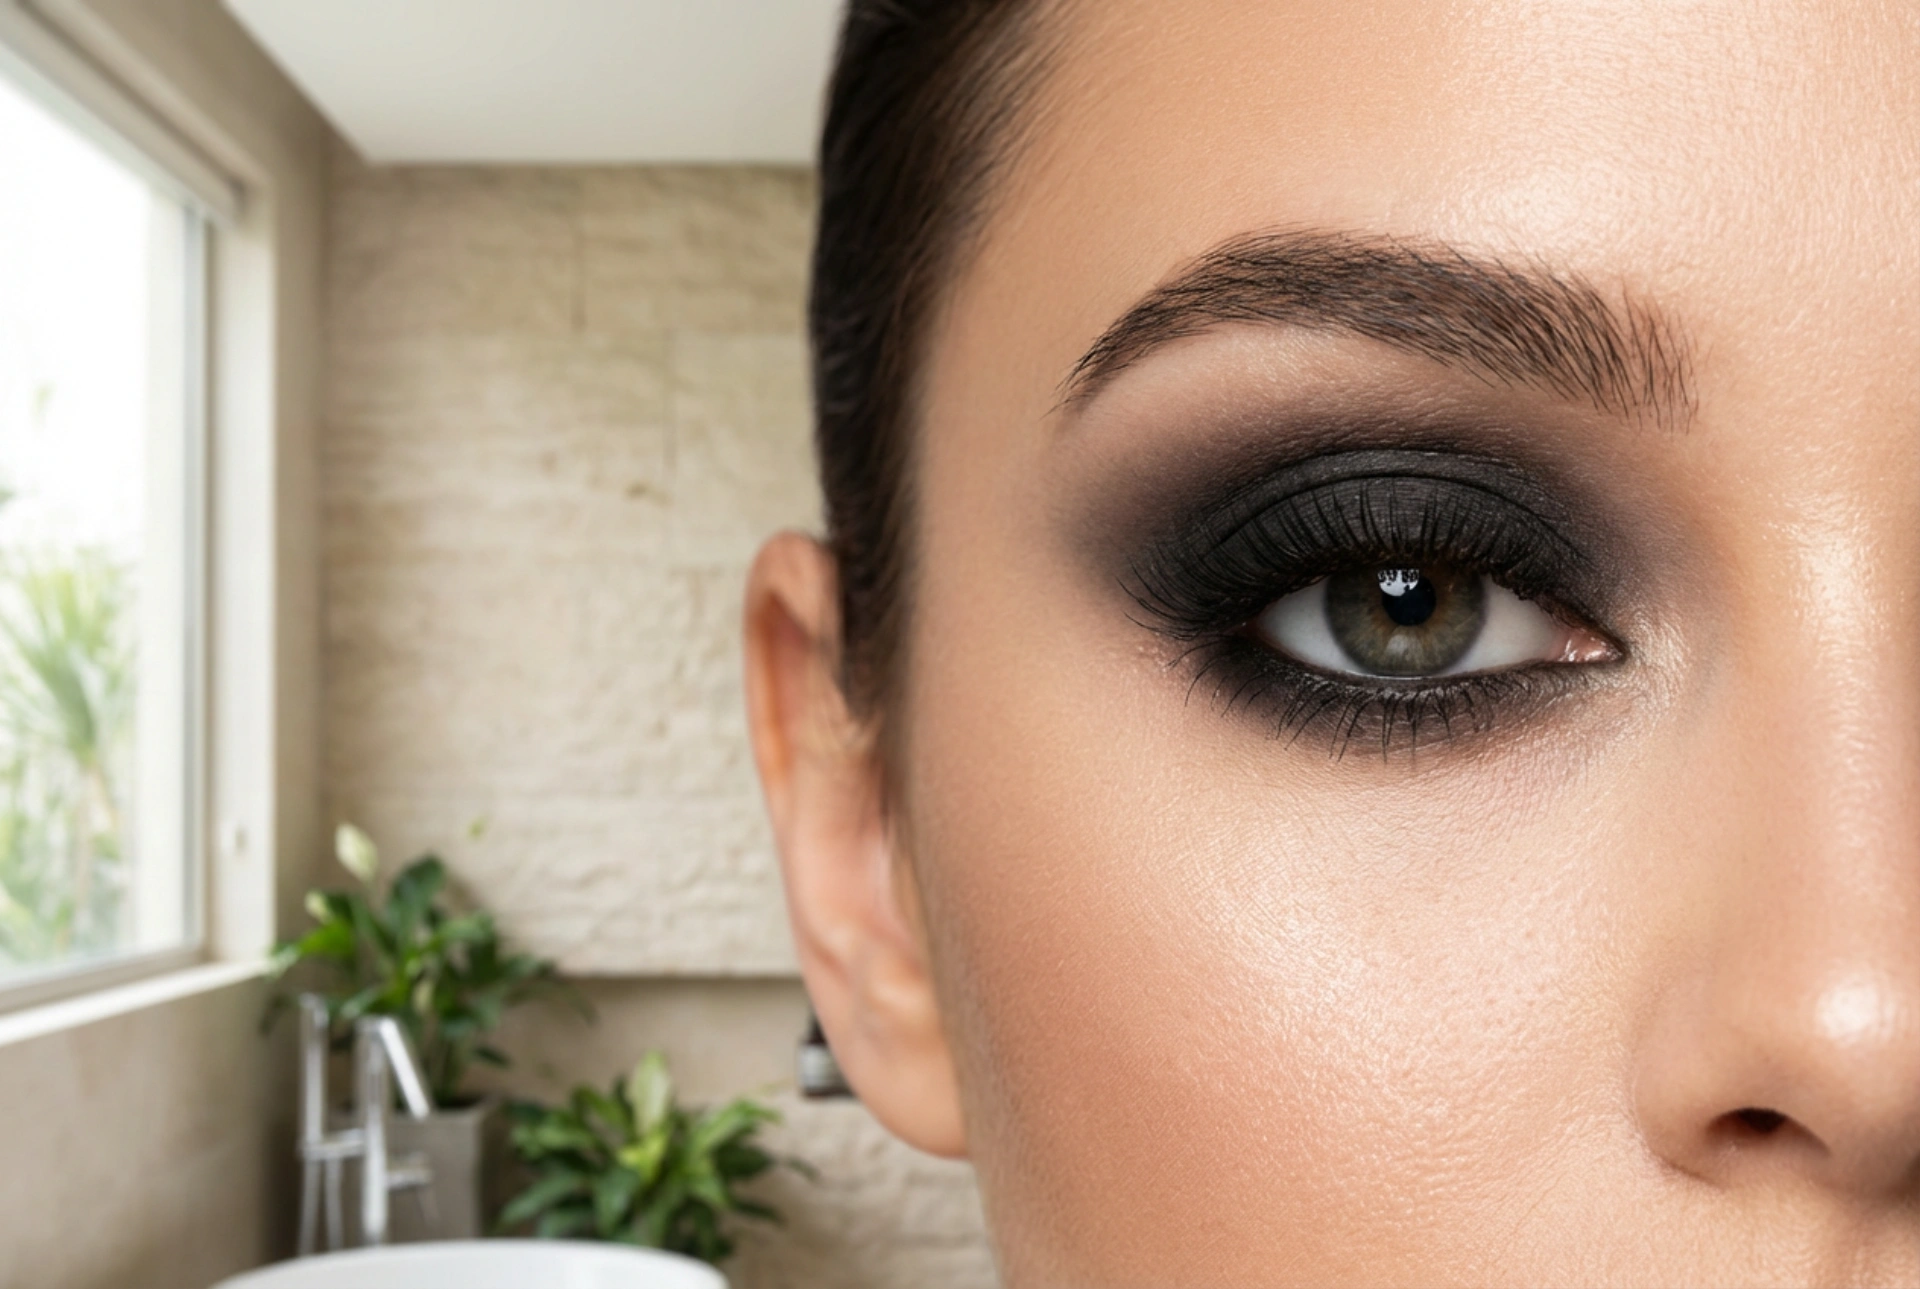


Black eyeshadow is a powerful tool in any makeup collection, capable of creating looks that range from subtly smoky to intensely dramatic. However, its deep pigmentation can be intimidating, with many fearing the dreaded 'panda eye' effect caused by smudging and fallout. The key to a flawless, elegant finish, like a perfectly diffused smoky eye, lies not in avoiding black eyeshadow, but in mastering its application. With the right preparation, tools, and techniques, you can achieve a sophisticated look that is clean, long-lasting, and beautifully blended.
The Foundation: Preparing Your Eyelids for Intensity
The first and most critical step to prevent black eyeshadow from smudging or creasing is creating a perfect canvas. The natural oils on your eyelids can cause makeup to break down and migrate throughout the day. A proper base ensures the eyeshadow adheres properly and its colour stays true and vibrant for hours.
Why an Eyeshadow Primer is Essential
An eyeshadow primer is a product specifically designed to create a smooth, slightly tacky surface for shadow to grip onto. It acts as a barrier between your skin's oils and your makeup. Applying a thin layer of primer from your lash line to your brow bone will not only intensify the black pigment but also significantly improve its longevity, preventing it from settling into fine lines. Allow the primer to set for a minute before you begin applying any colour.
Alternative Base Options
If you don't have an eyeshadow primer, a good alternative is to use a small amount of a matte, long-wearing concealer. Apply a very thin layer and blend it out evenly over the entire eyelid. It is crucial to set this with a light dusting of translucent setting powder or a neutral-toned eyeshadow. This step mattifies the base, making it easier to blend powders on top without them catching or becoming patchy.
Mastering the Art of Application and Blending
The secret to avoiding a heavy, messy application is to work in thin layers. It's always easier to add more product than to take it away. This gradual approach gives you maximum control over the intensity and placement of the shadow.
Choosing the Right Tools
Using the correct brushes is non-negotiable for a well-blended look. You will generally need three key types:
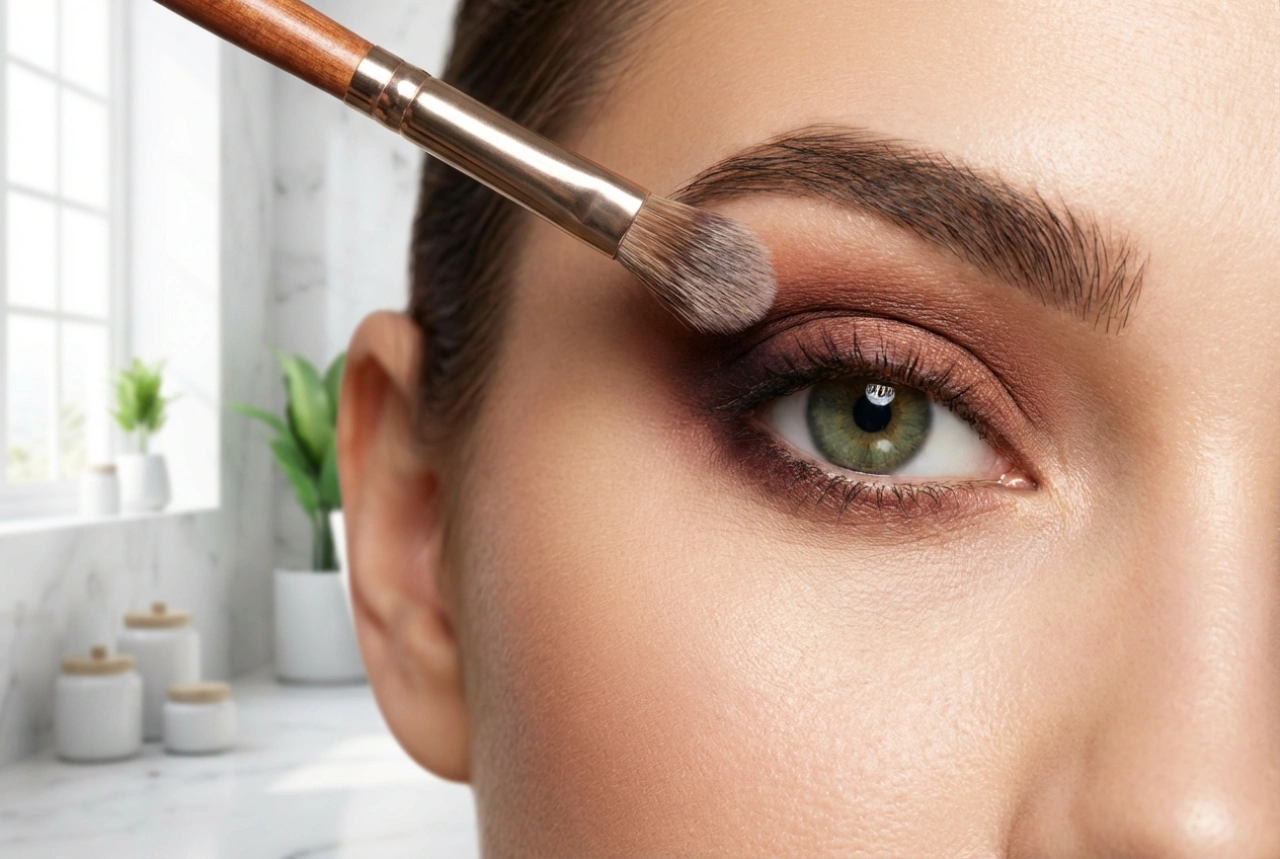
- A flat shader brush: This type of brush has dense, firm bristles, perfect for packing or stamping the black eyeshadow onto the eyelid with minimal fallout.
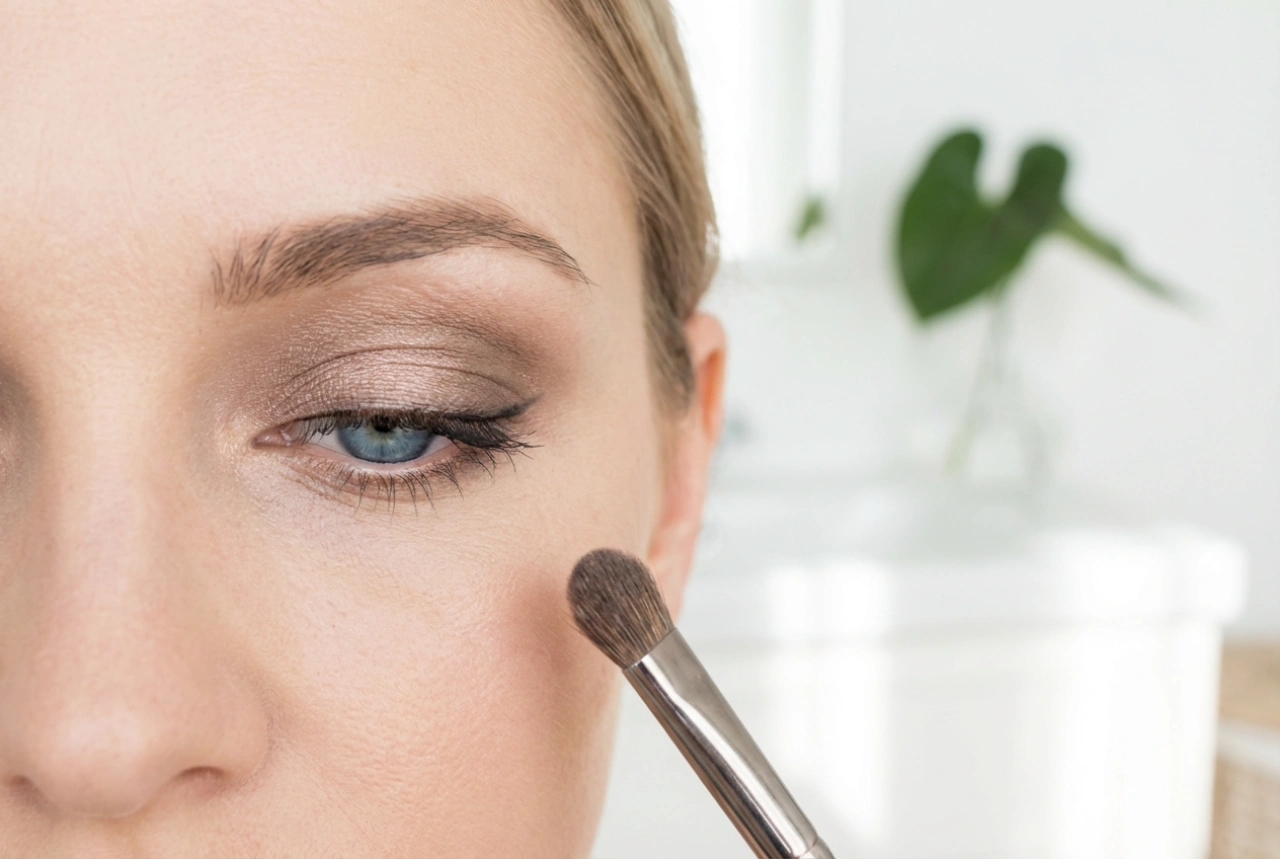
- A fluffy blending brush: This is your most important tool. A clean, soft, and fluffy brush is used to diffuse harsh edges and create a seamless gradient. It's wise to have more than one on hand.
- A small pencil brush: With its small, pointed tip, this brush is ideal for precise application along the lower lash line or for adding depth to the outer corner of the eye.
The Stamping and Blending Technique
Instead of sweeping the black shadow across your lid, which can cause fallout and a patchy finish, start by loading your flat shader brush and gently tapping off any excess. Then, press or 'stamp' the colour onto your mobile eyelid, focusing the intensity near the lash line. Once the initial layer is down, take a clean, fluffy blending brush. Using very light pressure, begin to soften the top edge of the black shadow. Use small, circular motions or a 'windscreen wiper' motion back and forth in the crease to diffuse the line and create a smoky effect. To help with the blend, you can use a mid-toned grey or brown shadow as a transition shade just above the black, blending the two together.
Shaping and Defining for Your Eye Type
How you place your black eyeshadow can enhance your natural eye shape. While there are no strict rules, some general guidelines can help you achieve a more flattering result. The goal is to create balance and dimension.
Adapting to Your Eye Shape
For hooded or smaller eyes, concentrating the darkest pigment on the outer third of the lid and blending it upwards and outwards can create the illusion of lift and more space. Avoid taking the black shadow too high up towards the brow bone. For almond or large eyes, you have more space to play with, and you can apply the black shadow more generously across the lid for a bold statement. For round eyes, elongating the shadow towards the outer corners can create a more almond-like shape.
The Importance of a Transition Shade
A transition shade is a neutral colour, often a soft brown, taupe, or grey, that is a few shades darker than your skin tone. Applying this into and slightly above your crease before you apply the black shadow helps to create a soft gradient. It acts as a bridge between the intense black on your lid and the natural skin tone of your brow bone, ensuring the final look is smoky and professional, not just a harsh block of colour.
Finishing Touches and Clean-Up
Even with careful application, a little fallout from a dark shadow is almost inevitable. A few simple tricks can make clean-up effortless.
Managing Fallout
One of the most effective methods is to do your eye makeup before your face makeup. This way, you can easily wipe away any fallen pigment with a makeup wipe without disturbing your foundation or concealer. Another popular technique is 'baking', where you apply a thick layer of loose translucent powder under your eyes before starting your eyeshadow. This powder catches any fallout, and you can simply sweep it all away with a fluffy brush once you're done.
Creating a Sharp Edge
For a very clean and lifted look, you can sharpen the outer edge of your eyeshadow. Take a flat brush with a small amount of concealer or a cotton bud dipped in makeup remover and gently sweep it upwards from the outer corner of your eye towards the tail of your brow. This creates a crisp, defined line that elevates the entire look. Finally, complete your eye makeup with a coat of black mascara to blend your natural lashes into the look and add further definition.