


Achieving perfectly sculpted, uniform nail extensions can be an intricate process, but modern techniques have made it more accessible than ever. Dual nail forms, also known as reverse forms, are a revolutionary tool for creating beautiful extensions with impressive speed and precision. They act as a mould to build the nail, resulting in a smooth surface and an ideal shape right from the start. This guide will walk you through the essential steps of using dual forms, from initial shaping to the final, gentle removal.
What Are Dual Nail Forms?
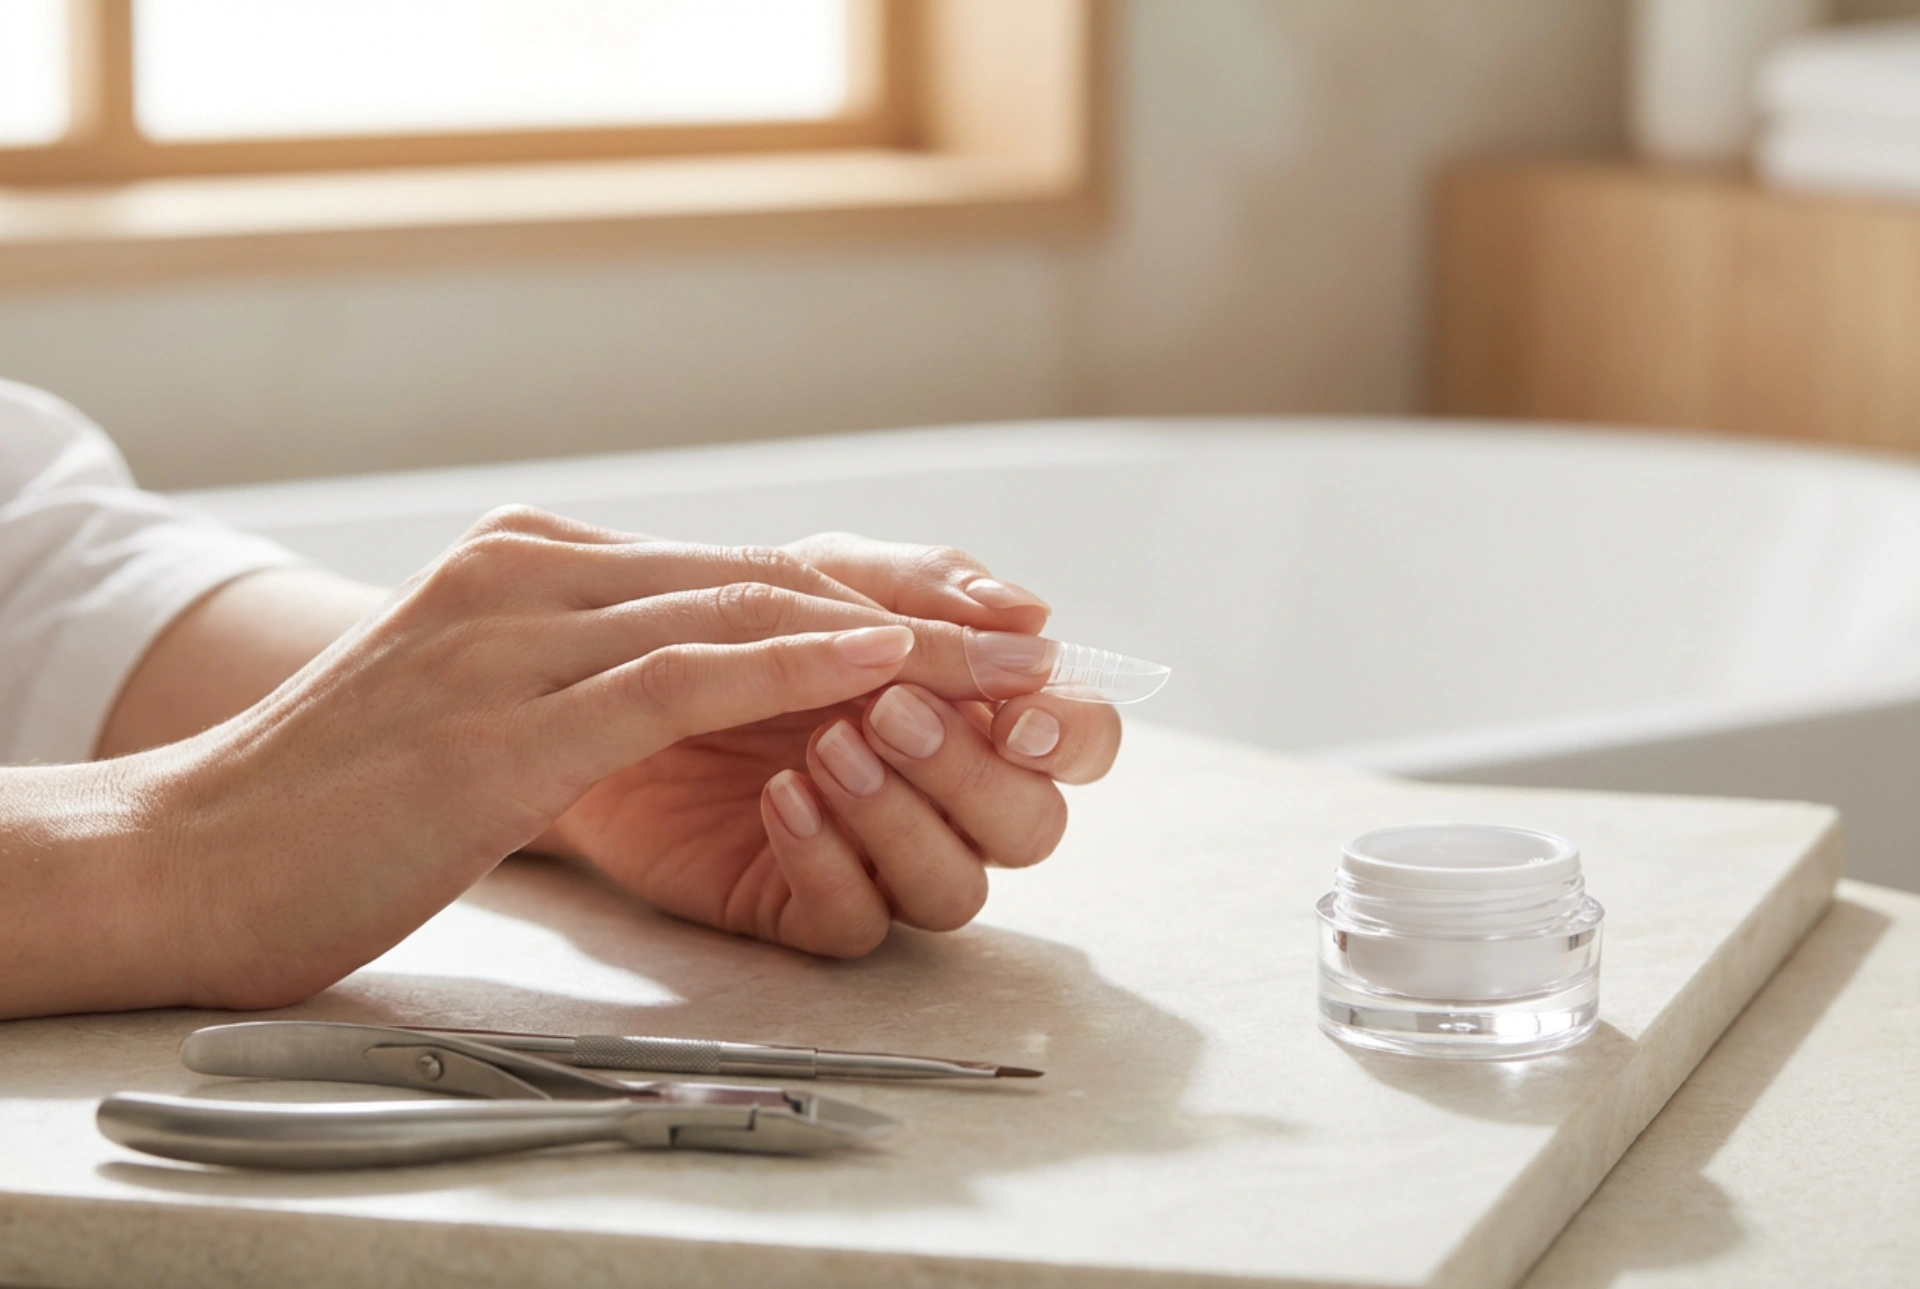
Dual forms are reusable, flexible plastic tips that function as a mould for your nail enhancement product, such as gel or poly-gel. Unlike traditional paper forms that are placed under the natural nail's free edge, dual forms are placed on top of the nail plate. The enhancement product is applied inside the form, which is then pressed onto the prepared natural nail and cured. The main advantage is that the form creates a perfectly smooth top surface and a flawless C-curve, significantly reducing the amount of filing and shaping required after curing. This makes them a popular choice for both beginners and experienced technicians looking for an efficient and consistent method.
Essential Preparation of the Nail Plate
The longevity of any nail enhancement heavily relies on proper preparation. Neglecting this crucial stage can lead to lifting and premature wear. Before you even touch a dual form, ensure your natural nails are perfectly prepped and ready for application. This creates a clean and stable foundation for the product to adhere to.
- Cleanse and Sanitise: Begin by thoroughly washing your hands and nails. Use a sanitising spray on your hands and a nail cleanser on the nail plates to remove any oils or contaminants.
- Cuticle Care: Gently push back the cuticles using a cuticle pusher. If necessary, carefully trim any non-living tissue with cuticle nippers. A clean cuticle area is vital to prevent lifting.
- Buff the Surface: Using a fine-grit buffer, lightly buff the entire surface of the natural nail. The goal is to remove the natural shine, not to thin the nail. This creates a slightly rough texture for the product to grip onto.
- Dehydrate and Prime: After removing any dust, apply a nail dehydrator to the nail plate to remove any remaining moisture and oils. Follow this with a thin layer of a suitable primer, which acts like double-sided tape, bonding the natural nail to the enhancement product. Allow it to dry completely as per the product's instructions.
The Application Technique: Shaping and Pressing
With the nails prepped, you can move on to the core of the process. The success of a dual form application lies in selecting the right size, applying the product correctly, and pressing the form onto the nail with precision.
Selecting the Perfect Form Size
Choosing the correct dual form size is non-negotiable. The form should fit your natural nail perfectly from one sidewall to the other without any gaps or pressure. If it's too small, it will pinch the nail and create an unnatural shape. If it's too large, the product will spread out, flooding the cuticle and sidewalls. Test a few sizes on each finger to find the ideal match before applying any product.
Applying Product and Pressing the Form
Once you've selected your forms, take your chosen enhancement product (e.g., poly-gel, builder gel) and apply a suitable bead inside the dual form. Use a brush dampened with a slip solution or appropriate liquid to spread the product evenly within the form, building it up to your desired length and thickness. Focus on creating a thinner layer near the cuticle area and building up the structure towards the free edge and apex. Next, gently place the form onto the nail plate, starting at a 45-degree angle near the cuticle. Slowly press it down, ensuring the product spreads evenly without creating air bubbles. Watch for any excess product that may squeeze out around the cuticle or sidewalls and clean it up immediately with your brush before curing.
Final Steps: Removal and Finishing Touches
After the nail is correctly positioned, it must be cured under an LED or UV lamp. It is often helpful to flash-cure for a few seconds while holding the form in place to prevent it from shifting. Once secured, proceed with the full cure time recommended for your product. After curing is complete, the form can be removed.
- Removing the Form: This step is surprisingly simple. Gently pinch the end of the form or wiggle it from side to side. It should pop off cleanly, revealing a smooth, shiny nail extension.
- Cleansing and Shaping: The cured extension will have a sticky inhibition layer. Wipe this away with a lint-free wipe soaked in a cleanser. While the top is smooth, the underside and free edge may need refining. Use a nail file to shape the free edge to your desired style (e.g., square, almond) and smooth the transition underneath if necessary.
- Applying a Top Coat: To protect the extension and give it a lasting, high-gloss shine, apply a layer of top coat over the entire nail, capping the free edge. Cure this for the recommended time.
- Nourish the Cuticles: Finish your manicure by applying a drop of cuticle oil and massaging it into the skin around the nail. This rehydrates the area and gives your new nails a professional, polished look.
Mastering dual forms may require a little practice, but their ability to deliver consistent, beautifully shaped nails makes them an invaluable tool for any nail enthusiast. By following these steps for preparation, application, and finishing, you can achieve durable and elegant nail extensions with a flawless, salon-quality finish.


