


Achieving a neat, polished manicure at home often comes down to the details, and proper cuticle care is paramount. While many focus on the colour and shape of their nails, well-maintained cuticles provide the perfect frame for any look. A cuticle remover is a key product in a modern nail care routine, offering a gentle and effective way to manage overgrown or excess tissue without the need for cutting. Understanding how to use it correctly can elevate your home manicure from amateur to professional-looking.
What is a Cuticle Remover and How Does It Work?
A cuticle remover is a cosmetic gel or liquid specifically formulated to soften and break down the non-living tissue that adheres to the nail plate. This excess skin, often mistaken for the live cuticle (the eponychium), can make nails appear untidy and shorter than they are. The primary function of a remover is to make this dead skin easy to push back and wipe away. The formulas typically contain alkaline ingredients, such as potassium hydroxide or sodium hydroxide, which work to gently dissolve the keratin in the dead skin cells. Some milder formulations may use fruit acids (AHAs) or urea to achieve a similar softening effect. When applied, the product quickly penetrates and breaks down the targeted tissue, allowing for its effortless removal without affecting the living skin around the nail.
A Step-by-Step Guide to Using Cuticle Remover
Incorporating a cuticle remover into your routine is simple. Following these steps ensures a safe and effective application for beautifully groomed nails.
Step 1: Preparation
Begin with clean, dry hands. Ensure all previous nail polish has been thoroughly removed. You do not need to soak your hands before application, as most removers work best on dry skin. Have your tools ready: a wooden orange stick or a metal cuticle pusher with a soft tip, and cotton pads.
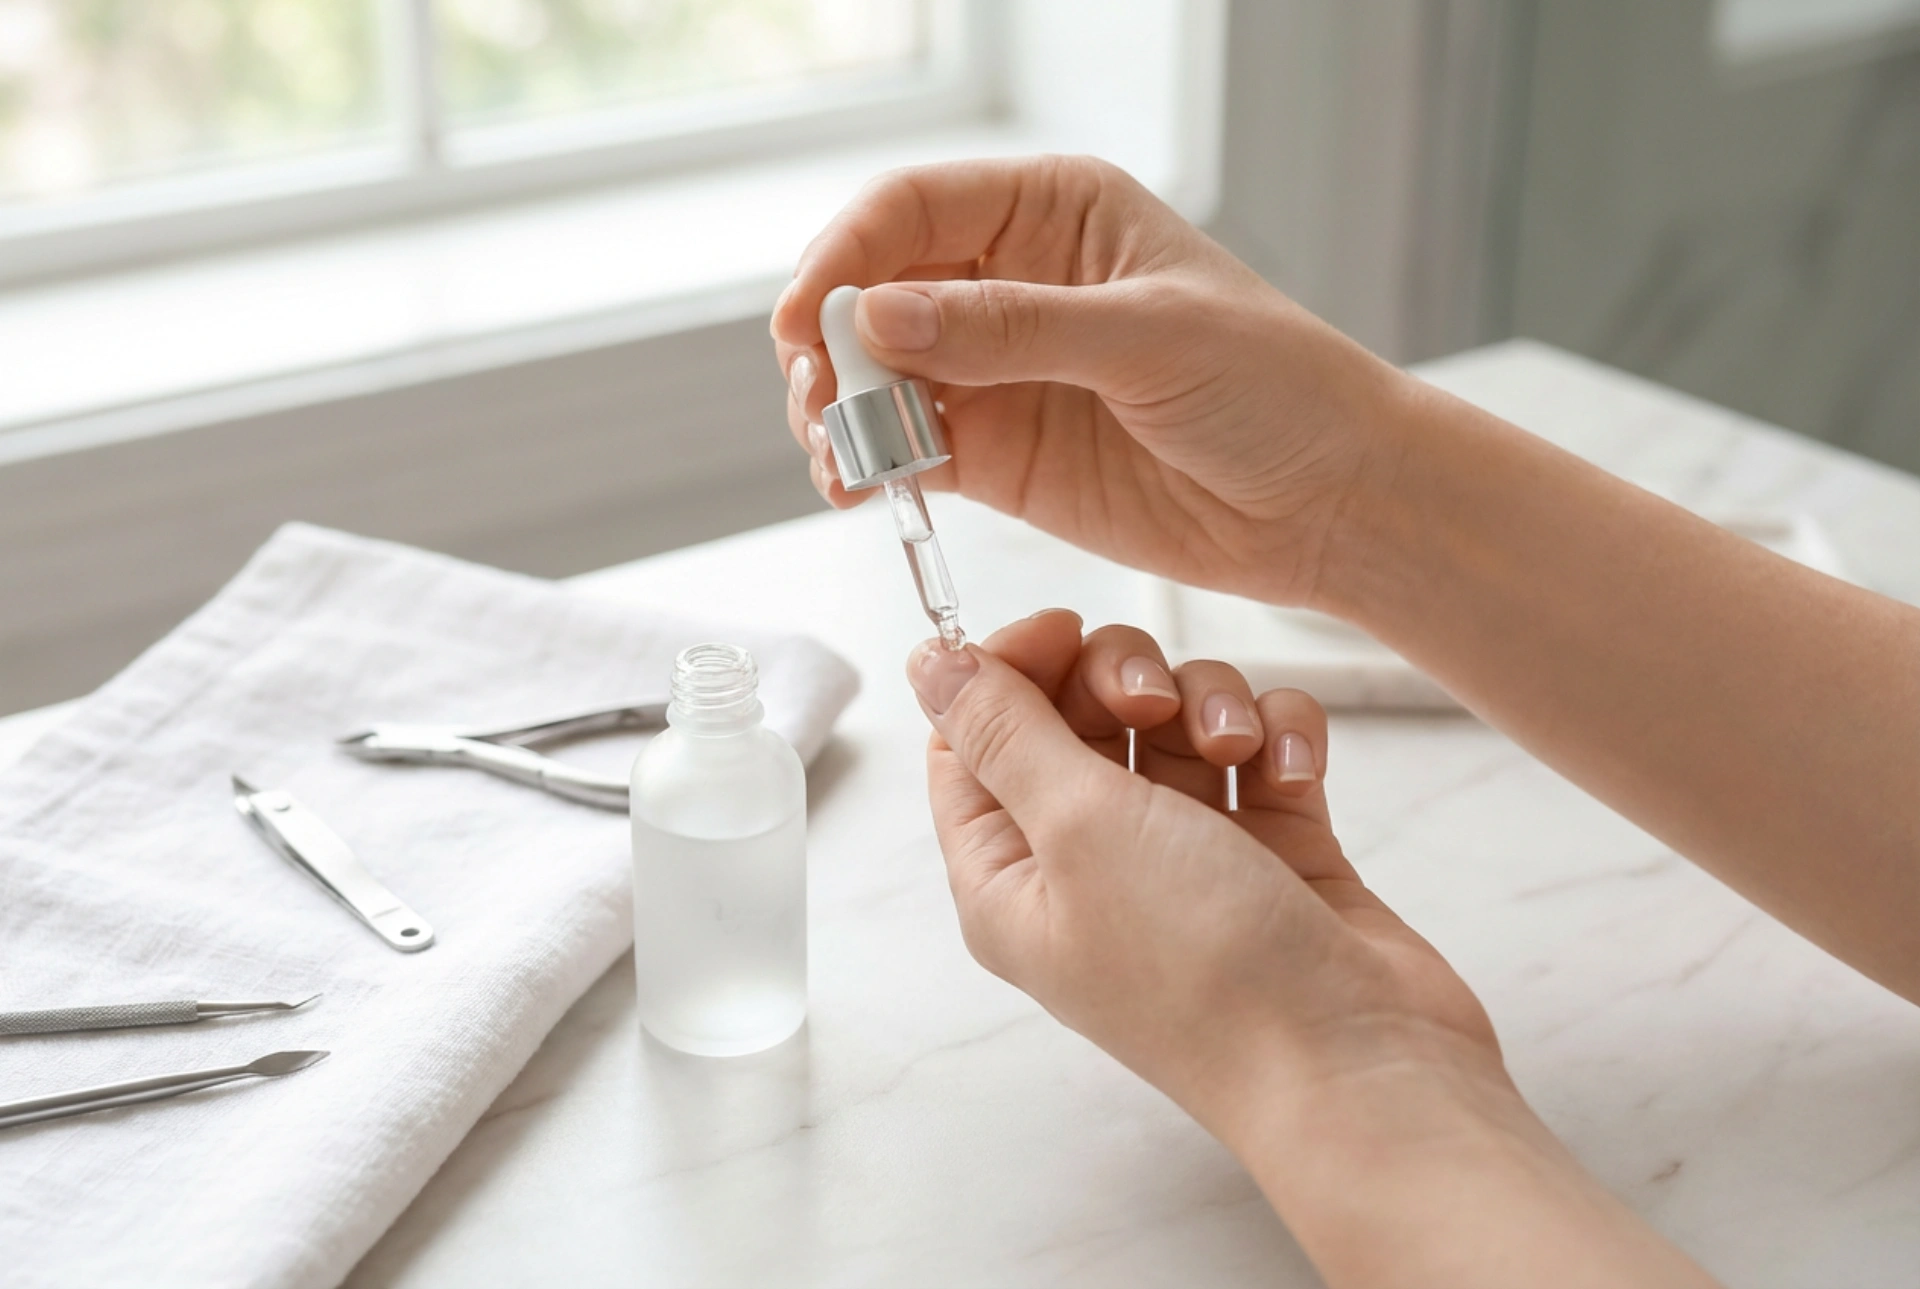
Step 2: Application
Apply a thin layer of the cuticle remover directly onto the cuticle area of each nail on one hand. Be precise and try to avoid spreading the product onto the surrounding skin of your fingers. Most products come with a brush or a nozzle for easy application. Working on one hand at a time prevents the product from staying on for too long.
Step 3: Wait for the Magic to Happen
Let the product sit for the duration specified in its instructions. This is typically very short, often between 15 and 60 seconds. It is crucial not to exceed the recommended time, as the active ingredients can cause irritation if left on the skin for too long. You will not necessarily see a visible change, but the product will be actively softening the dead tissue.
Step 4: Gently Push Back the Cuticles
Take your wooden cuticle stick or a gentle pusher and carefully start to push back the softened cuticles. Use small, circular motions at the base of the nail to gently nudge the cuticle line back and lift away the dissolved, non-living tissue from the nail plate. Be gentle; there should be no need to apply firm pressure.
Step 5: Cleanse and Neutralise
Once you have pushed back the cuticles on all five nails, use a cotton pad to wipe away the product residue and the loosened flecks of skin. Immediately after, wash your hands thoroughly with warm water and a mild soap. This step is essential as it neutralises the remover's alkaline formula and stops its action, preventing potential skin irritation.
Best Practices for Healthy Cuticles
To get the most out of your cuticle remover and maintain healthy nails, keep these tips in mind:
- Patch Test First: If you have sensitive skin, it's wise to test the product on a small area of one nail before applying it to all ten.
- Never Cut Live Skin: The goal is to remove the dead, transparent skin on the nail plate, not the eponychium (the band of living tissue at the base of the nail). Cuticle removers help differentiate between the two, making it easier to avoid cutting.
- Don't Overuse It: Using a cuticle remover once a week or every two weeks is generally sufficient. Overuse can lead to dryness and irritation.
- Hydration is Key: After washing your hands, always follow up with a nourishing cuticle oil or a rich hand cream. This replenishes moisture lost during the process and keeps the skin around your nails soft, supple, and healthy.
- Avoid on Broken Skin: Never apply cuticle remover to any cuts, sores, or irritated skin around the nail, as this can cause stinging and further irritation.
By correctly using a cuticle remover, you can maintain clean, elegant nail beds that form the perfect foundation for any manicure. It's a simple, safe, and effective method for achieving a salon-worthy finish in the comfort of your own home.


