


Achieving a salon-quality manicure at home has become an accessible luxury, thanks to the availability of user-friendly gel nail systems. The centrepiece of this setup is the curing lamp, which transforms liquid polish into a durable, glossy finish that can last for weeks. Creating your own at-home manicure station is not just about buying a lamp; it's about curating a complete kit and mastering a methodical process. This guide will walk you through assembling the essentials and establishing a workflow for a flawless, long-lasting gel manicure every time.
Building Your Starter Kit: The Essentials
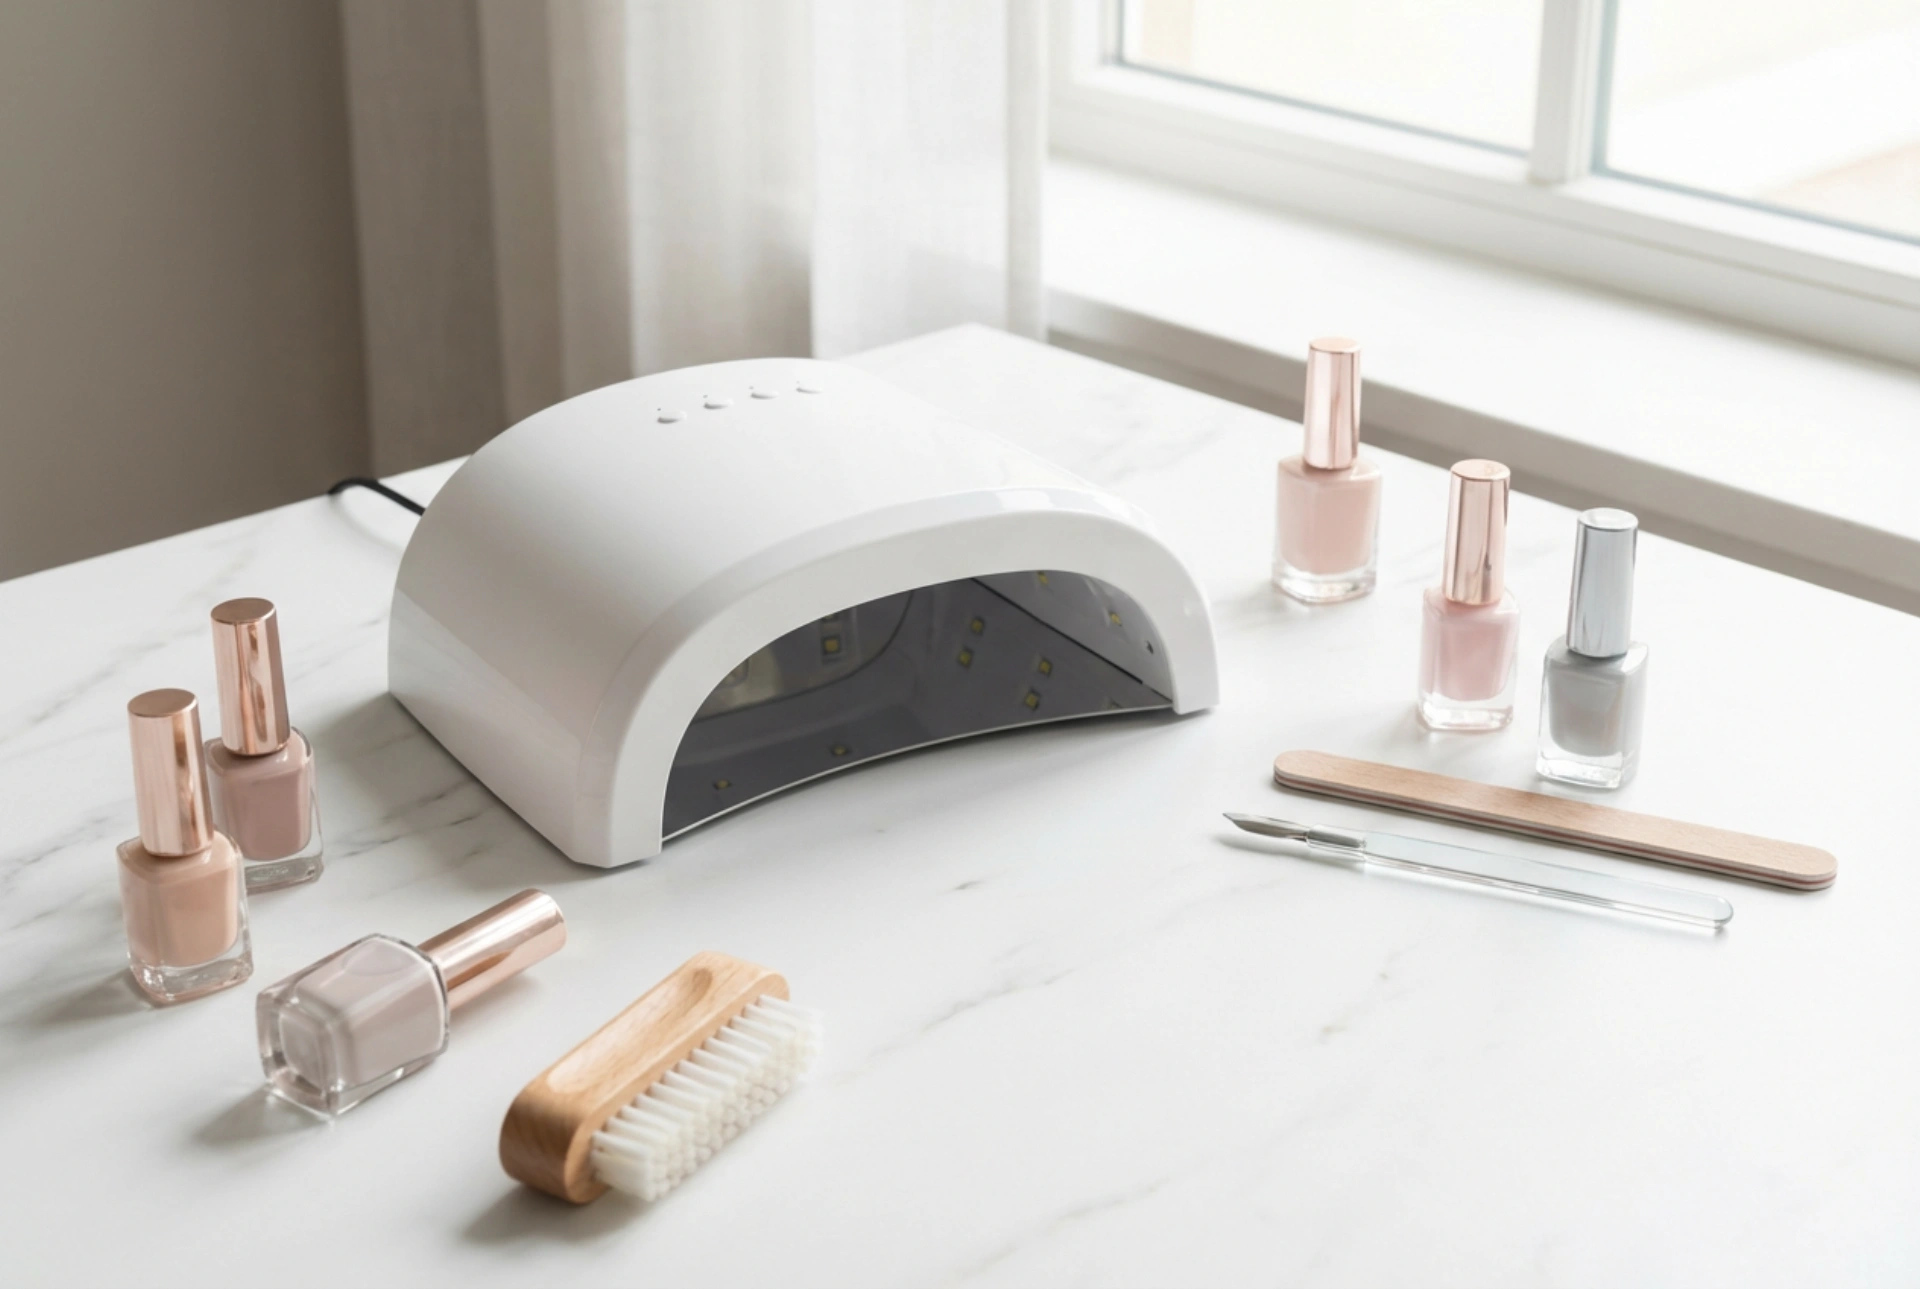
A successful at-home gel manicure depends on having the right products and tools on hand. Trying to substitute items can compromise the quality and longevity of your nails. Here’s a breakdown of what you'll need to create a comprehensive starter kit.
The Curing Lamp: LED, UV, or Hybrid?
The lamp is the most critical investment. It uses specific light wavelengths to cure or 'harden' the gel polish. There are three main types: LED, UV, and hybrid lamps that combine both technologies. LED lamps generally cure polish faster (30-60 seconds) and their bulbs have a much longer lifespan. UV lamps take longer (around 2 minutes) and their bulbs may need replacing over time. Hybrid lamps offer the best of both worlds, providing fast curing for a wide range of gel products. For home use, a lamp with a wattage between 24W and 48W is typically sufficient to ensure proper curing without being overly intense.
Polishes and Preparations
Gel manicures involve several liquid layers, each with a specific function. You will need:
- Nail Dehydrator/Cleaner: A solution used to remove any oils and residue from the nail plate, ensuring maximum adhesion.
- Primer: An optional step for some, this product further enhances the bond between the natural nail and the base coat, especially for those who experience lifting.
- Base Coat: This is the foundation of your manicure. It protects the natural nail from staining and creates a surface for the colour to adhere to.
- Colour Gel Polish: Choose your desired shades. It's best to start with one or two versatile colours to perfect your technique.
- Top Coat: This final layer seals in the colour, provides a high-gloss or matte finish, and protects the manicure from chipping and scratching. Some are 'no-wipe', while others leave a sticky 'inhibition layer' that needs to be cleansed off.
Essential Tools
Proper tools are non-negotiable for clean and professional results.
- Nail Files: Have a couple of different grits. A 180-grit file is great for shaping natural nails, while a softer 240-grit is good for gentle refinement.
- Buffer Block: A four-sided block or a soft buffer file is used to lightly remove the shine from the natural nail, creating a better surface for the polish to grip.
- Cuticle Pusher: A metal or wooden (orange wood stick) pusher is needed to gently push back the cuticles and remove non-living tissue from the nail plate.
- Lint-Free Wipes: Essential for applying the nail cleaner and for wiping the sticky layer without leaving fluff behind.
- Cuticle Oil: To finish the manicure by hydrating the skin around the nails.
Organising Your Workspace and Workflow
A smooth process begins with an organised space. Before you open a single bottle of polish, prepare your station. Choose a stable, flat surface like a desk or table with good lighting. Protect the surface with a towel or mat. Arrange all your tools and products in the order you will use them: preparation tools first, then the sequence of liquids (dehydrator, primer, base, colour, top), followed by your lamp and finishing items like wipes and oil. This systematic arrangement prevents scrambling for items with wet nails and reduces the chance of mistakes.
A Step-by-Step Guide to Application
Follow these steps methodically for a durable and beautiful finish. Rushing the process, especially the preparation, is the primary cause of premature lifting and chipping.
Step 1: Nail Preparation
Start by filing your nails to your desired shape. Gently push back your cuticles. Using the fine-grit side of your buffer, lightly buff the entire surface of each nail just enough to remove the shine. Do not over-file. Use a lint-free wipe soaked in nail dehydrator to thoroughly clean each nail, removing all dust and oils.
Step 2: Base Application
If you are using a primer, apply it sparingly to the nails and let it air dry. Next, apply a very thin layer of base coat, making sure to cover the entire nail without touching the surrounding skin or cuticles. 'Cap' the free edge by running the brush along the tip of the nail. Cure the base coat under your lamp for the recommended time (usually 30-60 seconds).
Step 3: Colour Application
Apply your first layer of colour polish. Remember that thin coats are key to proper curing. As with the base, avoid contact with the skin and cap the free edge. Cure this layer fully. Apply a second thin coat of colour to achieve full opacity, again capping the edge and curing for the recommended time.
Step 4: The Finishing Touch
Apply a thin layer of top coat over the entire nail, once again sealing the free edge. This layer provides shine and protection. Cure for the final time, sometimes for slightly longer than the colour coats, as per the product's instructions. If your top coat is not a 'no-wipe' formula, it will feel sticky. Take a lint-free wipe with nail cleaner or isopropyl alcohol and wipe each nail firmly to reveal the high-gloss, non-tacky finish.
Step 5: Hydrate
Finish your manicure by applying a drop of cuticle oil to the skin around each nail and massaging it in. This rehydrates the area and gives your manicure a polished, professional look.


