


Using a hair mask is a wonderful way to provide your hair with a concentrated dose of nourishment and moisture, turning a simple routine into a moment of mindful self-care. To get the most out of your deep conditioning treatment, however, correct application is key. From preparing your strands to the final rinse, each step plays a crucial role in achieving soft, shiny, and healthy-looking hair. This guide will walk you through the process, ensuring you unlock the full potential of your chosen hair mask.
Preparing Your Hair for the Mask
Proper preparation ensures that the hair cuticle is ready to absorb all the beneficial ingredients from the mask. Start by washing your hair with a gentle shampoo to remove any dirt, oil, or product build-up. Focus the shampoo on your scalp and roots, allowing the lather to run down the lengths of your hair as you rinse. After shampooing, gently squeeze out the excess water. You want your hair to be damp, not dripping wet. Using a soft towel, pat your hair to remove more water. Avoid rubbing vigorously, as this can cause friction and damage the hair cuticle, making it less receptive to the treatment.
The Art of Application: A Step-by-Step Guide
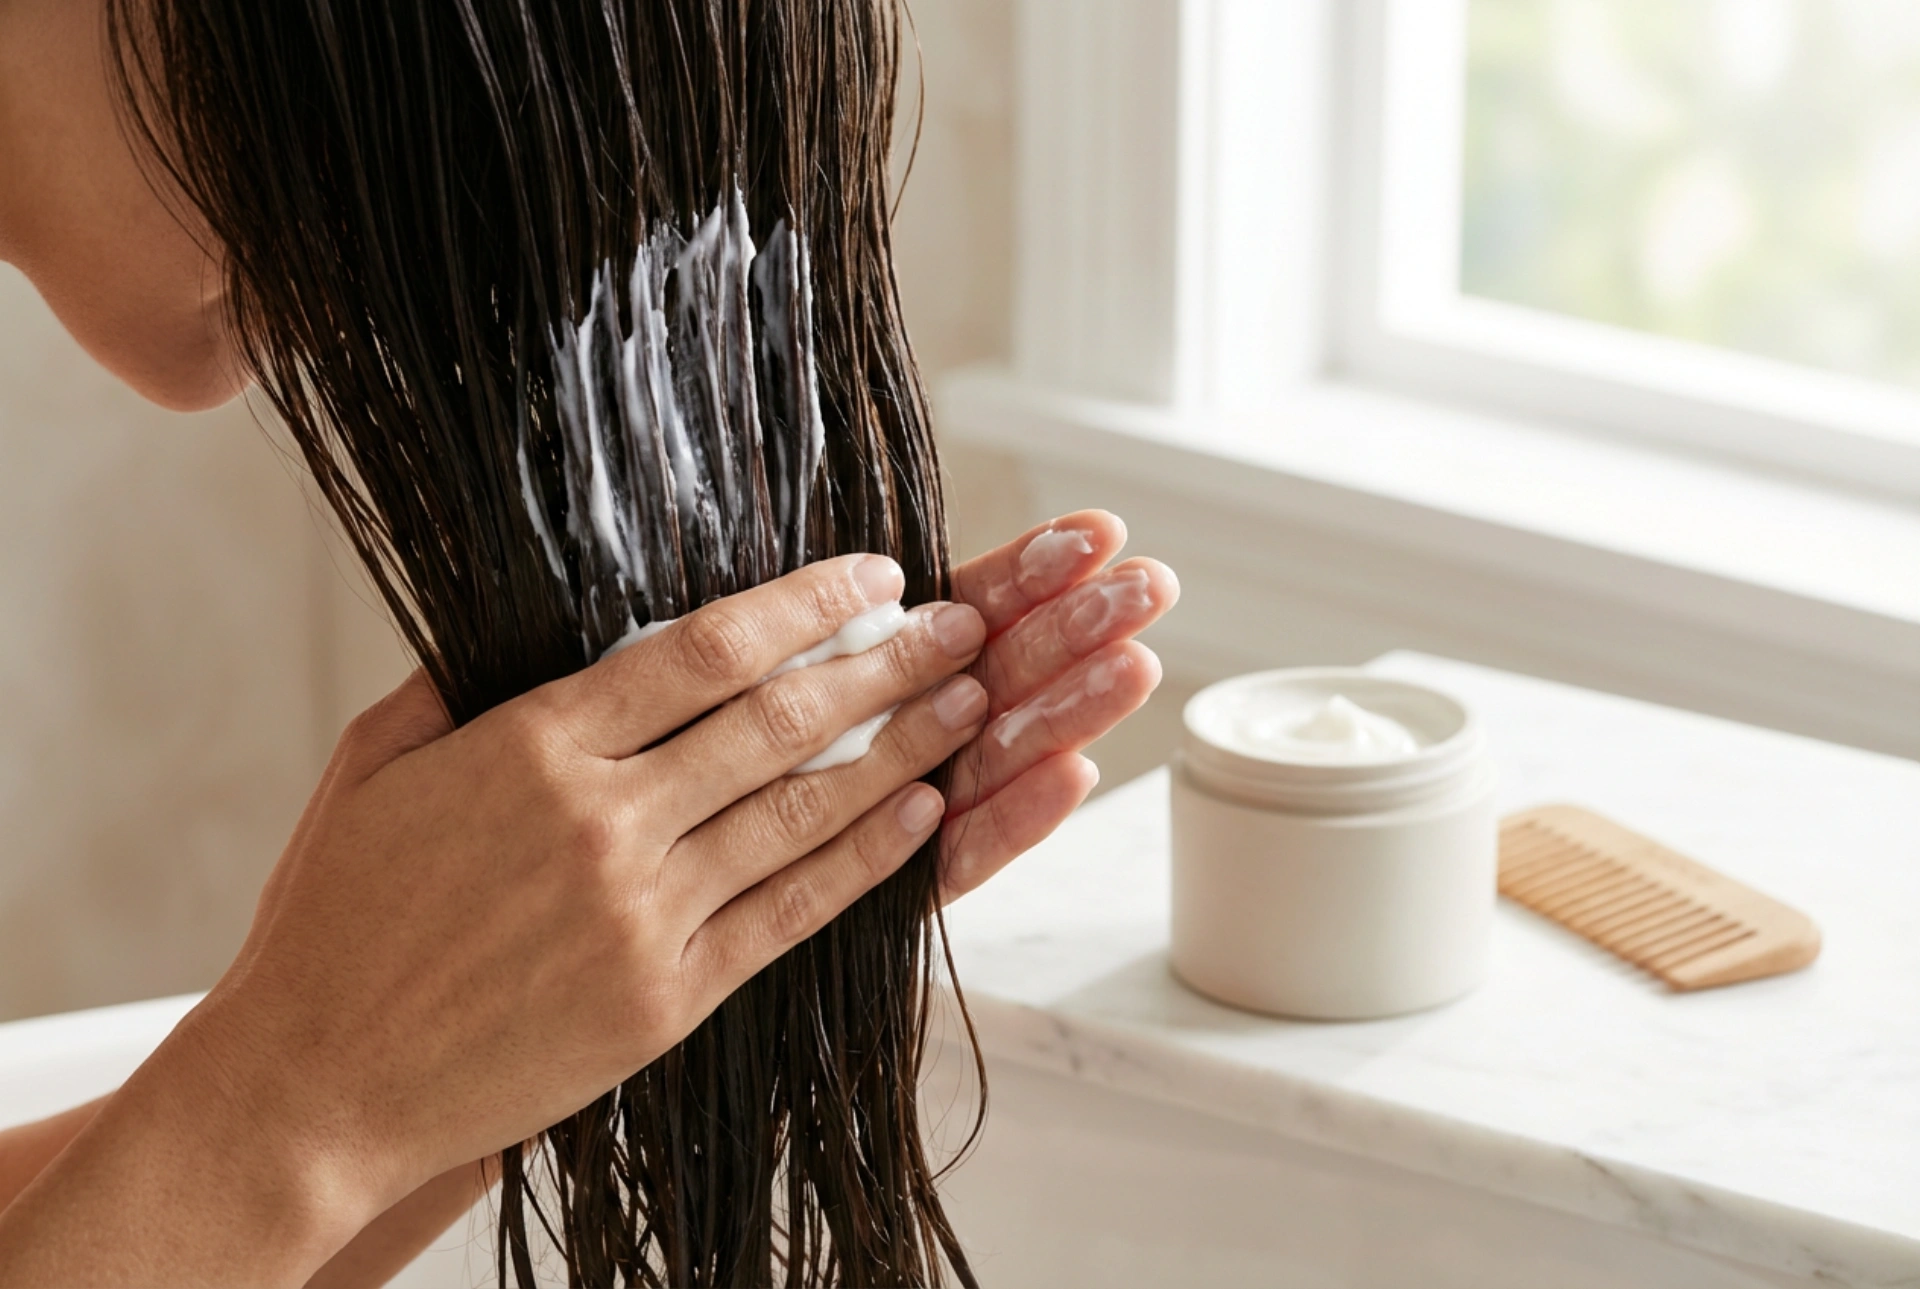
Once your hair is clean and damp, it's time to apply the mask. The goal is to distribute the product evenly so that every strand benefits from the treatment. Follow these steps for a flawless application:
- Section your hair: If you have thick or long hair, dividing it into four or more sections will make the application much more manageable. Use clips to keep the sections separate.
- Apply from the mid-lengths down: Take a small amount of the mask and begin applying it to your hair, starting from the middle of the strands and working your way down to the ends. The ends are typically the oldest and most damaged part of your hair, so they need the most attention.
- Avoid the roots (usually): For most hair types, especially those prone to oiliness, it's best to avoid applying a rich mask directly to the scalp and roots. This can weigh the hair down and make it look greasy. If you have a very dry scalp or are using a mask specifically designed for it, you can disregard this rule.
- Comb it through: Use a wide-tooth comb or your fingers to gently distribute the mask evenly through each section. This ensures no strand is left untouched and helps to detangle the hair carefully.
How Long Should You Keep the Mask On?
Patience is a virtue when it comes to hair masks. The time needed for the product to work its magic can vary, so it's essential to read the instructions on the packaging. Most masks require between 5 to 20 minutes to penetrate the hair shaft effectively. Leaving a mask on for less time than recommended may not provide the full benefits. Conversely, leaving it on for much longer than suggested (for example, overnight, unless the product specifies it's safe to do so) doesn't necessarily add extra benefits and can sometimes lead to product build-up or weigh down fine hair. For an enhanced effect, you can wrap your hair in a warm towel or a shower cap while you wait. The warmth helps to open up the hair cuticles, allowing for deeper penetration of the mask's ingredients.
Rinsing and Final Touches
When the time is up, the final step is to rinse the mask out thoroughly. Use lukewarm water to rinse your hair until it feels clean and there is no slippery residue left. Rinsing with water that is too hot can strip away some of the nourishing ingredients you've just applied. For a finishing touch, you can do a final rinse with cool water. This helps to seal the hair cuticle, locking in moisture and boosting shine. After rinsing, gently squeeze out the excess water and proceed with your usual styling routine. You'll notice your hair feels softer, looks shinier, and is much easier to manage.