


Achieving perfectly sculpted eyebrows at home can be a deeply satisfying part of any self-care routine. With precision and the right technique, waxing can deliver clean, defined, and long-lasting results. This process, highlighted by focused action and gentle rituals, transforms brow shaping into an art form. To ensure a smooth and successful experience, it's essential to follow a structured approach covering preparation, the waxing itself, and crucial aftercare.
Preparing for At-Home Eyebrow Waxing
Proper preparation is the foundation of a flawless at-home wax. Before you begin, take the time to set up your space and your skin correctly. Start by choosing a well-lit area with a clean, flat surface to lay out your tools. Ensure your hands and the skin around your eyebrows are impeccably clean. Use a gentle, oil-free cleanser and a cotton pad to remove any makeup, oils, or skincare products from the brow area, then pat it completely dry. Skin must be dry for the wax to adhere properly to the hair.
Map Your Desired Shape
To avoid removing too much hair, it's wise to map out your ideal brow shape first. Use a brow pencil to lightly outline the shape you want to keep. This creates a clear guide, ensuring you only apply wax to the hairs you intend to remove. A classic method for mapping involves using a pencil to measure:
- The start: Align the pencil vertically from the outer edge of your nostril straight up. This is where your brow should begin.
- The arch: Look straight ahead and align the pencil from the outer edge of your nostril through the centre of your iris. This marks the highest point of your arch.
- The end: Angle the pencil from the outer edge of your nostril to the outer corner of your eye. This is where your brow should end.
Once you have your outline, you can also trim any particularly long brow hairs with small, curved scissors for a neater finish. Finally, and most importantly, perform a patch test with the wax on a small area of skin (like the inside of your wrist) 24-48 hours beforehand to check for any adverse reactions.
The Wax Application Process: A Step-by-Step Guide
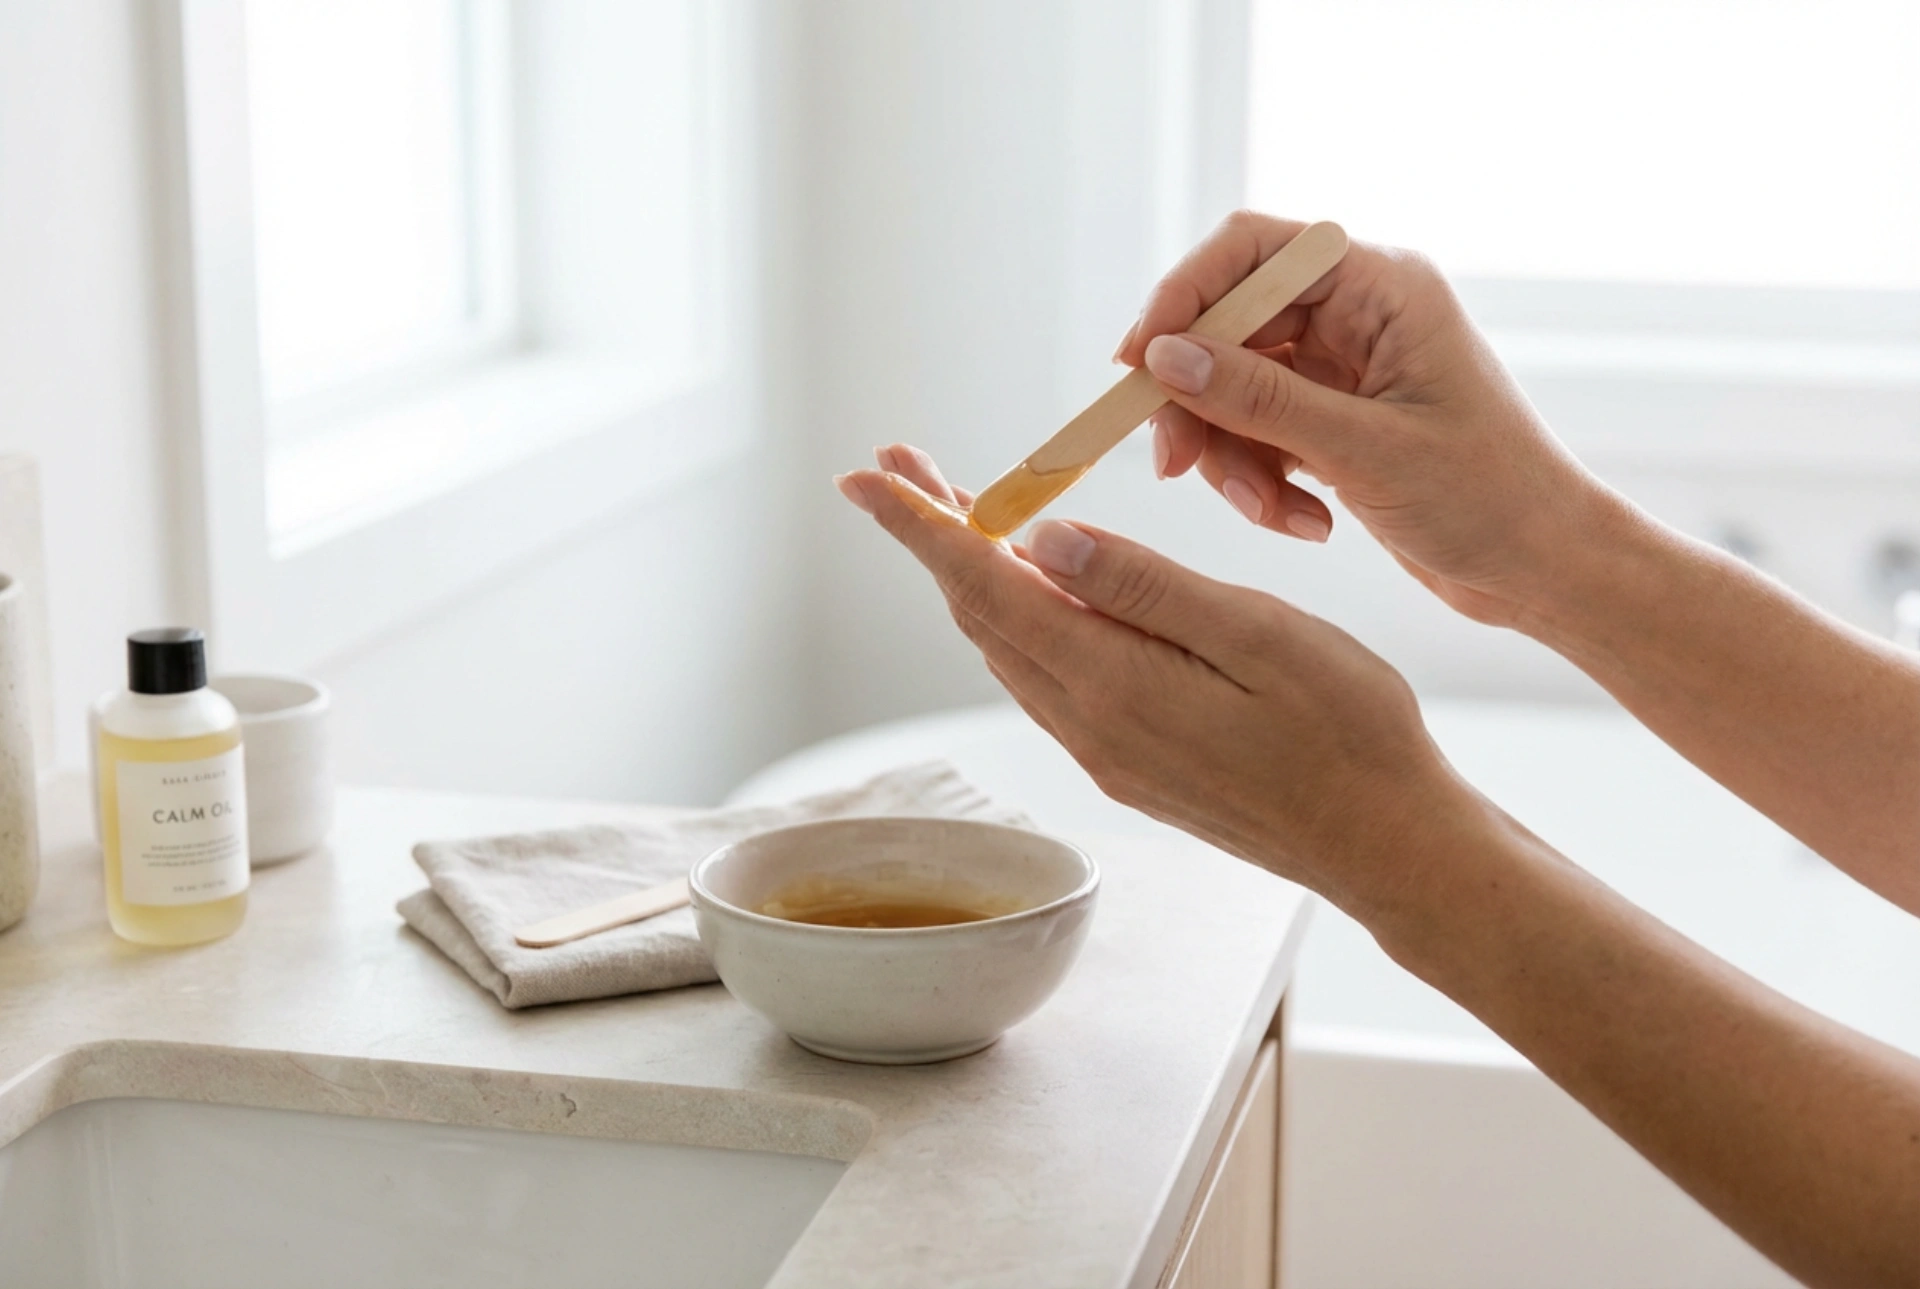
With your brows prepped and mapped, you are ready to begin the waxing process. Whether you are using pre-waxed strips, soft wax with fabric strips, or hard wax that requires no strips, always read and follow the manufacturer's instructions carefully. Heat the wax to the recommended temperature, and always test it on the inside of your wrist to ensure it's comfortably warm, not hot, to avoid burning your delicate skin.
Applying and Removing the Wax
Work in small, manageable sections to maintain control. Using the applicator provided, apply a thin, even layer of wax to the hairs you want to remove—those outside your pencilled guide. It is crucial to apply the wax in the direction of hair growth. If using soft wax, place the fabric strip over the wax, pressing down firmly in the direction of hair growth, leaving a small tab at the end to pull. If using hard wax, allow it to cool and harden for the time specified in the instructions.
To remove the wax, hold the skin taut with one hand. With the other hand, grip the end of the strip or the hardened wax tab. In one swift, fluid motion, pull it off in the opposite direction of hair growth. Pull parallel and close to the skin, rather than upwards, to minimise discomfort and reduce the chance of bruising. Continue this process in small sections until you have removed all unwanted hair from below, above, and between the brows.
Post-Waxing Care for Soothed Skin
Immediate aftercare is essential for calming the skin and achieving a smooth finish. After waxing, the skin will likely be pink and sensitive. First, remove any sticky wax residue left on the skin. Most waxing kits come with a post-wax oil or wipes for this purpose. If not, a gentle, skin-friendly oil like jojoba or almond oil on a cotton pad will work well. Avoid using water or alcohol, which will not dissolve wax residue and can further irritate the skin.
Calming and Protecting the Area
To reduce redness and soothe the skin, apply a calming lotion or gel containing ingredients like aloe vera or chamomile. You can also apply a cool compress for a few minutes if you experience significant redness or a stinging sensation. For the next 24 to 48 hours, it's vital to protect the freshly waxed skin. Be sure to avoid the following:
- Hot baths, showers, saunas, and steam rooms.
- Exposure to direct sunlight and sunbeds.
- Chlorinated pools.
- Applying makeup, exfoliants, or perfumed products to the brow area.
- Touching or rubbing the skin unnecessarily.
- Intense exercise that causes excessive sweating.
Maintaining Your Beautifully Shaped Brows
To keep your brows looking their best, establish a simple maintenance routine. Typically, you will need to wax every three to six weeks, depending on your individual hair growth rate. In between sessions, you can use tweezers to pluck any stray hairs that appear. A few days after waxing, once any sensitivity has completely subsided, you can begin to gently exfoliate the skin around your brows two to three times a week. This helps to slough away dead skin cells and can aid in preventing ingrown hairs. Keeping the skin in the area well-moisturised will also help maintain skin health and make future waxing sessions easier. With careful preparation and dedicated aftercare, at-home waxing can be an empowering and effective way to maintain beautifully shaped eyebrows.


