


A flawless, long-lasting hybrid manicure depends not only on the colour you choose but also on the foundation you build. While a base coat is essential, builder gel is the true hero when it comes to creating structure, strength, and the perfect nail shape. Understanding what builder gel is and how it differs from other products is key to elevating your at-home nail care routine and achieving salon-quality results that last for weeks.
What is Builder Gel and What is its Purpose?
Builder gel is a type of viscous gel used in nail styling to build, shape, and strengthen the nail plate. Unlike standard thin base coats, builder gels have a much thicker, honey-like consistency. This density allows you to not only protect the natural nail but also to add structure. Its primary functions include reinforcing weak or brittle nails, correcting imperfections on the nail surface, creating a perfect C-curve for added durability, and even slightly extending the length of the nail beyond the natural tip. It creates a strong, yet flexible, foundation that prevents chipping and breakage, making your manicure significantly more durable.
Builder Gel vs. Base Coat: Understanding the Key Differences
Many people confuse builder gels with standard base coats, but they serve distinct purposes in a manicure. Using the right product at the right stage is crucial for achieving the desired effect and longevity.
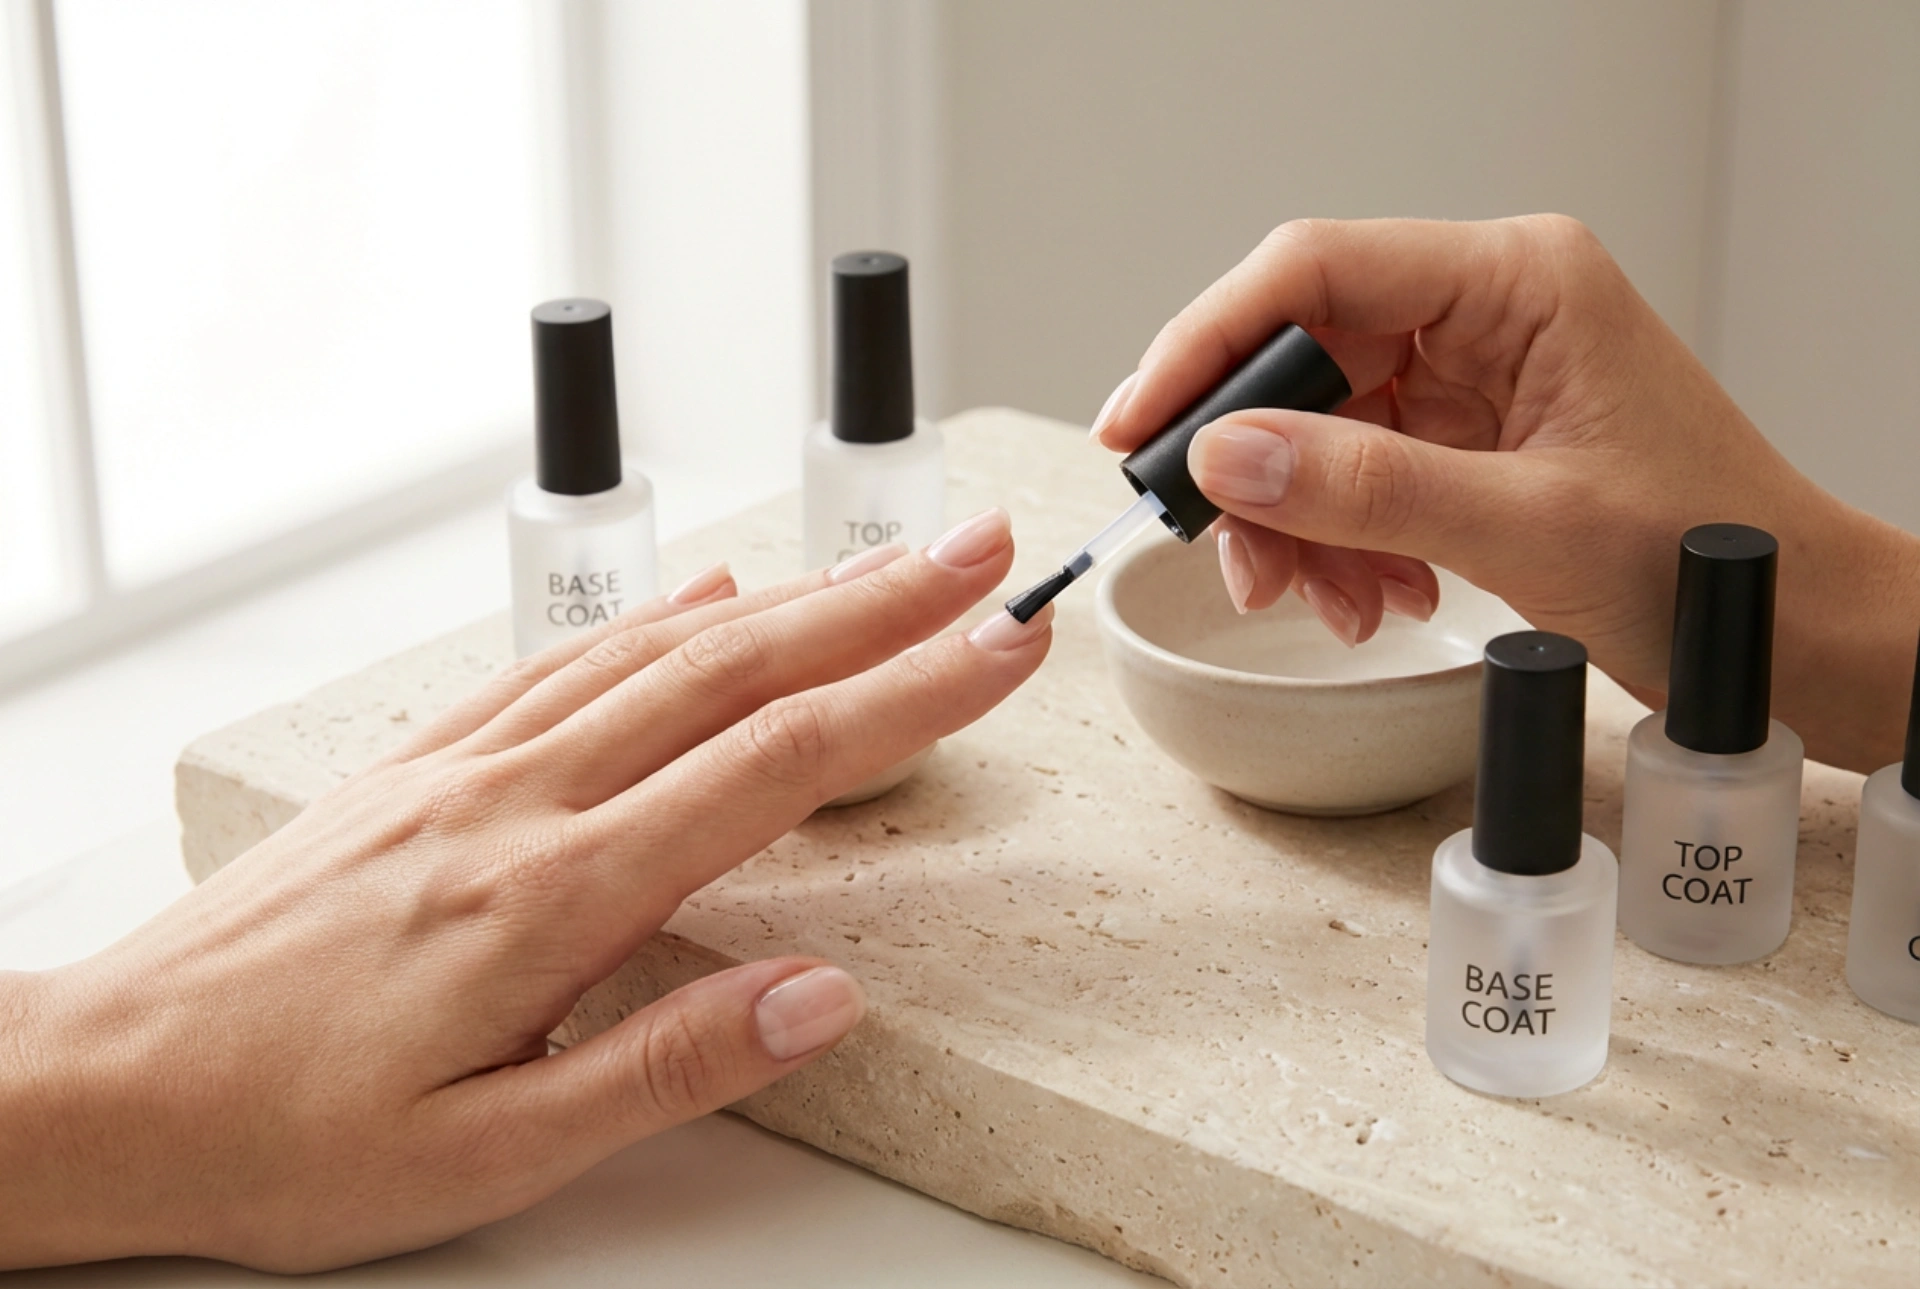
The Role of a Base Coat
A base coat is a thin-viscosity product designed primarily for adhesion. Its main job is to create a protective barrier between the natural nail plate and the pigmented gel polish. This prevents the natural nail from staining and ensures that the colour coat sticks properly, extending the life of the manicure. It is always the first layer applied after nail preparation.
The Role of a Builder Gel
A builder gel, on the other hand, is all about structure and reinforcement. Its thick consistency allows you to build an 'apex'—the highest point of the nail, which provides strength. It's used after a thin layer of base coat (for adhesion) to even out the nail surface, fill in ridges, repair small cracks, or add length using a nail form. While some modern builder gels are formulated to be used directly on a prepared nail, using a separate base coat underneath often yields the best results.
Common Types of Builder Gels
Builder gels come in various formulations and colours, each suited for different needs and aesthetic goals. Understanding the types can help you choose the perfect one for your manicure.
- Clear Gels: This is the most versatile option. A clear builder gel is perfect for encapsulating glitter or other decorations, strengthening the natural nail without altering its colour, or as a solid foundation for any shade of gel polish.
- Cover Gels (Nude/Pink): These gels are pigmented in various shades of nude, beige, and pink that mimic the colour of the natural nail bed. They are excellent for masking imperfections, discolouration, or creating a natural-looking 'mannequin manicure'. They also provide a perfect base for a classic French manicure.
- Self-Levelling Gels: Ideal for beginners, these gels have a consistency that allows them to settle smoothly over the nail, creating an even surface with minimal effort. You simply guide the product, and it does most of the work for you, reducing the amount of filing and shaping required.
- Thixotropic (Jelly) Gels: These advanced gels have a unique 'memory' property. They are very thick in the pot but become more fluid when manipulated with a brush, staying exactly where you place them without running into the cuticles. This gives the user maximum control for precise building and shaping.
How to Apply Builder Gel: A Step-by-Step Guide
Applying builder gel correctly is essential for a smooth and durable finish. Follow these steps for a professional application at home.
Step 1: Nail Preparation
Begin with clean hands and nails. Gently push back your cuticles and remove any non-living tissue from the nail plate. File your nails into your desired shape and lightly buff the entire surface with a soft buffer to remove the shine. This creates a better surface for the products to adhere to. Finally, wipe each nail with a lint-free pad soaked in a nail cleanser or dehydrator to remove any oils and dust.
Step 2: Base Coat Application
Apply a very thin layer of a standard hybrid base coat to each nail, making sure to cap the free edge. Be careful not to touch the skin or cuticles. Cure the base coat under a UV/LED lamp according to the manufacturer’s instructions (usually 30-60 seconds).
Step 3: Builder Gel Application
First, apply a thin 'slip layer' of the builder gel over the entire nail without curing it. This helps the next layer flow evenly. Next, pick up a larger bead of gel on your brush and place it in the centre of the nail, slightly away from the cuticle. Gently 'float' the brush over the gel to guide it towards the cuticle area and down towards the free edge, building up the apex. You can turn your hand upside down for a few seconds to let gravity help create a perfect C-curve. Once you are happy with the shape, cure the nail under the lamp for the recommended time (often 60-90 seconds).
Step 4: Finishing
After curing, the gel will have a sticky 'inhibition' layer. Wipe this off with a cleanser. Now, inspect the nail shape. If there are any lumps or bumps, you can gently file the nail to perfect its structure. Remove any dust with a brush, and you are ready to apply your chosen colour gel polish or simply finish with a top coat for a natural, strengthened look. Cure the final layer, and your durable, beautifully shaped manicure is complete.


