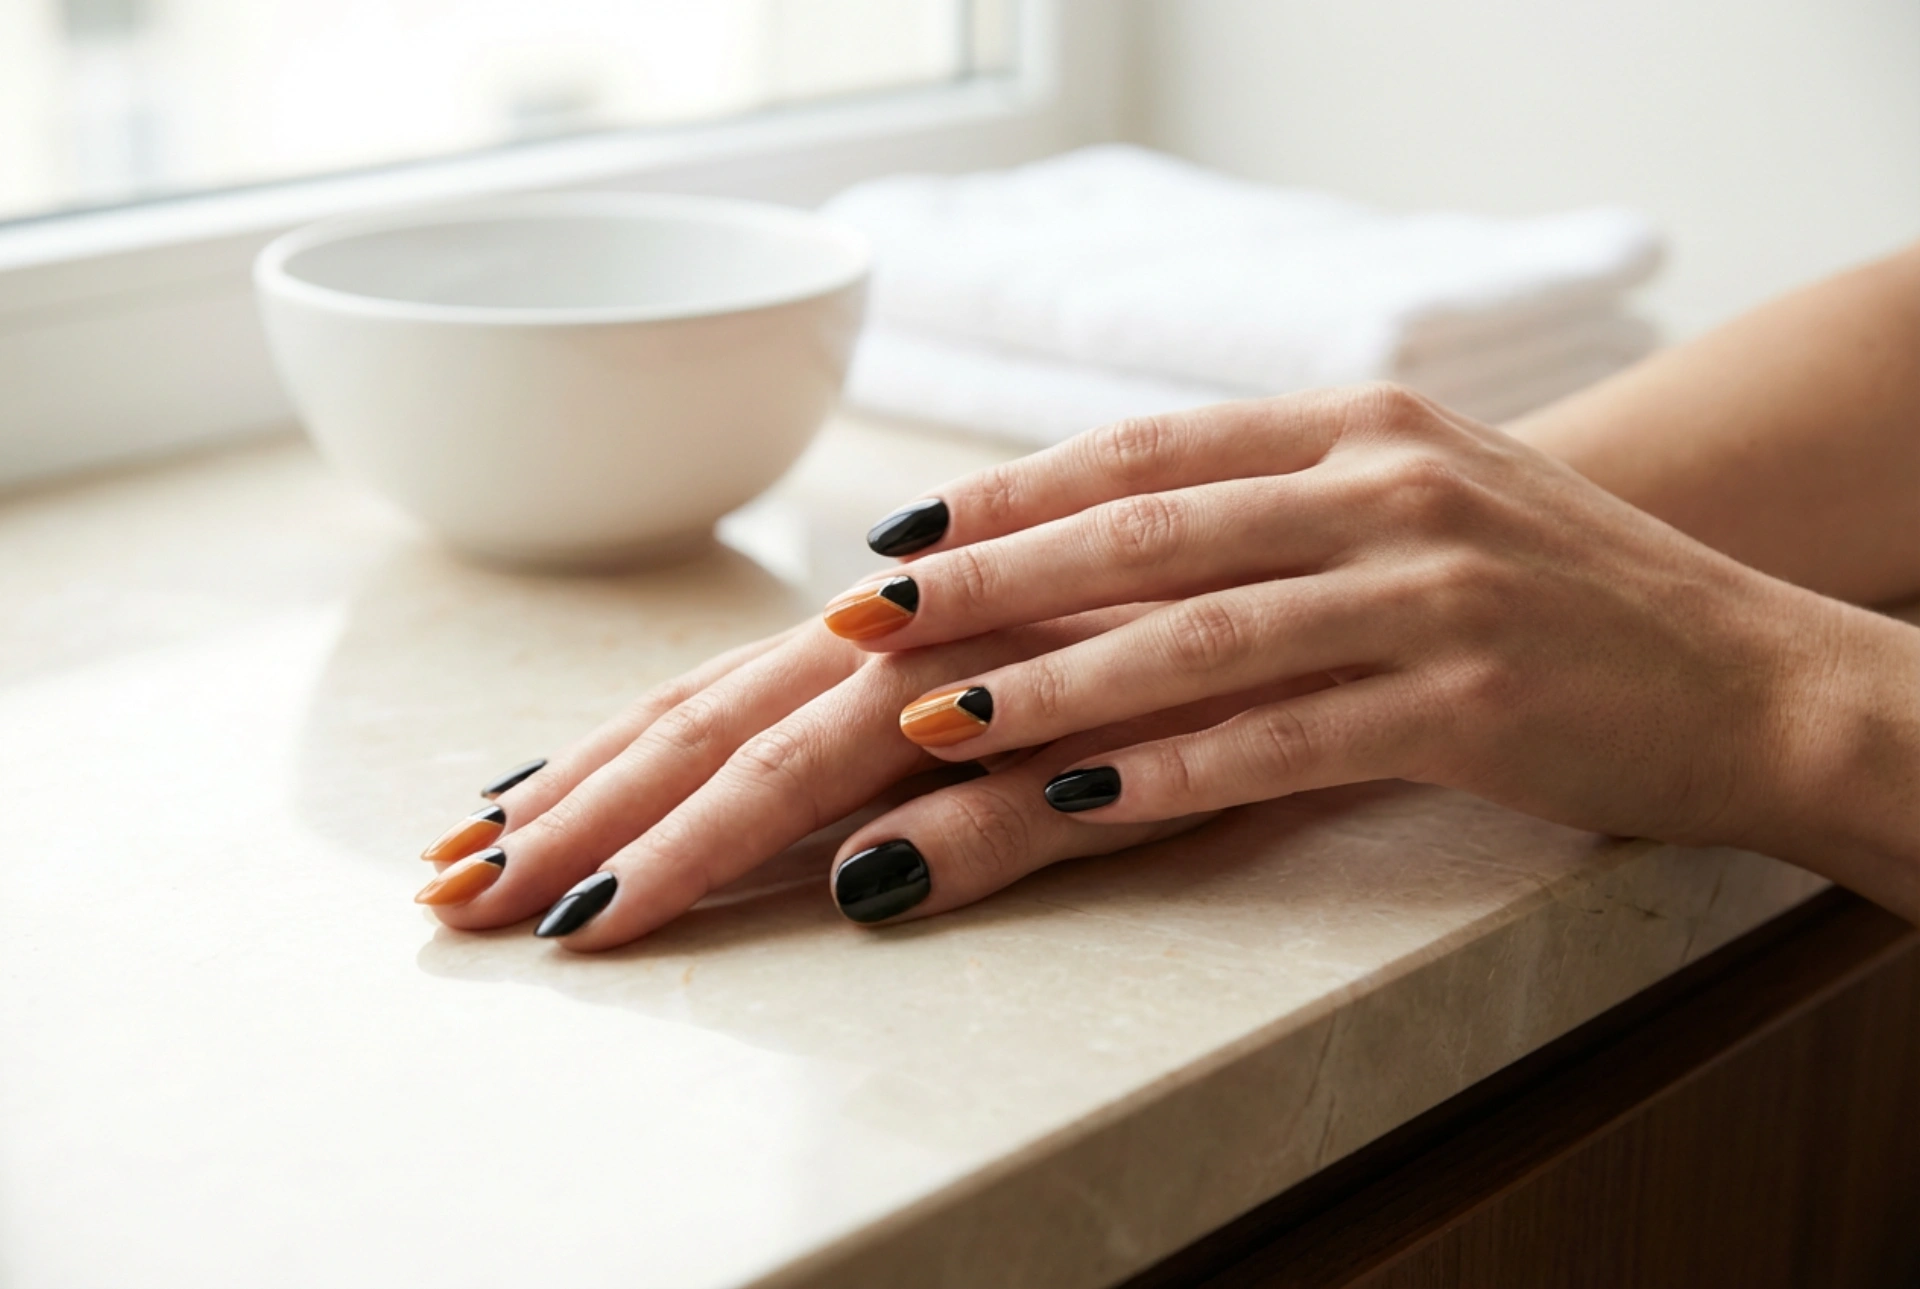


The combination of black and orange is a timeless classic that evokes everything from autumnal warmth to festive fun. Far from being limited to one season, this striking colour duo can be adapted for sophisticated, modern nail art suitable for any occasion. Whether you're aiming for a subtle touch of elegance or a bold, eye-catching design, black and orange offer endless creative possibilities. This guide will walk you through preparing your nails and creating two distinct looks, step by step.
Preparing Your Nails for a Flawless Finish
Before you begin painting, proper preparation is key to achieving a professional-looking and long-lasting manicure. A clean canvas ensures the polish adheres smoothly and evenly.
- Shape and Clean: Start by removing any old polish. File your nails to your desired shape, moving the file in one direction to prevent splitting. Gently buff the surface of your nails to create a smooth base.
- Cuticle Care: Apply a cuticle remover and gently push back your cuticles with an orange stick or a dedicated tool. Never cut your cuticles, as this can lead to irritation. Wash your hands afterwards to remove any residue.
- Apply a Base Coat: Always begin with a layer of clear base coat. This step is crucial as it protects your natural nails from staining (especially from potent colours like black and orange) and helps your manicure last longer.
Everyday Elegance: The Subtle Two-Tone Look
For a look that's chic and suitable for daily wear, a simple design focusing on clean lines or an accent nail is a perfect choice. It's minimalist yet makes a statement.
What You Will Need:
- Black nail polish
- Orange nail polish
- Base coat
- Glossy or matte top coat
- Optional: Thin nail art tape or a fine-tipped brush
Step-by-Step Guide:
- After applying your base coat and letting it dry, choose your main colour. Let's use orange for this example.
- Apply two thin coats of orange polish to all nails except for one accent nail, typically the ring finger. Allow each coat to dry completely.
- On your accent nail, apply two thin coats of black polish.
- For a twist, you could create a modern French manicure by painting the tips of your orange nails black, or add a single, fine black vertical line down the centre of each orange nail using a thin brush.
- Once your design is fully dry, apply a high-quality top coat to all nails to seal the polish, add shine, and prevent chipping. A matte top coat can also offer a very contemporary finish.
Bold and Festive: The Classic Halloween Gradient
A gradient, or ombré, effect is a fantastic way to showcase the beautiful blend of black and orange. It looks intricate and is perfect for a Halloween party or any time you want a more dramatic style.
What You Will Need:
- Black nail polish
- Orange nail polish
- Base coat
- Top coat
- A small piece of a makeup sponge
- Liquid latex or tape to protect the skin around your nails
- A small brush and polish remover for cleanup
Step-by-Step Guide:
- Begin with your fully dried base coat. You can apply one coat of a light orange or even white polish as a base to make the gradient colours pop.
- Apply liquid latex or small pieces of tape to the skin around your nail. This will make the cleanup process much easier.
- On a flat, non-porous surface, paint a stripe of orange polish and an adjacent stripe of black polish directly onto your makeup sponge. The stripes should be wide enough to cover your nail.
- Gently dab the sponge onto your nail, moving it slightly up and down to blend the colours. The first layer may look sheer; repeat the process once the first layer is tacky to build up the colour intensity.
- While the polish is still slightly wet, carefully remove the liquid latex or tape.
- Use a small brush dipped in nail polish remover to clean up any excess polish from the edges of your nail for a sharp, professional finish.
- Once the gradient is completely dry, apply a generous layer of top coat. This will smooth out the texture from the sponge and give your nails a beautiful, glossy look.
Tips for a Long-Lasting Manicure
To keep your black and orange creation looking perfect for as long as possible, follow a few simple aftercare rules. Avoid using your nails as tools, and wear gloves when washing dishes or using cleaning products. Applying a fresh layer of top coat every two to three days can significantly extend the life of your manicure and revive its shine. Finally, keep your hands and cuticles hydrated by regularly applying hand cream and cuticle oil.




