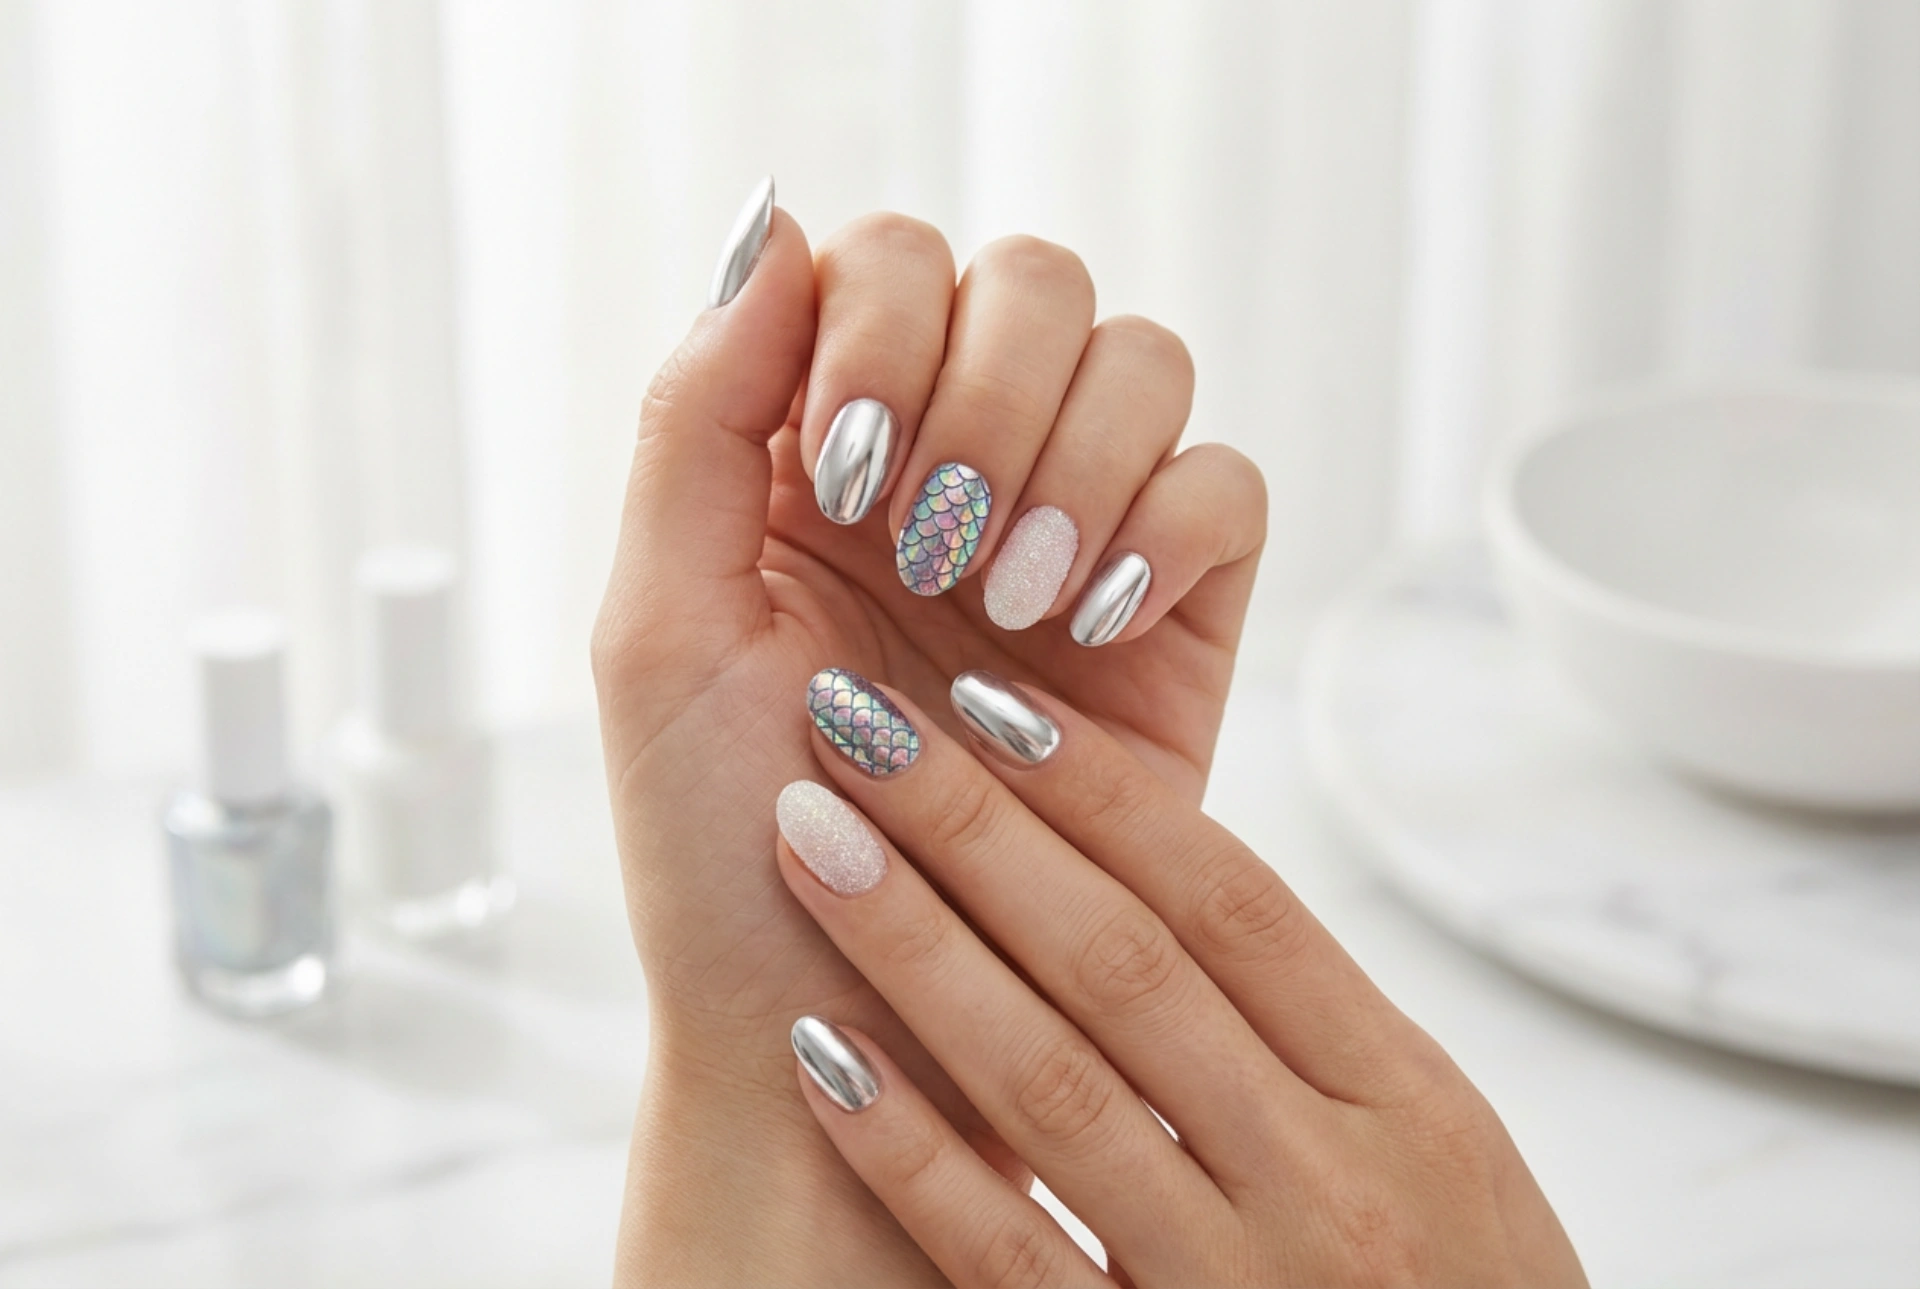


Beautifully styled hands and elegantly decorated nails are a wonderful way to express personal style. In modern nail styling, the use of fine decorative powders has revolutionised how we approach home manicures. These delicate pigments, when applied correctly, can transform a simple base colour into a captivating masterpiece, reflecting soft light and showcasing beautiful textures. From the ultra-sleek, metallic sheen of the mirror effect to the magical, iridescent glow of the mermaid dust, and the delightful, tactile feel of the sugar finish, nail powders offer endless possibilities for creative self-expression. Achieving these professional-looking results at home is entirely possible with the right techniques and a little patience.
Mastering the Flawless Mirror Effect
The mirror effect, often referred to as chrome nails, offers a futuristic, high-shine finish that mimics polished metal. This eye-catching style is incredibly popular because of its sleek, liquid-like appearance. To achieve a true mirror reflection, the preparation of the nail surface is absolutely crucial, as any bumps or imperfections will be highlighted by the metallic shine.
To begin, apply your chosen base coat and cure it under a lamp. Next, apply a background colour. While black is the classic choice for a deep, dramatic silver or gold chrome, pastel shades can create beautiful, subtle rose gold or pearlescent variations. Once the colour is cured, apply a specialised non-wipe top coat and cure it completely. The surface must be perfectly smooth and tack-free for the powder to rub in correctly.
- Using a silicone brush or a dense eyeshadow sponge applicator, take a tiny amount of the mirror powder.
- Gently press the powder onto the nail surface and begin rubbing in small, circular motions.
- Apply even pressure until the dull powder miraculously transforms into a seamless, reflective mirror.
- Use a very soft, clean brush to sweep away any loose pigment from the surrounding skin and cuticles.
- Seal the entire design with another layer of top coat, making sure to carefully cap the free edge of the nail to prevent chipping, and cure.
Achieving the Dreamy Mermaid Finish
For those who prefer a softer, more whimsical aesthetic, the mermaid effect is the perfect choice. This technique uses translucent, iridescent pigments that shift colours in the light, reminiscent of sea shells and mythical scales. Depending on how you apply it, this powder can look subtly pearlescent or strikingly holographic.
The mermaid effect is incredibly versatile because it can be applied in two distinct ways, each yielding a unique finish. The most traditional method involves rubbing the powder directly into the sticky dispersion layer of cured gel polish. This technique creates a beautiful, multidimensional sparkle that integrates deeply with the base colour.
Step-by-Step Mermaid Application
After applying and curing your colour coat—white, pink, and mint green work exceptionally well—do not wipe away the tacky residue. Instead, dip a clean finger or a sponge applicator into the mermaid powder and rub it firmly into the sticky layer. The powder will adhere to the dispersion layer, creating a uniform, shimmering sheet of colour. Gently brush off the excess, apply a glossy top coat, and cure to lock in the magical glow. Alternatively, applying the powder over a cured non-wipe top coat will result in a glass-like opalescent sheen.
Creating the Tactile Sugar Effect
Unlike the smooth finishes of mirror and mermaid styles, the sugar effect is all about texture and three-dimensional sparkle. This technique mimics the appearance of frosted sugar crystals on the nails, catching the light from every angle with a distinctive, matte-shimmer finish. It is an excellent option for adding accent nails or creating intricate raised patterns.
The secret to the sugar effect lies in leaving the powder exposed, rather than sealing it under a top coat. To achieve this, you will need a fine glitter powder and a wet, uncured layer of product to act as an adhesive.
- Apply your final layer of top coat, or use a detail brush with a thick gel to draw delicate patterns such as swirls or sweater-knit textures.
- While the gel is still wet and uncured, generously sprinkle the sugar powder over the entire nail until the wet surface is completely saturated.
- Allow the excess powder to fall back into its container, then place the hand under the lamp to cure the gel completely.
- Once fully cured, use a stiff manicure brush to vigorously sweep away any loose crystals.
The resulting texture is surprisingly durable, smooth to the touch, and holds its frosted appearance for weeks without requiring a sealing top coat.
Pro Tips for a Long-Lasting Powder Manicure
Working with fine cosmetic powders can sometimes be messy, but a few simple habits can elevate your results and prolong the wear of your manicure. First, always protect your cuticles. Applying a barrier cream or peel-off tape around the nail bed before starting can make clean-up incredibly quick and neat.
Second, the longevity of any powder design depends on the sealing process. When applying the final top coat over rubbed-in powders like mirror or mermaid, use a separate top coat bottle if possible, or wipe your brush thoroughly before inserting it back into the bottle to avoid contaminating your main top coat with loose glitter particles. Always remember to seal the free edge of the nail perfectly, as this prevents water from getting underneath the powder layer and causing premature lifting.




