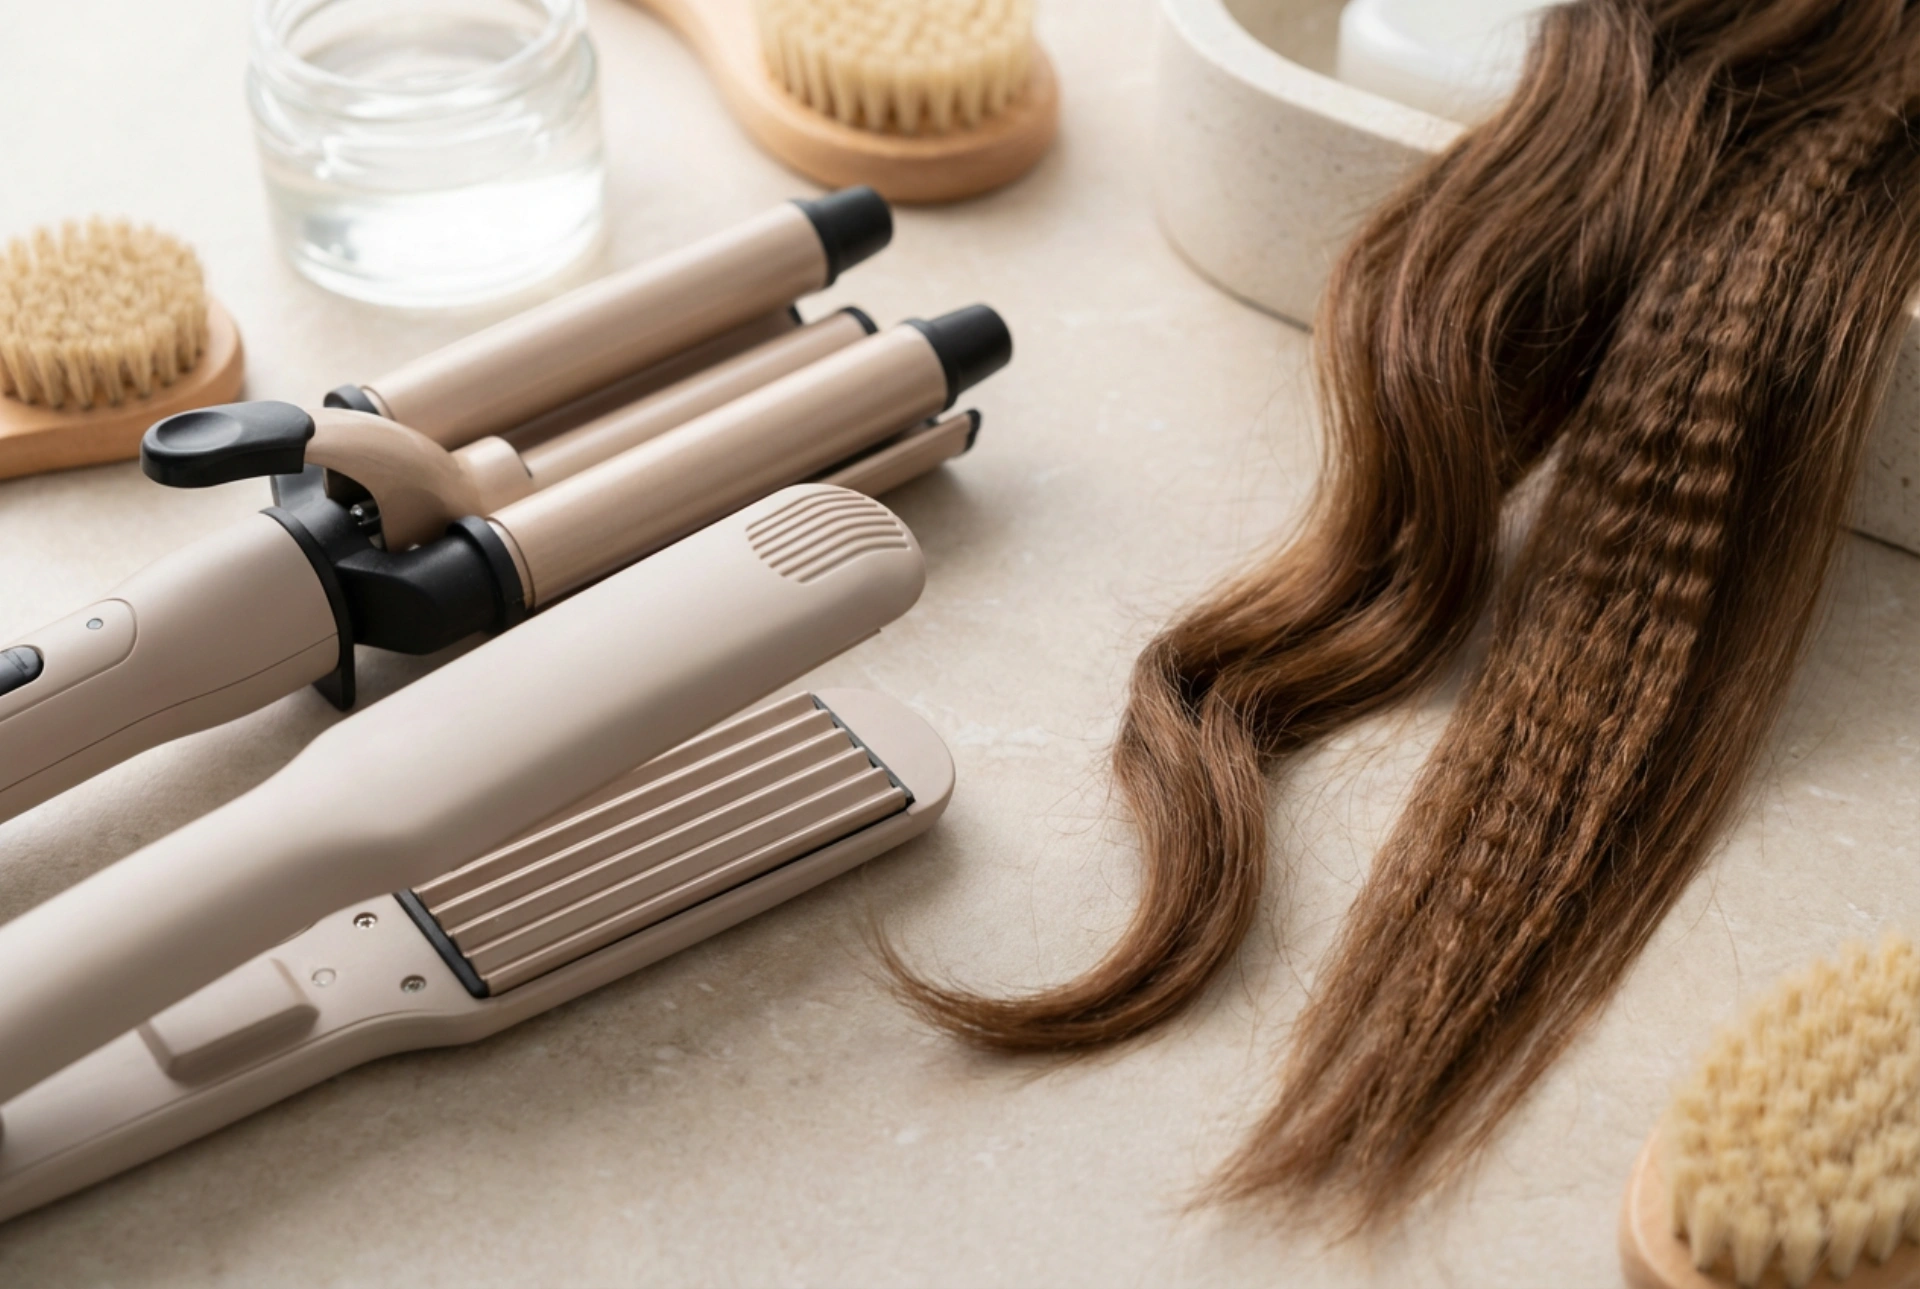


Achieving salon-worthy hairstyles at home has become highly accessible with the evolution of modern thermal styling tools. Among the most popular instruments for adding texture, movement, and volume are the hair waver and the hair crimper. While they might look somewhat similar at a glance, they create distinctly different textures and serve unique purposes in a beauty routine. Understanding the differences between these two styling devices, as well as mastering the techniques to use them safely, can elevate your hair styling routine and allow you to switch effortlessly between effortless, beachy waves and high-fashion, high-volume textures.
What is a Hair Waver and When to Use It?
A hair waver, often designed with triple barrels, is engineered to create continuous, flowing 'S-shaped' waves. Unlike traditional curling wands that require wrapping the hair around a single barrel, a waver works by clamping sections of hair between curved plates. This design mimics the natural, relaxed texture often associated with a day spent by the ocean, hence the term 'beachy waves.'
This tool is exceptionally versatile and works beautifully on various hair lengths, from medium bobs to ultra-long locks. It is the perfect choice when you desire a soft, romantic aesthetic with minimal effort. Because the barrels are typically larger, they produce wider, gentler bends in the hair, which helps to retain a natural movement and bounce. A waver is ideal for everyday styling, casual outings, or even semi-formal events where a relaxed yet polished look is desired.
What is a Hair Crimper and When to Use It?
In contrast to the smooth curves of a waver, a hair crimper features plates with a distinct zigzag or corrugated pattern. When clamped onto the hair, it creates sharp, tight, geometric ridges. Crimping was a defining beauty trend of the past decades, but it has made a sophisticated comeback in modern styling, often used subtly to build structure rather than styling the entire head from root to tip.
One of the greatest advantages of a hair crimper is its unmatched ability to generate volume. When applied strategically to the roots beneath the top layer of hair, crimping lifts the strands away from the scalp, creating the illusion of thicker, fuller hair without the need for heavy styling products or backcombing. Additionally, crimping can be used on select sections to add an edgy, modern texture to ponytails, braids, or updos. If your primary goal is maximum volume at the crown or a bold, structured texture, the crimper is your go-to device.
Key Differences: Waver vs. Crimper
To determine which tool best suits your styling goals, it is helpful to compare their main characteristics side by side:
- Texture Profile: Wavers produce soft, rounded, continuous waves, whereas crimpers create sharp, angular, zigzag patterns.
- Volume Potential: Crimpers excel at generating root volume and structural lift. Wavers focus more on adding body, movement, and wave definition throughout the mid-lengths and ends.
- Styling Speed: Because wavers typically have larger plates or barrels, they can style larger sections of hair at once, making them faster for full-head styling. Crimping often requires working in smaller, precise sections to achieve a uniform pattern.
- Aesthetic Vibe: A waver leans towards bohemian, romantic, and casual looks. A crimper delivers a highly textured, retro-modern, or edgy artistic finish.
Step-by-Step Guide for Safe Heat Styling at Home
To ensure your hair remains healthy, shiny, and undamaged when using hot tools, it is crucial to follow a safe styling protocol. Because both wavers and crimpers rely on direct heat plates, proper preparation is key.
1. Always Start with Completely Dry Hair
Never use a waver or crimper on damp or wet hair. Applying high heat to wet strands can cause water droplets trapped within the hair shaft to boil and turn to steam, leading to severe structural damage. Ensure your hair is completely dry before beginning.
2. Apply a High-Quality Heat Protectant
Distribute a lightweight heat-protecting spray or serum evenly through your hair. This creates a protective barrier that minimises thermal damage and helps lock in moisture, leaving your finished style with a healthy-looking shine.
3. Choose the Right Temperature
Modern styling tools usually offer adjustable temperature settings. Fine, damaged, or colour-treated hair should be styled at lower temperatures (between 150°C and 170°C). For thick, coarse, or naturally resistant hair, a slightly higher temperature (up to 200°C) may be used, but always start low and increase only if necessary.
4. Work in Structured Sections
Divide your hair into manageable sections using clips. Working from the bottom layers upwards allows for more precise control and ensures that no sections are missed or overheated. Clamp each section for only a few seconds—typically three to five seconds is sufficient to set the shape.
5. Allow the Hair to Cool Before Touching
Avoid brushing or running your fingers through your newly styled waves or crimps while they are still warm. Allowing the hair to cool completely helps the structure set, ensuring your hairstyle lasts much longer throughout the day.
Matching the Tool to Your Hair Type and Goals
When deciding which tool to invest in, consider your unique hair texture and styling habits. If you have very fine, flat hair that struggles to hold a curl, a crimper used discreetly at the roots can provide a stable, long-lasting foundation of volume that transforms your everyday look. On the other hand, if you have naturally straight or slightly wavy hair of medium density and love a soft, effortless daytime aesthetic, a triple-barrel waver will quickly become your favourite daily styling companion.
For those who love experimenting with diverse hairstyles, having both tools in your beauty kit offers endless creative freedom. By understanding how to balance temperature control, sectioning, and proper hair preparation, you can enjoy beautiful, damage-free styling that highlights the natural beauty and health of your hair.





