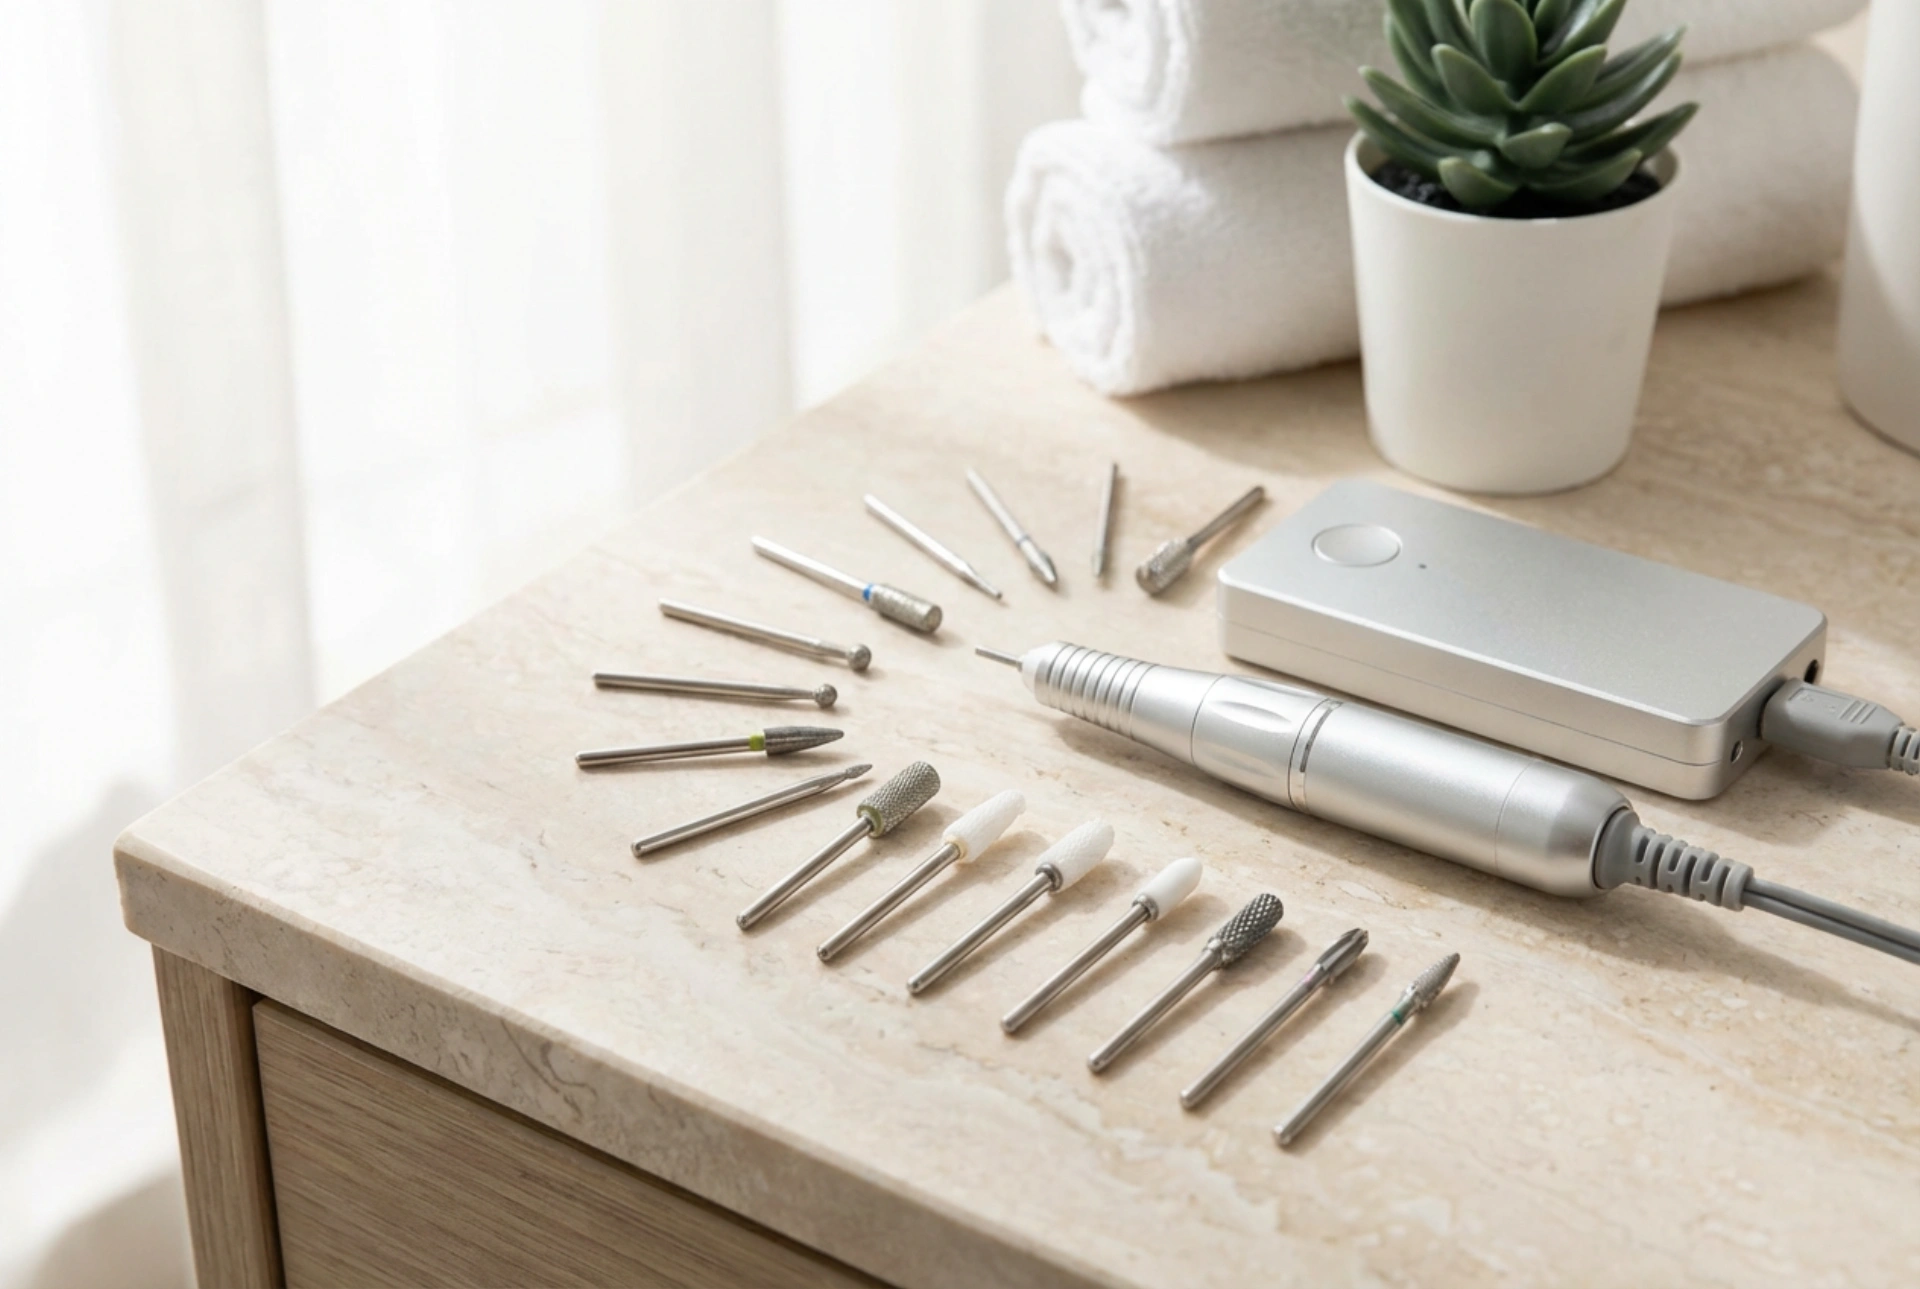


A pristine, modern setup of precise nail tools arranged on a smooth, gently illuminated surface represents the high standard of hygiene and precision required for contemporary manicure care. Incorporating a nail drill into your personal beauty routine can elevate the appearance of your hands, offering exceptionally clean outlines and perfectly prepared nail plates. This versatile tool allows for detailed work that traditional files cannot easily match. However, mastering a nail drill requires a deep understanding of different drill bits, proper handling techniques, and strict hygiene protocols to achieve beautiful, elegant results safely and comfortably at home.
Understanding Nail Drill Bits: Materials and Shapes
Choosing the correct attachment is the absolute foundation of a successful and safe manicure. Drill bits come in various shapes, materials, and grit levels, each tailored to a specific part of the nail care process. Selecting the right bit ensures that you can refine the cuticle area and smooth the nail surface without causing friction or discomfort.
Diamond and Ceramic Bits
Diamond bits are widely appreciated for their precision and gentle abrasive qualities. They do not cut the skin but rather micro-exfoliate it, making them excellent for smoothing out dry, rough skin around the nail walls and gently lifting the cuticle. These bits are typically colour-coded to indicate their grit level, with red representing a fine grit suitable for delicate skin, and blue representing a medium grit for standard use.
Ceramic bits, on the other hand, are highly valued for their heat-reduction properties. Because ceramic material generates significantly less friction than metal, these bits remain cool during operation. This makes them exceptionally comfortable for removing gel polishes or gently refining thicker areas of the nail plate without creating uncomfortable hot spots.
Carbide and Polishing Bits
Carbide bits are made of strong, durable metal and feature small flutes rather than a traditional gritty surface. These flutes shave away product rather than grinding it down, making them highly efficient for thinning down thick overlays or shaping extensions. Due to their efficiency, they require a confident hand and are best used on the surface of enhancements rather than the natural nail.
To complete the manicure, polishing bits made of silicone, felt, or soft cotton are used. These gentle attachments buff the natural nail plate and surrounding skin to a healthy, natural shine. They help seal the edges of the skin, leaving a flawlessly smooth finish that prevents future snagging or dryness.
Safe Technique for Home Cuticle and Nail Care
Using a nail drill requires a steady hand, light pressure, and a systematic approach. The device should never be used with heavy force; instead, let the rotation speed of the machine do the work for you. Maintaining control is key to a beautiful and pain-free result.
Preparing the Nails and Setting the Speed
Before turning on your device, ensure your hands and nails are completely dry. Moisture softens the skin excessively, which can make it difficult to see where the cuticle ends and can increase the risk of accidental grazing. Use a traditional wooden stick to gently push back the cuticles, creating a clear boundary and path for the drill bit.
When adjusting the speed, always start with a low setting, ideally between 5,000 and 10,000 RPM (rotations per minute), especially when working around the delicate cuticle area. Higher speeds are reserved for surface refining and product removal, while lower speeds offer maximum control and safety near the skin.
The Correct Movement and Angle
To ensure safety, follow these essential guidelines during your styling session:
- Keep the bit parallel: Always hold the drill bit parallel to the nail plate. Tilting the tip downwards can create grooves or uneven spots in the natural nail.
- Work in the opposite direction: Move the handpiece in the opposite direction of the bit's rotation. If the bit is spinning clockwise, guide the tool from left to right to prevent it from skipping or sliding off the nail.
- Keep the tool moving: Never let the rotating bit rest in one spot. Use light, continuous, sweeping motions to distribute the friction evenly and avoid heat build-up.
- Anchor your hand: Rest your pinky finger on your working hand against the hand holding the drill. This anchor point provides stability and prevents sudden slips.
Essential Hygiene and Maintenance of Drill Bits
Hygiene is the most critical aspect of using a nail drill, even when the device is reserved exclusively for personal use. Proper cleaning prevents the accumulation of skin cells, fine dust, and natural oils, ensuring that your precision tools remain sharp, effective, and safe for every application.
Cleaning and Disinfection Steps
After every single beauty session, your drill bits must undergo a thorough cleaning process. Start by using a dedicated brass or nylon cleaning brush to remove fine nail dust from the tiny grooves of the bits. Once the visible dust is removed, wash the bits in warm, soapy water to dissolve any remaining residue. For a deeper clean, an ultrasonic cleaner can be highly effective.
After washing, rinse the bits with clean water and dry them completely with a clean paper towel. Once dry, apply a suitable cosmetic disinfectant spray designed for metal and ceramic beauty tools. Allow the disinfectant to work for the time recommended by the manufacturer, then let the bits air-dry completely before storing them in a sealed, dust-free container.
Device Care and Longevity
The nail drill handle, or handpiece, also requires regular maintenance. Wipe the exterior with a soft microfiber cloth slightly dampened with a mild sanitising solution. Avoid letting liquids or fine dust enter the motor vents or the chuck mechanism where the bits are inserted, as this can cause internal wear. Keeping the main unit clean ensures quiet, vibration-free operation, allowing you to enjoy precise and relaxing nail care sessions for years to come.




