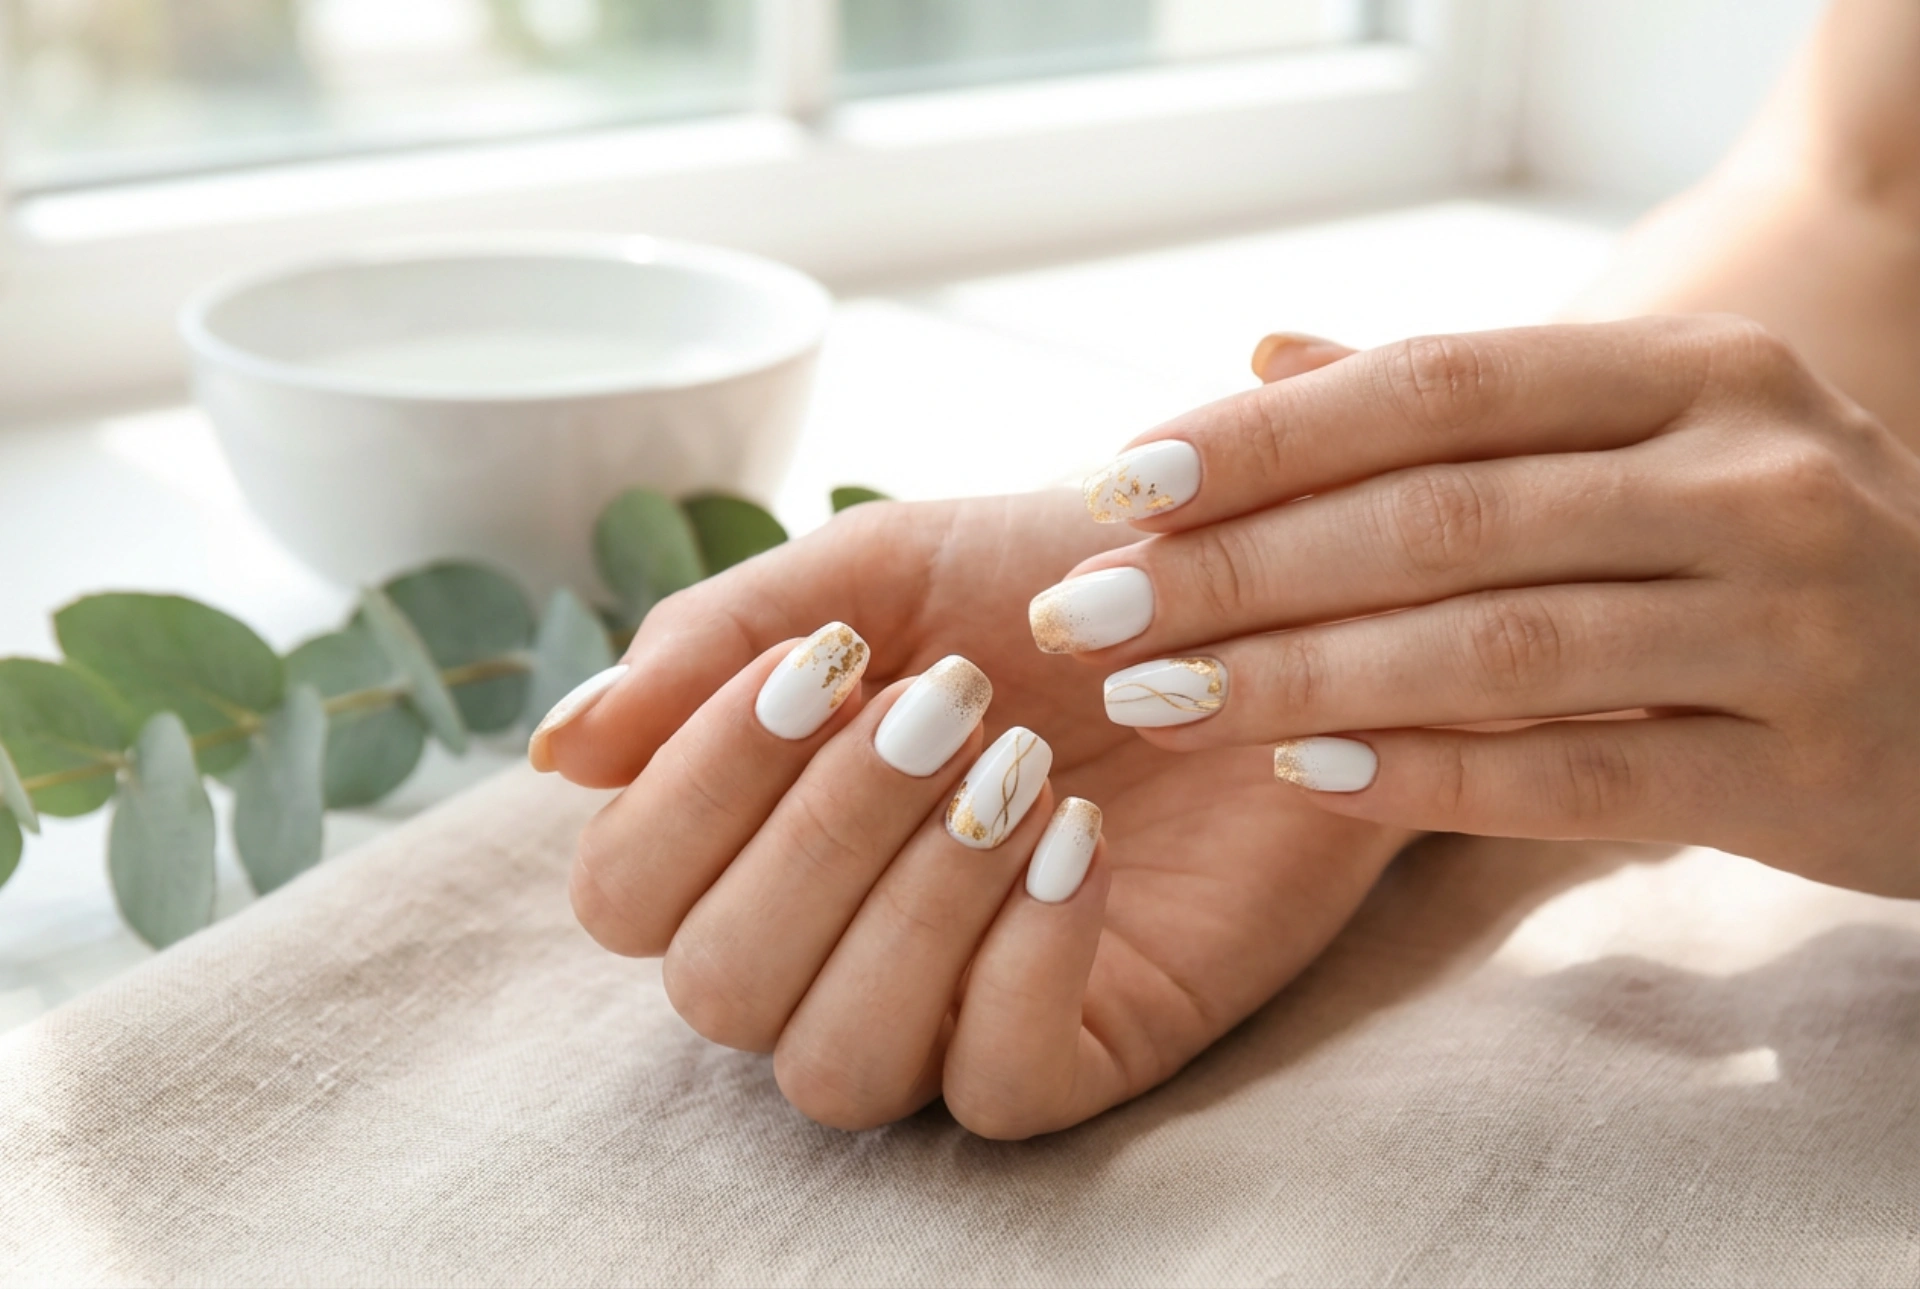


Elegant manicured hands with pristine white nails decorated with subtle gold accents present a clean, modern aesthetic. This sophisticated combination brings a luxurious texture to your hands, suitable for both everyday elegance and special occasions. The contrast between the minimalist, crisp white background and the rich warmth of gold creates a timeless design that is highly versatile. By learning how to incorporate delicate foil flakes, shimmering gold powder, and fine, precise lines, you can achieve a professional-looking finish at home.
Why the White and Gold Combination Works So Well
The pairing of white and gold is a classic in beauty and design. White acts as a neutral, bright canvas that reflects light, making your hands appear clean and manicured. When you introduce gold accents, they elevate the entire look by adding depth, warmth, and a touch of sophistication. Unlike bright multi-coloured patterns, this duo remains subtle and elegant, allowing you to experiment with different textures and techniques without overwhelming the overall aesthetic. Whether you prefer a matte or glossy finish, the gold elements catch the light beautifully, enhancing the natural shape of your nails.
Preparing the Nails for a Flawless Application
To ensure that the white polish serves as a perfect, streak-free base, proper nail preparation is essential. Any unevenness on the nail plate can become more visible under white polish, so taking time to prepare the surface is key:
- Begin by gently shaping the nails into your preferred silhouette, such as oval, almond, or square, using a soft-grit file.
- Gently push back the cuticles using a wooden stick to create a clean, elongated nail bed.
- Lightly buff the nail surface to remove any natural oils, ensuring better adhesion of the base coat.
- Apply a high-quality base coat to protect the natural nail and create a smooth layer for the white polish.
- Apply two thin coats of a highly pigmented white polish, allowing adequate drying time between coats to prevent streaks.
Mastering Gold Foil Flakes
Gold transfer foil offers an organic, textured appearance that is incredibly easy to apply. Because foil flakes do not require perfect symmetry, they are ideal for beginners looking to add a touch of luxury to their manicure. To apply gold foil:
Step-by-Step Foil Application
Once your white base polish is almost dry but still slightly tacky (or after curing if using gel polish, leaving the sticky dispersion layer intact), you can begin applying the foil. Use tweezers to pick up tiny pieces of gold foil and place them gently onto selected areas of the nail. Press down lightly with a silicone tool or a dry fingertip to adhere the foil, then pull away quickly. This technique creates a beautiful, irregular, distressed gold effect that looks highly professional. Finish with a generous layer of top coat to seal the edges of the foil and prevent peeling.
Adding Shimmer with Gold Powder
Gold powder, often referred to as chrome or pigment powder, provides a metallic, mirror-like lustre that is different from the textured look of foil. This technique is perfect for creating soft gradients or highlighting the tips of the nails.
How to Apply Gold Powder
For a subtle shimmer, use a small eyeshadow sponge or a silicone applicator. Gently dip the applicator into a tiny amount of gold powder. Lightly buff the powder onto the dry surface of the nail, focusing on the tips or creating an ombre effect from the cuticle upwards. If you want a mirror-shine finish, ensure the base is completely smooth. Gently wipe away any excess powder around the cuticles with a soft, clean brush before securing the design with a top coat.
Drawing Fine, Precise Gold Lines
The addition of fine lines requires a steady hand and the right tools, but it adds an unmatched level of modern elegance to your manicure. Fine lines can be used to frame the nail, create geometric patterns, or add delicate metallic borders around the foil details.
Techniques for Perfect Lines
To achieve clean lines, choose a long, thin detail brush (often called a liner brush). Dip only the tip of the brush into a gold metallic polish or painting gel, ensuring there are no large droplets on the bristles. Place your hand on a flat, stable surface to steady your fingers. Start drawing from the centre of the pattern outwards, applying very light pressure. If you want the lines to look delicate, keep the brush vertical. If you make a mistake, a small brush dipped in remover can easily clean up any uneven edges before the design sets.
Sealing the Art for Longevity
Protecting your nail art is just as important as the application process itself. Because you are mixing different textures like powders, foils, and lines, a proper sealing method ensures the design remains intact without chipping or losing its shine. Apply a clear, high-gloss top coat over the entire nail, paying special attention to capping the free edge. For a modern twist, you can also use a matte top coat over the white base, leaving only the gold elements glossy to create a beautiful contrast of textures.




