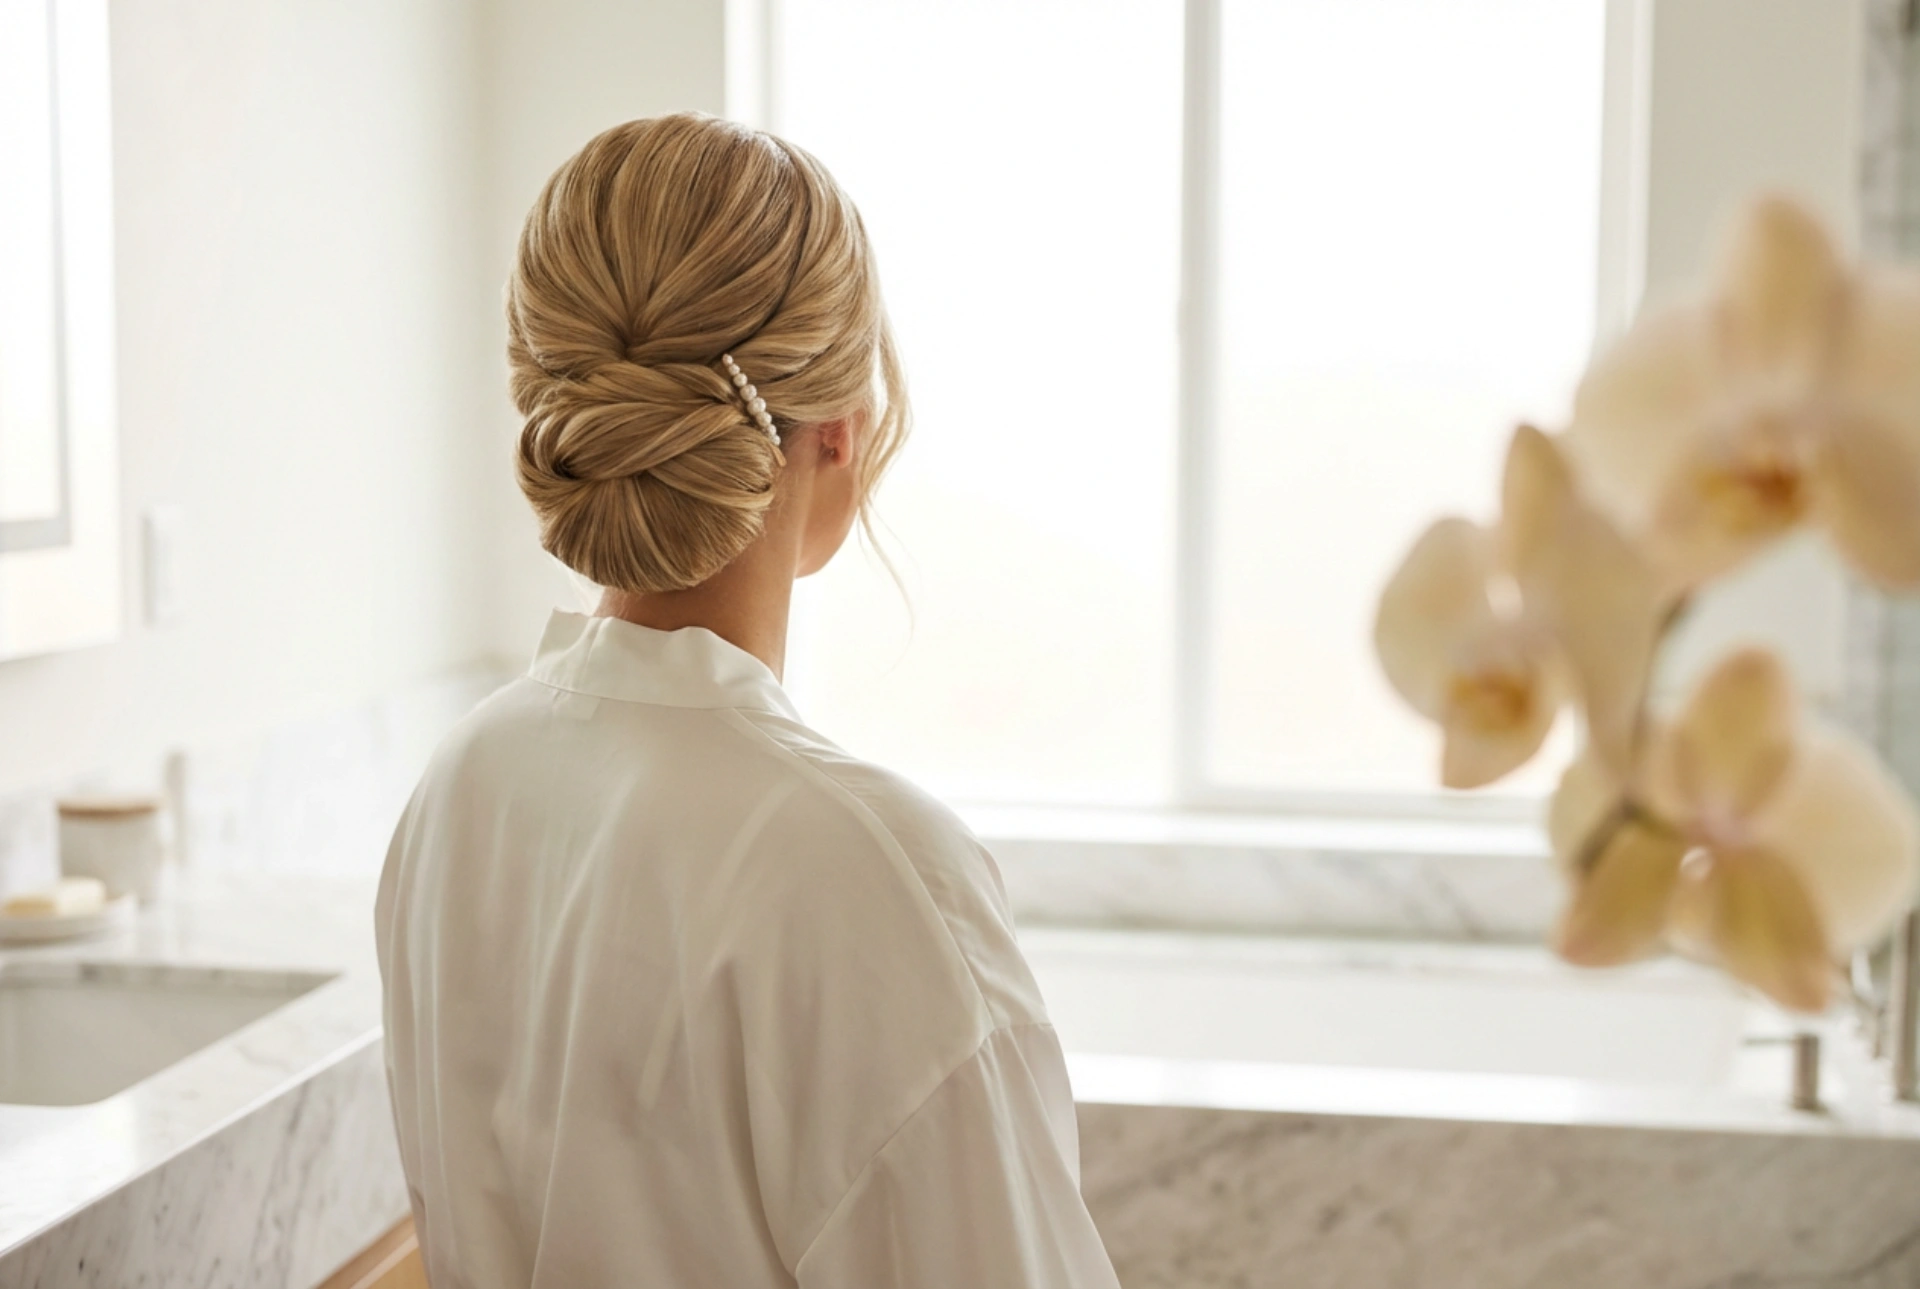


A wedding is one of the most memorable occasions in a family's life, and for the mother of the bride or groom, it is a day of joy, celebration, and elegant presentation. Finding the perfect hairstyle that balances sophistication, comfort, and longevity is essential. A serene, polished updo, showcasing delicate textures and a refined silhouette from every angle, remains a timeless choice. This classic coiffure not only highlights the neckline and coordinates beautifully with formal attire but also ensures that you feel confident and poised throughout the entire event. Creating such a sophisticated look at home is entirely achievable with the right preparation and a structured, step-by-step approach.
Preparing the Hair for Long-Lasting Elegance
The foundation of any elegant wedding hairstyle lies in how the hair is prepared before styling begins. For a polished updo to maintain its structure from the morning ceremony until the late-night celebrations, the hair needs to have the right balance of grip and smoothness. Very clean, freshly washed hair can sometimes be too slippery to hold pins securely, whereas hair that is prepared properly will offer the ideal texture.
To begin, wash your hair the day before the event using a lightweight, clarifying shampoo and a nourishing conditioner, focusing the conditioner mainly on the mid-lengths and ends. This ensures the roots remain lifted and free of heavy residue. Before blow-drying, apply a small amount of volumising mousse or a heat-protection spray designed to add subtle texture to the strands. Blow-dry the hair using a round brush to lift the roots and smooth out any natural frizz, creating a clean, workable canvas. If your hair is naturally very fine, you may want to use a light texturising spray on the roots to provide extra grip for the hairpins.
A Step-by-Step Guide to the Classic Polished Updo
The classic low rolled chignon is an exceptionally elegant option that suits almost every face shape and hair density. It exudes effortless grace and looks highly professional, yet it can be easily recreated at home with a bit of patience and some basic styling tools.
Step 1: Sectioning and Creating the Base
Gently brush through the hair to remove any tangles. Using a tail comb, create a clean parting according to your preference—either a classic middle parting or a soft, flattering side parting. Next, separate the hair into three sections: two smaller sections at the front (from behind the ears forward) and one large section at the back. Secure the front sections with clips to keep them out of the way for now. Gather the back section into a low ponytail at the nape of your neck and secure it with a thin, strong hair elastic that matches your hair colour.
Step 2: Building the Volume and Roll
To create the elegant roll, gently backcomb the ponytail section slightly to add internal volume. Smooth the top surface of the ponytail so it looks neat. Take the end of the ponytail, fold it inwards and upwards towards the elastic, creating a soft, hollow roll or loop. Secure the ends firmly against the back of your head, just above the elastic, using sturdy bobby pins. Ensure the pins are inserted horizontally and crossed over each other for maximum hold.
Step 3: Incorporating the Front Sections
Release the left front section of hair. Brush it gently back towards the chignon, wrapping it gracefully over the top of the roll to conceal the hair elastic and pins. Secure the ends underneath the roll with bobby pins. Repeat the exact same process with the right front section, draping it smoothly over the left wrapped piece and securing it neatly underneath. This overlapping technique creates a beautiful, woven effect that adds depth and sophistication to the hairstyle.
Step 4: Finishing Touches and Securing
Look at the hairstyle from all angles using a hand-held mirror. Gently pull slightly on the crown area if you require a bit more height or a softer silhouette. Once you are completely satisfied with the shape, mist the entire style with a fine-mist, flexible-hold hairspray. This will tame any flyaways and lock the updo in place without making the hair look stiff or unnatural.
Securing and Comfortable Wear Throughout the Day
For a mother of the bride or groom, comfort is just as important as appearance. A hairstyle should never feel too tight, heavy, or insecure, as this can detract from the enjoyment of the day. To ensure your updo remains comfortable, choose high-quality pins with rounded tips that do not scrape the scalp. When inserting bobby pins, always ensure the wavy side faces downwards towards the scalp, as this provides the best grip and prevents the pins from slipping out over time.
If you plan on wearing hair accessories, such as a delicate pearl slide or a subtle floral pin, place them carefully after the main structure is secured. Position the accessory so it complements the flow of the hairstyle, rather than overpowering it. It is always wise to carry a few spare pins and a small travel-sized hairspray in your bag for quick, reassuring touch-ups during the reception.
Adapting the Updo to Complement Your Personal Style
While a sleek and polished updo is universally flattering, you can easily customise this hairstyle to better reflect your personal aesthetic and the neckline of your outfit. If your dress features an intricate high neckline or beautiful collar detail, keeping the front sections of the hair fully swept back will draw attention to these design features and create an elongated, elegant posture.
Alternatively, if you prefer a softer, more relaxed look, you can leave a few delicate, face-framing strands free around the hairline before securing the front sections. Use a curling wand on a low heat setting to add a very gentle bend to these loose strands, softening the overall look and highlighting your facial features. For those with shorter or medium-length hair, a similar polished look can be achieved by creating a faux-updo using small, tucked-under sections pinned closely to the nape of the neck, demonstrating that elegance is not limited by hair length.





