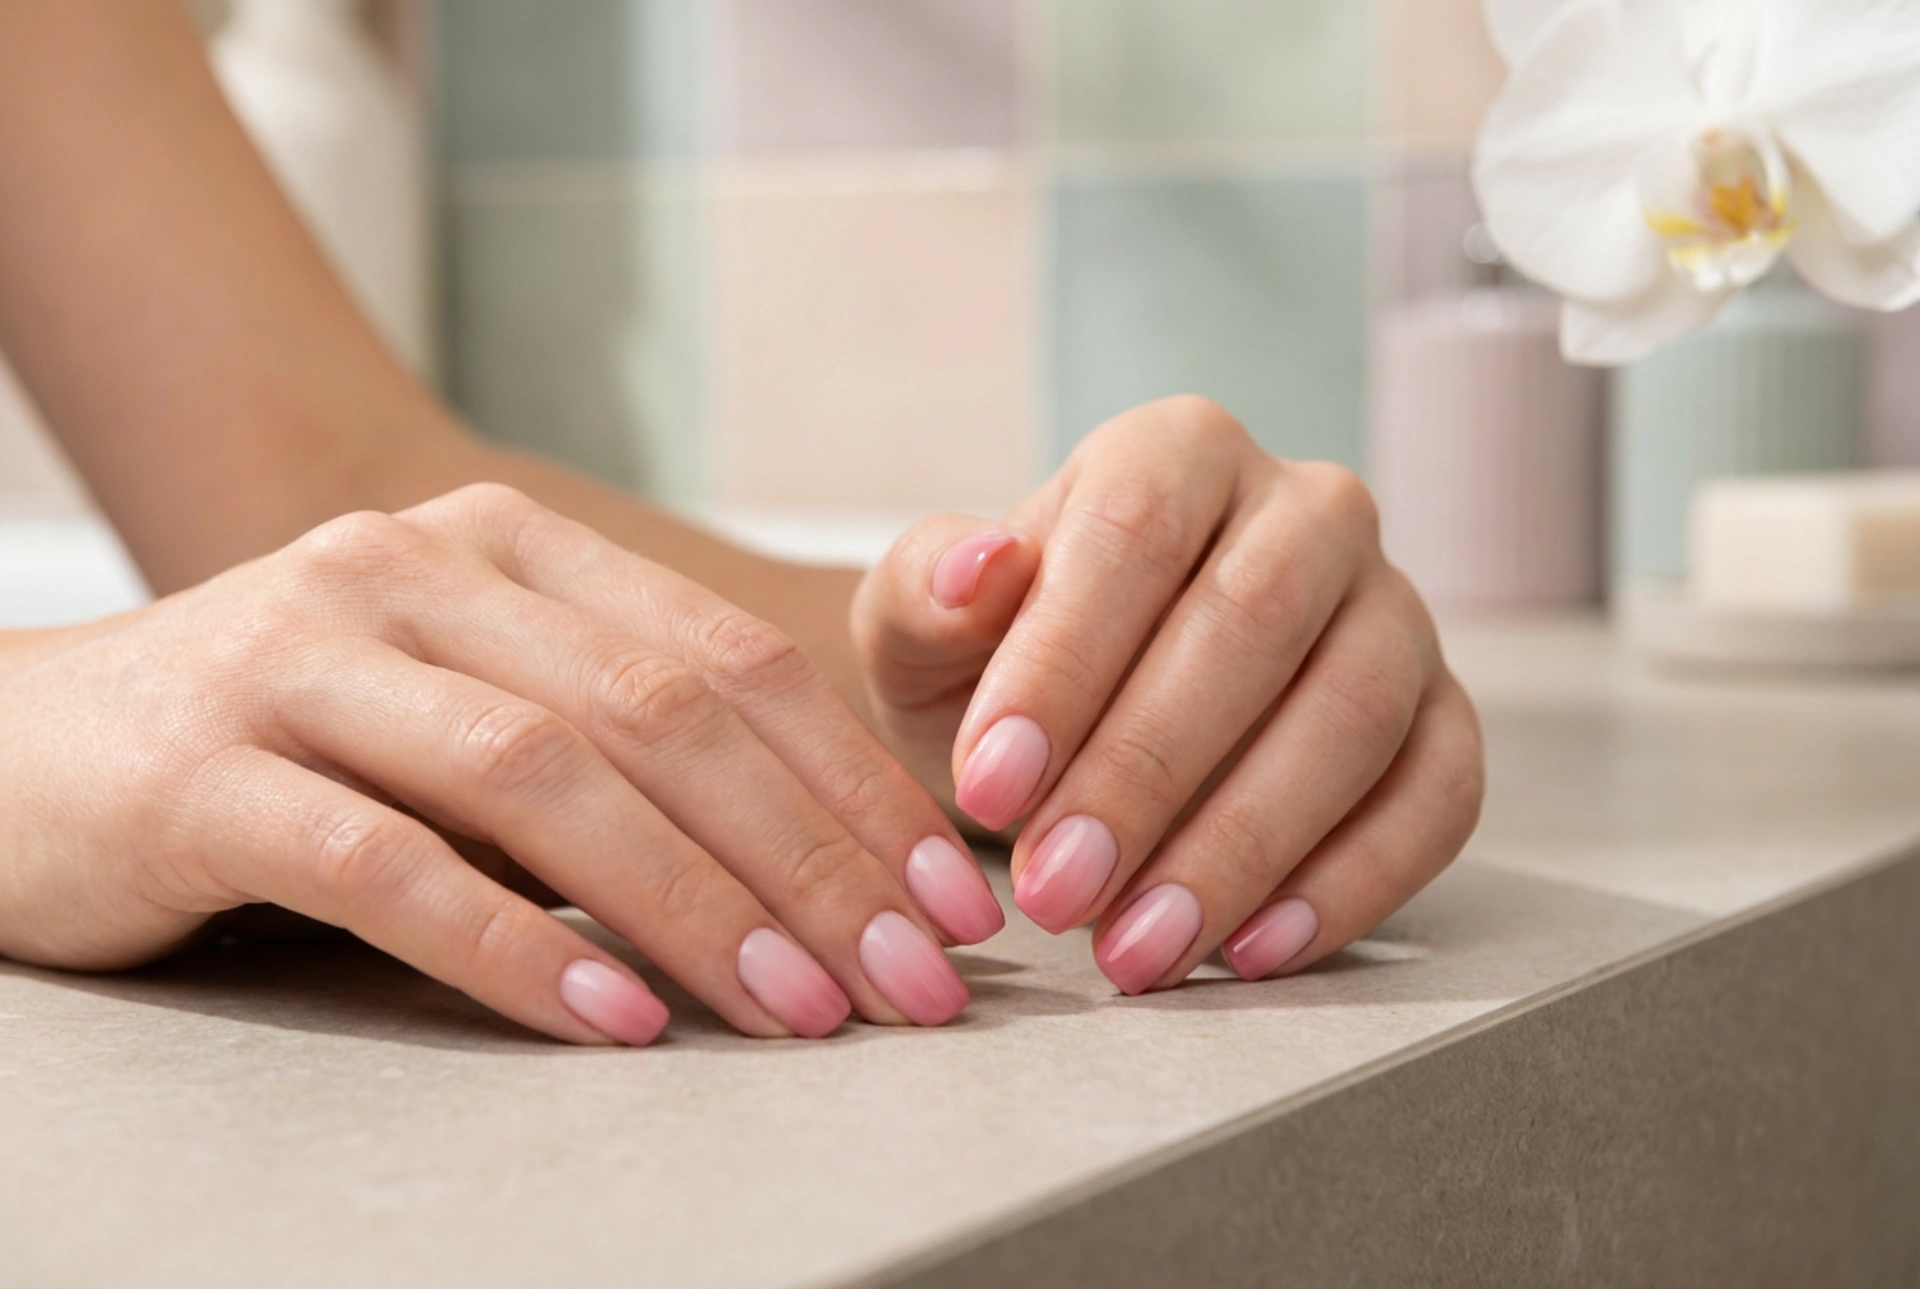


An elegant, close-up look at a well-groomed manicure often reveals the subtle artistry behind modern nail design. Soft pink ombre nails, with their seamless transition from a delicate pastel base to a deeper rosy hue, offer a serene and polished beauty aesthetic that complements any style. Achieving this smooth, even gradient at home does not require professional salon equipment, but rather a bit of patience and the right approach. Whether you prefer a natural light finish or a more defined gradient, mastering the technique can elevate your home manicure routine to a new level of sophistication.
The Sponge Technique for Classic Ombre
One of the most accessible and popular ways to create a beautiful gradient is the sponge technique. This method utilizes a simple cosmetic sponge to deposit and blend the colours onto the nail plate, mimicking a professional airbrushed finish.
To begin, prepare your nails by shaping them and applying a nourishing base coat to protect the natural nail plate. Once dry, apply one or two thin layers of your lighter pink shade as the background colour. Let this layer dry completely before moving on to the gradient step. On a clean, non-porous surface such as plastic wrap or a small mixing palette, paint two parallel stripes of your selected pink polishes, slightly overlapping them where they meet. Gently press a small, clean makeup wedge or cosmetic sponge onto the wet polish, then dab it lightly onto your nail in a soft bouncing motion. Repeat this process in thin layers, allowing each layer to dry slightly, to build up the intensity of the gradient without creating bubbles or a thick texture.
The Brush Blending Method
For those who prefer a more precise hand and a cleaner application process, the brush blending method offers an excellent alternative. This technique uses a dedicated nail art brush or a small, flat synthetic brush to merge the shades directly on the nail.
Start by applying your base coat and a neutral pink background layer. While the background is still slightly tacky but not completely wet, apply the lighter pink polish to the upper half of the nail (near the cuticle) and the darker pink to the free edge. Take a damp, flat nail brush and gently sweep back and forth across the boundary where the two colours meet. Using light, horizontal strokes, blend the line of transition until it becomes soft and indistinct. Because this method works with wet polish, it requires a gentle touch to avoid wiping away the colour entirely. Cleaning the brush between strokes on a lint-free wipe will keep the gradient looking fresh and prevent the colours from muddying.
The Powder and Pigment Approach
If you find that liquid nail polishes dry too quickly for a smooth blend, using cosmetic nail powders or fine pigments is a highly effective way to achieve a soft transition. This method is particularly suited for creating a very subtle, diffused effect that looks beautifully natural under any light.
First, apply your base and base colour as usual, ensuring a smooth, even surface. Depending on the type of polish you are using, you will need a slightly tacky surface for the pigment to cling to. Using a soft eyeshadow applicator or a fluffy brush, gently pat a small amount of the pink pigment onto the tip of the nail, working your way upwards towards the cuticle. As you move higher up the nail plate, use less pressure and a lighter amount of powder to naturally fade the colour out. This creates a remarkably smooth gradient with virtually no visible lines. Once you are satisfied with the blend, gently brush away any excess powder from the surrounding skin before sealing the design.
Essential Tips for a Flawless Gradient Finish
Regardless of the method you choose to create your pink ombre nails, the final steps of your manicure are crucial for achieving that polished, professional look.
- Protect the Surrounding Skin: Before applying any polish, you can apply a gentle barrier cream or liquid tape around the cuticles to make cleanup easy and keep the skin free from stray polish.
- Use a High-Quality Top Coat: A glossy top coat acts as a magic wand for ombre designs. Applying a generous layer of top coat helps to visually blend the colours together, smoothing out any minor imperfections or textures left by sponges or brushes.
- Work in Thin Layers: Building up the colour gradually is the secret to longevity and a seamless look. Thick layers of polish are prone to bubbling, smudging, and premature chipping.
- Ensure Proper Lighting: Working under soft, natural light or a bright desk lamp will help you spot any uneven areas in your gradient before the polish dries.
By choosing the method that best suits your personal style and comfort level, you can easily recreate this elegant, minimalist manicure at home. Soft pink ombre nails remain a timeless, versatile choice that brings a touch of refined beauty to your hands.




