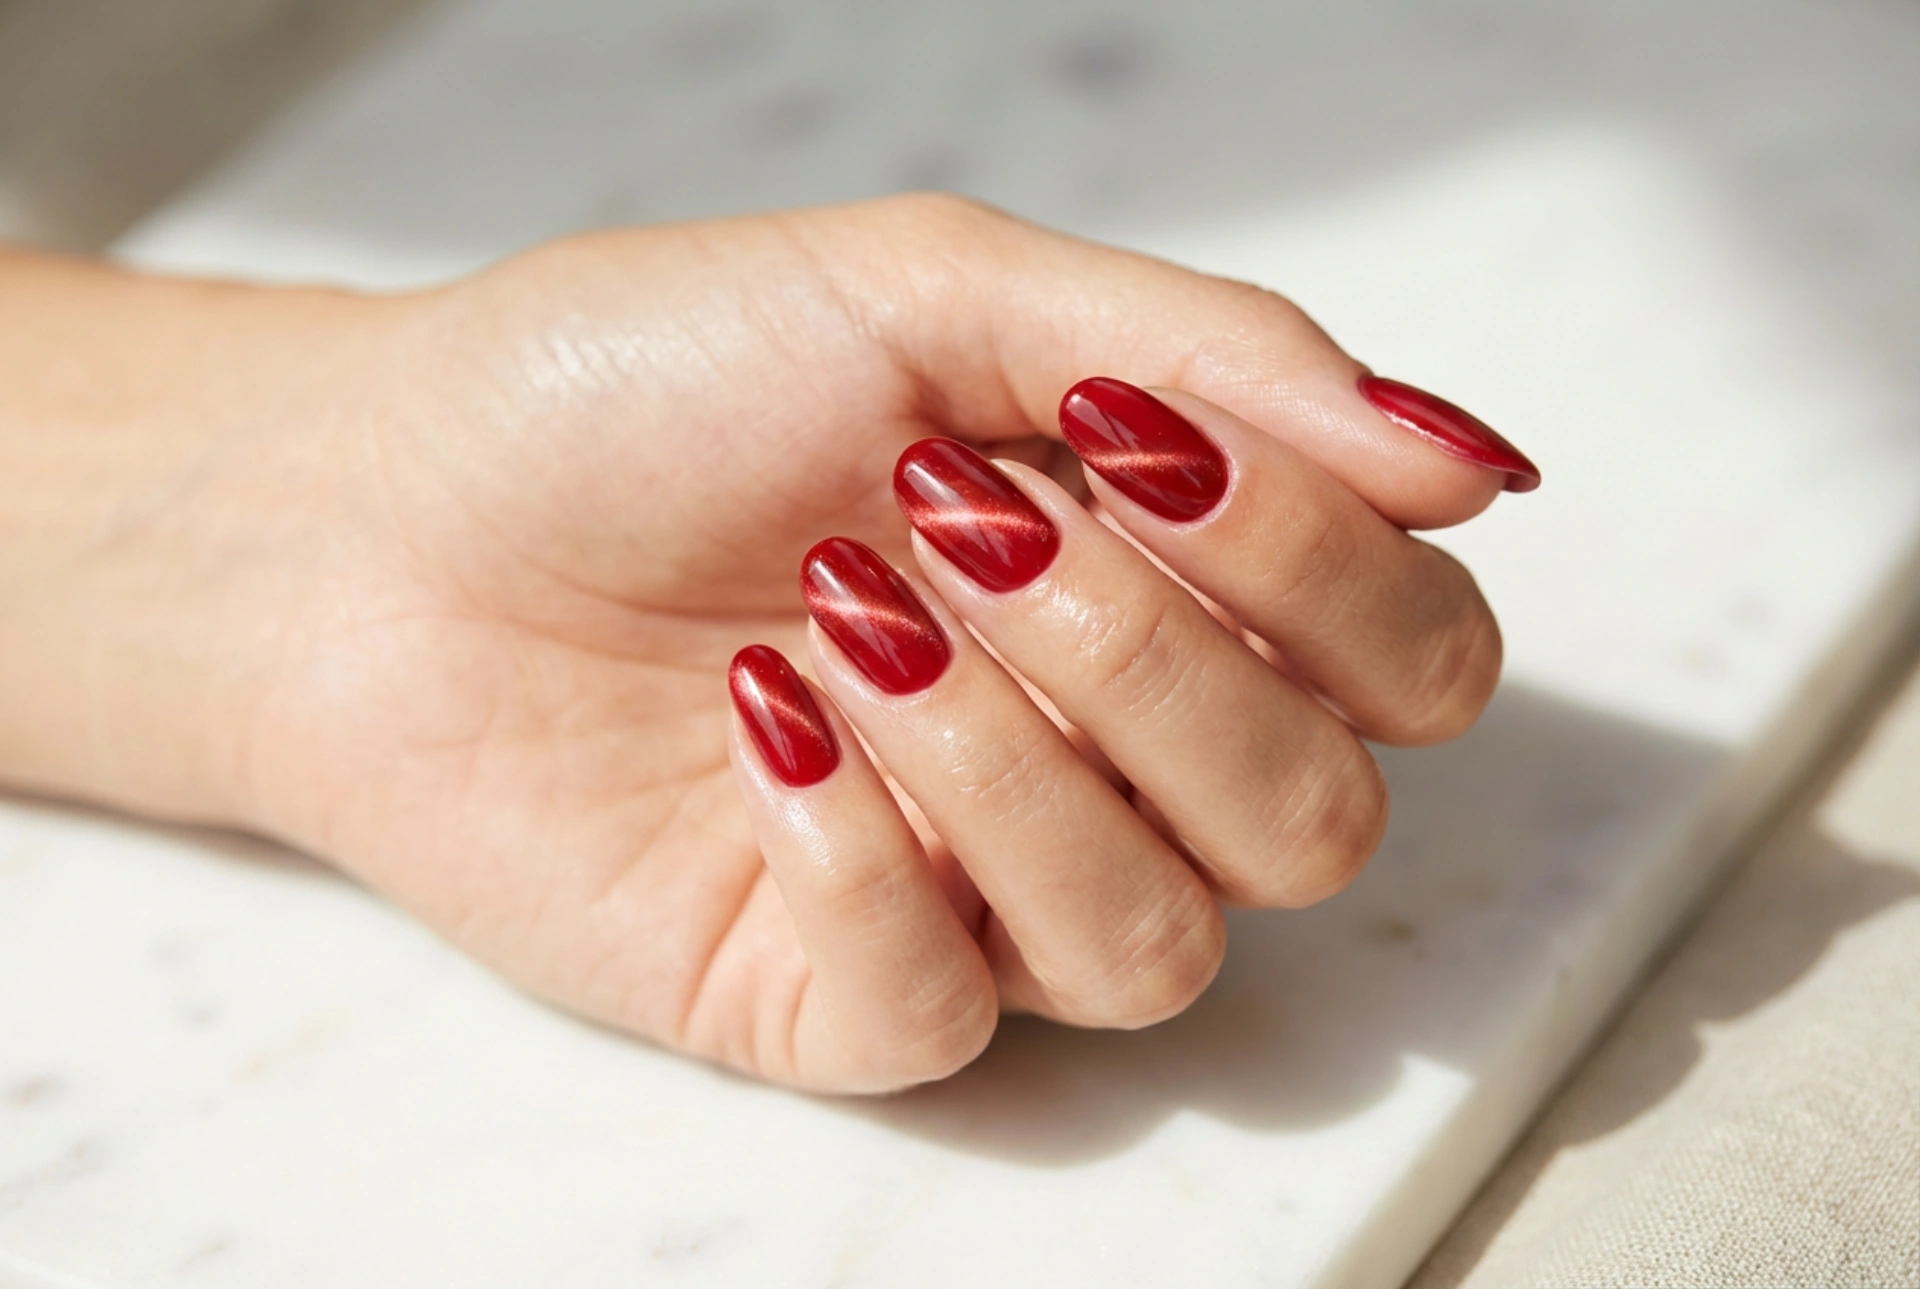


The mesmerising allure of glossy red cat eye nails lies in their unique depth and the way a shimmering magnetic streak catches the soft, natural light. This modern nail trend, reminiscent of the precious chrysoberyl gemstone, transforms a classic manicure into a sophisticated work of art. Achieving this dimensional, velvet-like effect at home is simpler than it seems, requiring only a steady hand, a dedicated magnet, and a bit of patience. By mastering the interaction between magnetic particles and the styling tool, you can create a striking look that balances elegance with contemporary flair.
Understanding the Cat Eye Effect
The secret behind the captivating cat eye finish is the presence of microscopic metal particles suspended within the nail polish formula. Unlike traditional glitter or shimmer polishes, these tiny magnetic fragments can be manipulated after application. When you introduce a specialised magnet close to the wet polish, these particles align along the magnetic field lines, shifting to the surface to form a bright, concentrated band of light. The remaining areas appear deeper and darker, creating a highly dramatic contrast that mimics the slit eye of a cat.
To achieve the best results, selecting a rich red shade is ideal. Crimson, burgundy, and deep ruby tones provide an excellent contrast against the bright, reflective particles. This contrast enhances the visual depth of the manicure, making it appear three-dimensional and constantly changing under different lighting conditions.
Preparing Your Nails for a Flawless Canvas
Before dipping into the magnetic application, proper nail preparation is essential to ensure the longevity and smooth appearance of your manicure. Any unevenness on the nail plate can disrupt the alignment of the magnetic particles, leading to a distorted shimmer line.
- Shape the nails using a fine-grit file, opting for a shape that complements your hands, such as a classic oval or a modern almond.
- Gently push back the cuticles using a wooden stick to clear the nail plate and create a clean boundary.
- Dehydrate and clean the nail surface using a lint-free wipe soaked in a mild nail prep solution to remove any residual oils or dust.
- Apply a thin, even layer of base coat to protect the natural nail plate and provide an optimal surface for the subsequent layers to adhere to.
Applying the Red Magnetic Polish
Once the base coat is dry, it is time to build the rich, red foundation. For the most intense cat eye effect, many enthusiasts prefer to apply a dark base layer, such as black or deep burgundy, before the magnetic polish. However, applying the red magnetic polish directly in two layers also yields a beautiful, luminous result.
The First Coat
Apply the first layer of your red cat eye polish. This layer should be relatively thin and spread evenly across the entire nail plate. At this stage, do not use the magnet. The primary goal of the first coat is to establish a solid, uniform background colour. Allow this layer to dry completely or cure it under your home lamp, depending on the specific type of polish you are using.
The Second Coat
Apply a slightly thicker second coat of the magnetic polish. This layer must remain wet when you use the magnet, so it is highly recommended to work on one nail at a time. If the polish begins to set or dry before you apply the magnet, the metal particles will not be able to move freely, resulting in a faint or non-existent streak.
Mastering the Magnet: Step-by-Step Technique
The magic happens during this step, and precision is key. The position, angle, and distance of the magnet will dictate the final design of your shimmering streak. To create a classic diagonal line, follow these steps carefully:
- Hold the magnet approximately three to five millimetres away from the wet nail surface. Be extremely careful not to touch the wet polish, as this will ruin the smooth finish.
- Position the magnet diagonally across the nail. If you want a straight line, hold the magnet parallel to the nail's surface. For a more dispersed, velvet effect, hover the magnet around the edges of the nail instead of a single fixed point.
- Keep the magnet completely still for about ten to fifteen seconds. This gives the heavy metal particles enough time to migrate through the wet formula and cluster together to form the signature line.
- Pull the magnet straight up and away from the nail. Immediately set or dry the polish to freeze the particles in their new alignment before they have a chance to disperse again.
Sealing the Design with a Glossy Top Coat
To protect your hard work and enhance the three-dimensional depth of the magnetic streak, a high-quality top coat is indispensable. The top coat acts as a magnifying glass, intensifying the shimmer and giving the nails a professional, high-gloss finish that catches the light beautifully.
Apply the top coat gently, using light strokes to avoid dragging the aligned particles beneath. Ensure you seal the free edge of each nail to prevent chipping. Once the top coat is dry, finish the routine by applying a drop of nourishing oil to your cuticles to restore moisture and give your hands a polished, elegant look that perfectly showcases your sophisticated red cat eye nails.




