


A nail drill, also known as an e-file, can seem like a professional-only tool, but with the right knowledge and a gentle approach, it can become a valuable part of your at-home manicure routine. It allows for precise shaping, efficient cuticle care, and a smooth finish that’s hard to achieve with manual files alone. However, safety is paramount. This guide will walk you through choosing your first kit and mastering the basic techniques for beautiful, healthy nails.
Choosing Your First At-Home Nail Drill
Stepping into the world of e-files can be overwhelming, with countless options available. For home use, you do not need the most powerful or complex machine. Instead, focus on safety, control, and ease of use. Here’s what to look for in a beginner-friendly kit.
Key Features for Beginners
- Variable Speed Control: This is the most crucial feature. A good drill for beginners should have an adjustable speed, usually measured in RPM (rotations per minute). Look for a model that can operate at very low speeds (e.g., under 5,000 RPM) to start. High speeds are for experienced technicians and can easily damage the natural nail plate.
- Forward and Reverse Rotation: The ability to change the drill bit's rotation direction is essential for working comfortably on both hands and moving towards or away from the cuticle area safely. It allows you to adapt the tool's angle for better control and a smoother result.
- Low Vibration and Noise: A handpiece that vibrates excessively is difficult to control and can be uncomfortable to hold. A quality motor will run smoothly and quietly, allowing for more precise work and a more pleasant experience.
- Lightweight Handpiece: You will be holding the handpiece like a pen, so it should be comfortable and lightweight to prevent hand fatigue. This helps you maintain a steady, gentle touch throughout the manicure process.
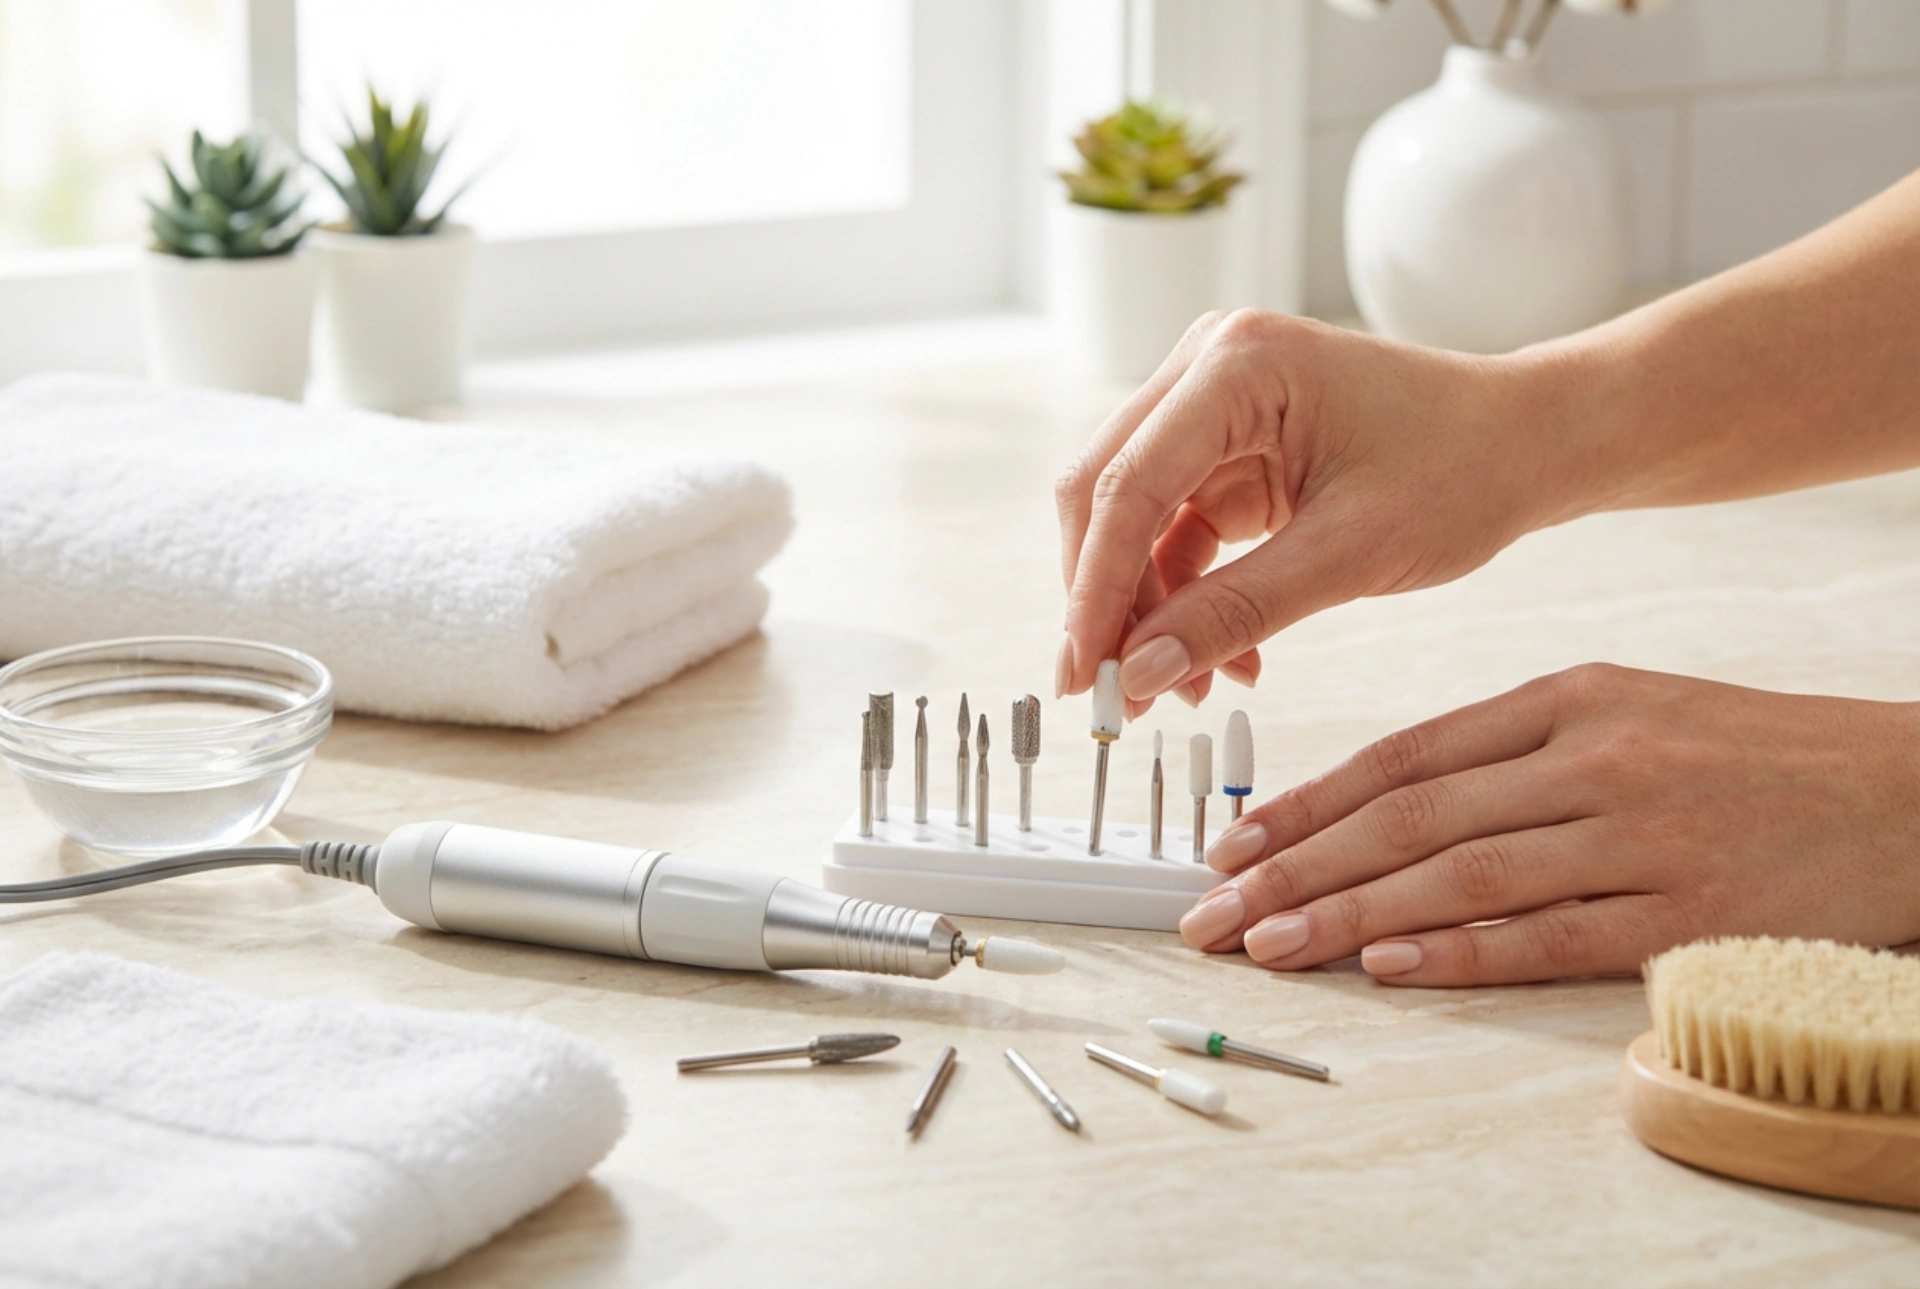
Most starter kits come with the main power unit (which can be corded or rechargeable), the handpiece, and a basic set of drill bits, providing everything you need to begin your journey.
A Beginner's Guide to Nail Drill Bits
Your nail drill kit will likely include several attachments, known as bits or burs. Each has a specific purpose, and using the right one for the job is fundamental to achieving a great result without causing damage. For home use on natural nails, you only need a few basic types. Always start by reading the manufacturer's instructions for your specific set.
Common Bits for Natural Nails
- Small Flame or Cone Bit: Often made of fine diamond particles or ceramic, this small, pointed bit is perfect for gentle cuticle work. It can be used to lift the non-living tissue of the eponychium, clean the side walls of the nail, and prepare the cuticle area for removal. Always use it on the lowest speed setting.
- Ball-Tipped Bit: This small, rounded bit is another excellent tool for cuticle care. It can gently exfoliate dry skin around the nail plate and clean up any remaining cuticle after it has been lifted.
- Barrel or Sanding Band Bit: A cylindrical bit, often used with single-use sanding bands of varying grits. This is used for shortening the free edge of the nail or for gently removing the shiny top coat of a gel polish. Use a fine-grit band and very light pressure on natural nails. Never use coarse bands on the natural nail plate itself.
- Felt or Cotton Polishing Bit: This soft bit is used at the very end of a manicure. On a low speed, it can be used with a tiny amount of cuticle oil or on its own to buff the natural nail to a high shine, leaving it looking healthy and glossy.
Always insert the bit fully into the handpiece and ensure it is securely locked in place before turning the machine on. Never switch bits while the drill is running.
How to Use a Nail Drill Safely at Home
Patience and a light touch are your best friends when learning to use a nail drill. Always work on clean, dry nails. Hold the handpiece like a pencil for maximum control and rest your hand or wrist on a stable surface to keep it steady. Remember to keep the bit moving at all times.
Step 1: Prepare the Cuticle Area
Start by gently pushing back your cuticles with a traditional wooden or metal pusher. Then, select a fine-grit flame or ball bit. Set your drill to its lowest speed and, using the 'forward' rotation, gently trace around the right side and top of your cuticle area. Keep the bit parallel to the nail plate and let its weight do the work—do not apply pressure. Switch to 'reverse' to do the same on the left side. The goal is to lift and exfoliate dry, non-living tissue, not to cut into the living skin.
Step 2: Shape and Shorten the Nail
If you need to shorten your nails significantly, a fine-grit sanding band or a gentle barrel bit can be used. On a low-to-medium speed, gently file across the free edge of the nail in one direction. Avoid a back-and-forth sawing motion. To refine the shape, it is often best to switch to a manual file for the final touches, as it offers more control for delicate shaping.
Step 3: Buffing and Removing Shine (for Gel Polish Prep)
If you are preparing your nails for a new gel polish application, you need to gently remove the surface shine. Use a very fine buffer block or a very fine sanding band on the lowest possible speed. Lightly and quickly float the bit over the entire surface of the nail plate. The goal is to create a slightly matte surface for the polish to adhere to, not to thin the nail.
Step 4: Finishing and Polishing
If you are aiming for a natural, shiny look without polish, a soft polishing bit is your final step. Ensure the nail is completely clean and free of dust. Use the felt or cotton bit on a low speed to buff each nail until it gleams. You can add a single, tiny drop of nail oil for extra lustre and hydration.
Mistakes to Avoid for Healthy Nails
Using a nail drill incorrectly can lead to weak, thin, or damaged nails. Be mindful of these common pitfalls to ensure your at-home manicures are always safe.
- Using a High Speed: The number one mistake for beginners. Always start on the lowest setting and only increase it slightly as you gain confidence for specific tasks like shortening. High speeds create heat and remove material too quickly, risking injury.
- Applying Too Much Pressure: Let the bit do the work. Pressing down hard will generate friction and heat, which can be painful and burn the nail plate, causing damage known as 'rings of fire'—visible red or sensitive patches.
- Staying in One Spot: Never hold a spinning bit in one place. This concentrates heat and friction, which will quickly lead to divots, thinning, and burns. Keep the handpiece moving in smooth, continuous strokes.
- Using the Wrong Angle: Keep the bit as parallel to the nail surface as possible. Angling the tip downwards can cause it to dig into the nail plate, creating grooves and weak spots.
- Aggressive Cuticle Removal: The e-file should only be used to exfoliate non-living tissue on the nail plate. Avoid touching the living skin of the eponychium or side walls, as this can cause cuts and irritation.
- Neglecting Tool Hygiene: After each use, brush all dust from your drill bits. You can then wipe them clean with a solution appropriate for sanitising metal tools to keep them ready and hygienic for your next manicure.
By avoiding these errors and practising with patience, you can safely incorporate a nail drill into your beauty routine for a flawless, long-lasting manicure every time.


