


An eyebrow pencil is a staple in many makeup bags, prized for its precision and control. It can transform sparse or undefined brows into polished, face-framing features. However, the key to a beautiful result lies in two fundamental aspects: selecting the right shade and mastering the application. A mismatched colour or a heavy hand can lead to an unnatural finish, but with the right knowledge, you can achieve effortlessly perfect brows.
How to Choose the Perfect Eyebrow Pencil Shade
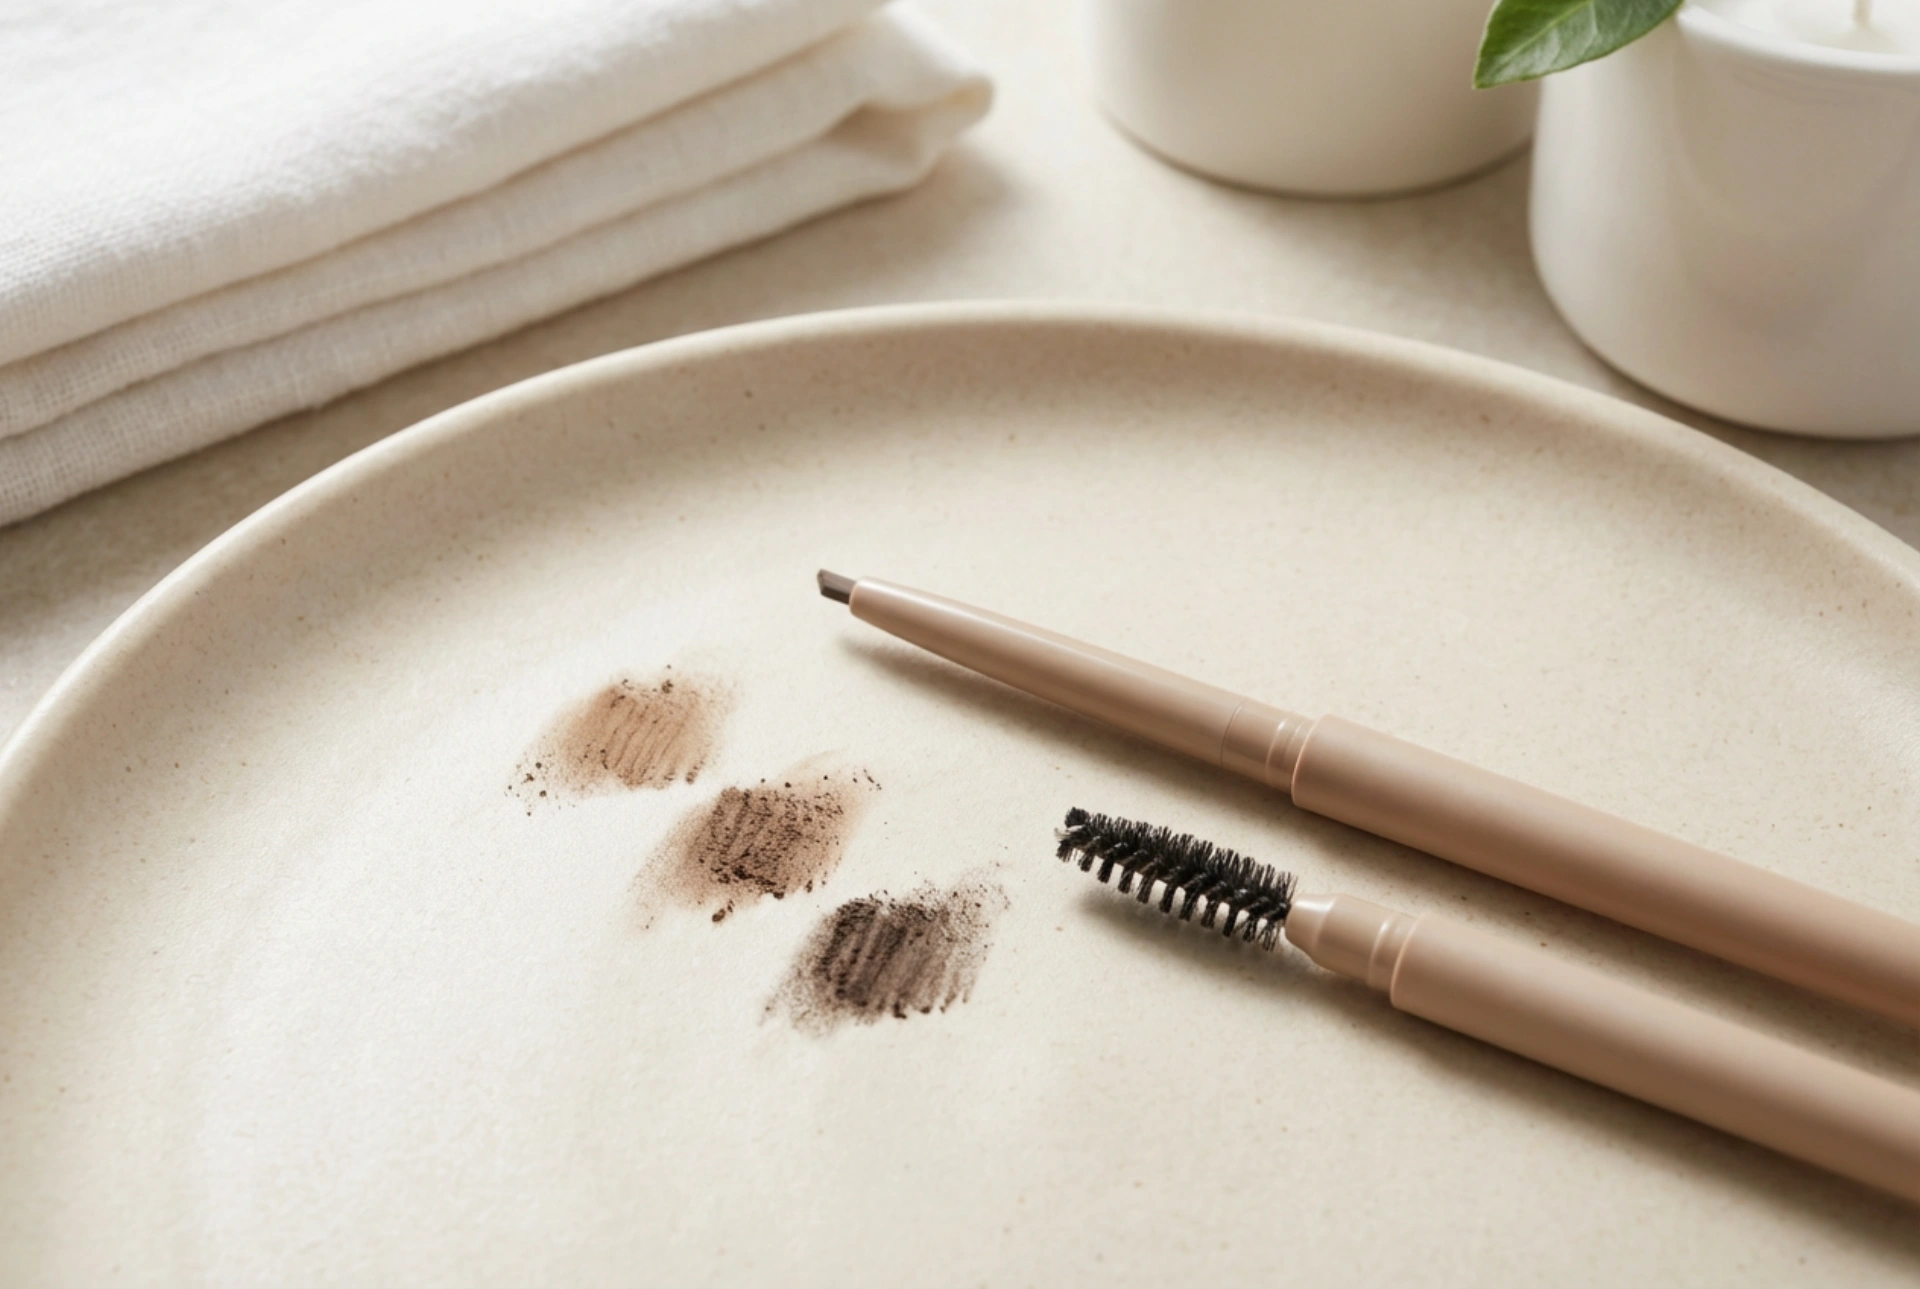
Finding your ideal shade is the first and most crucial step. The goal is to create depth and definition that looks entirely natural, enhancing your features without overpowering them. A common mistake is to choose a colour that is too dark or has the wrong undertone, which can look harsh and artificial.
A general rule of thumb is to match your pencil to the colour of your hair roots, not the ends, as this is your most natural base tone. Also, consider your skin's undertone (cool, warm, or neutral) when making your selection. Here are some guidelines for different hair colours:
- For dark hair: Avoid a stark black pencil unless your hair is jet black. Instead, opt for a dark brown, charcoal, or soft black shade. Often, choosing a pencil one to two shades lighter than your hair colour prevents the brows from looking too severe and blocky.
- For brown hair: Match the undertone of your hair. If your hair has warm, reddish tones, look for a pencil with similar warmth. If your hair is an ashy brown, a cool-toned taupe or grey-brown will be a much better fit and blend more seamlessly.
- For blonde hair: Taupe and soft, ashy blonde shades are usually the most flattering choices. It's best to avoid pencils with strong red or orange undertones, which can look unnatural against fair hair and skin.
- For red hair: Depending on the vibrancy of your hair, you might choose an auburn pencil, a warm brown, or even a blonde pencil with a hint of warmth to complement your natural colouring.
Before committing to a shade, always swatch it. Test a potential pencil on the back of your hand or, even better, draw a small, light line near your jawline. View it in natural daylight to get the most accurate idea of how the colour works with your skin tone and hair.
A Step-by-Step Guide to Natural-Looking Brows
Once you have the right shade, it's time to focus on technique. The aim is always to enhance, not completely redraw. Follow these steps for a polished, yet believable, result.
Step 1: Prepare Your Brows
Start with clean, dry brows free of any skincare products. Take a clean spoolie brush (the brush that often comes on the other end of an eyebrow pencil) and comb your brow hairs upwards and outwards. This helps you see the natural shape of your brow and clearly identify any sparse areas that need a little filling.
Step 2: Gently Outline the Shape
Using the pencil with a very light hand, softly define the lower line of your brow, following your natural shape from the start to the arch and tail. This creates a clean base and acts as a guide for filling. It is vital to avoid drawing a harsh, solid line; this is just a soft guide to establish structure.
Step 3: Fill with Hair-Like Strokes
This is the most important part of the process for achieving a natural look. Instead of shading the brow in with solid colour, use the fine tip of your pencil to draw short, upward, hair-like strokes. Angle them in the direction of your natural hair growth. Focus primarily on the sparse areas within your brow shape. Apply less pressure at the front of the brow for a softer, more diffused start, and add slightly more definition towards the arch and tail.
Step 4: Define the Arch and Tail
The arch and tail are where brows typically need the most definition to look sharp and polished. Pay extra attention to creating a crisp shape here, ensuring the tail tapers to a clean point. Be careful not to extend the tail too far downwards, as this can visually drag the face down.
Step 5: Blend for a Seamless Finish
The final, non-negotiable step is blending. Take your spoolie brush again and gently comb through your brows. This crucial action softens any harsh lines, distributes the pencil product evenly, and perfectly blends it with your natural brow hairs. It’s the secret to creating a seamless, undetectable finish.
Common Eyebrow Pencil Mistakes to Avoid
Achieving perfect brows is as much about what you don't do as what you do. Steer clear of these common pitfalls for the best results every time.
- Using a shade that is too dark: This is the most frequent error and instantly makes brows look artificial and severe. When in doubt, it is always safer to go a shade lighter than you think you need.
- Applying too much pressure: An eyebrow pencil requires a light, feathery touch. Pressing too hard creates a waxy, blocky texture that looks drawn-on instead of mimicking fine hairs.
- Creating a 'block' front: The inner part of your eyebrow should be the softest and most diffused part. Drawing a harsh square or rounded shape at the start is a tell-tale sign of overdone brows.
- Forgetting to blend: Skipping the spoolie step leaves visible pencil marks and prevents the product from merging with your natural hairs. Blending is what transforms a good brow into a great one.
- An overly long tail: A brow tail that extends too far down or out can disrupt the harmony of your facial features. A good guide is to imagine a line from the corner of your nose to the outer corner of your eye; the brow tail should not go past this imaginary line.


