


Using an electric nail file, or e-file, to remove gel polish at home can be a quick and efficient method, but it requires knowledge and a gentle touch to avoid damaging your natural nails. While traditionally a salon tool, e-files are now widely available for home manicures. Mastering the correct technique is essential for achieving a smooth finish while keeping your nails healthy and strong. This guide will walk you through the process, from choosing the right components to the final, gentle buff.
Choosing Your Tools: A Guide to E-File Bits
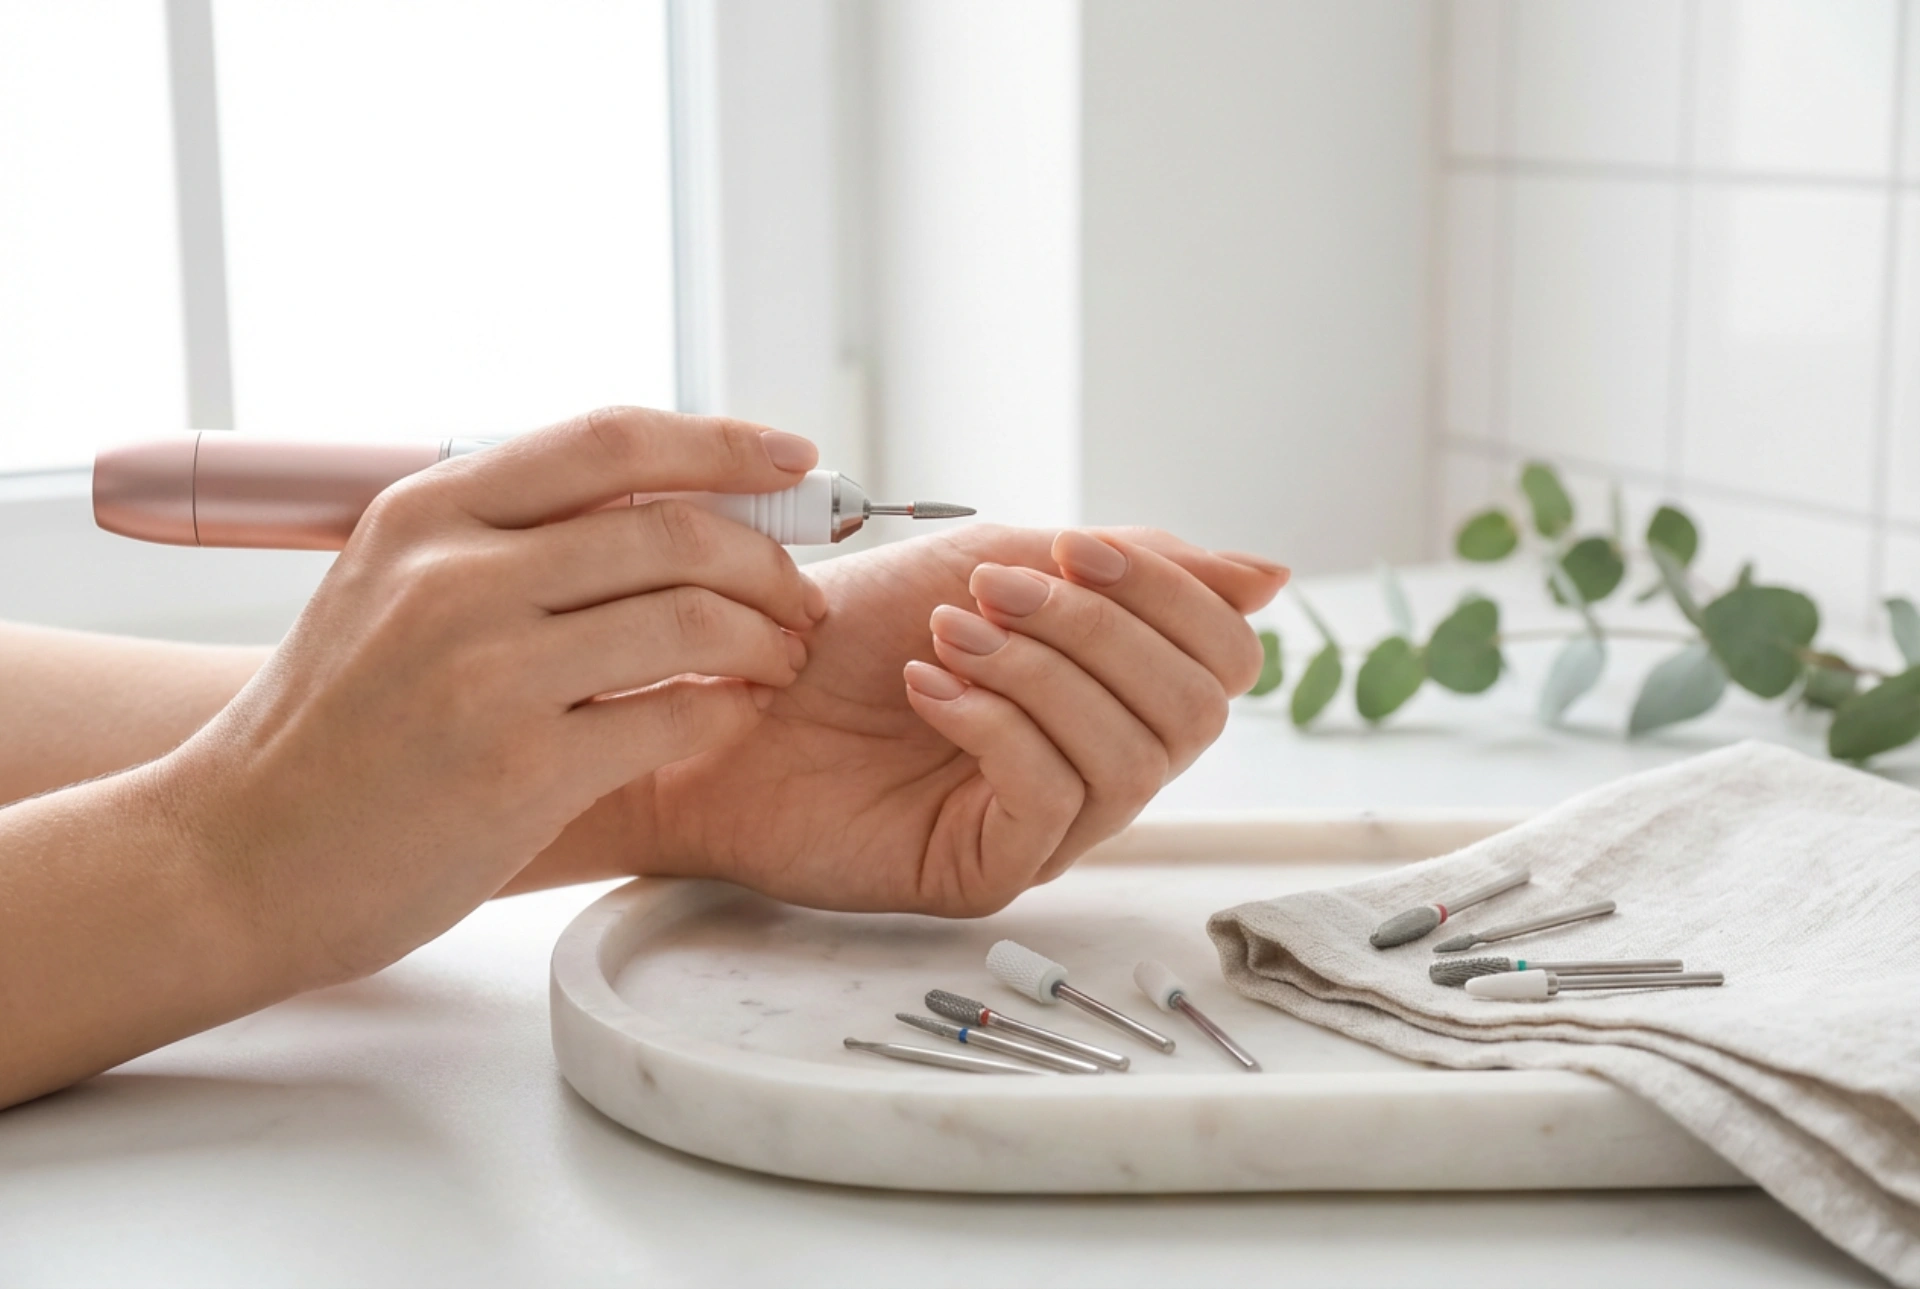
The success of your gel polish removal depends heavily on using the correct drill bit. For beginners, it's crucial to select bits that are effective yet forgiving. The material and shape of the bit are the two most important factors to consider.
When it comes to materials, you'll commonly find two types suitable for gel removal:
- Ceramic Bits: These are an excellent choice for beginners. They tend to produce less heat than metal bits, which reduces the risk of discomfort. Their durability is sufficient for home use, and they effectively remove gel polish without being overly aggressive.
- Carbide Bits: Made from a very hard metal, these are extremely durable and efficient at removing product quickly. However, they can also generate more heat and require a more experienced hand to control. If you choose carbide, opt for a fine or medium grit to start.
The shape of the bit determines how it interacts with the nail surface. For removing the bulk of the gel polish from the nail plate, a barrel or cone shape is ideal.
- Barrel Bits: A rounded or 'safety' barrel bit is highly recommended for home use. These have a smooth, non-cutting top, which significantly reduces the risk of accidentally cutting the skin around your cuticles and sidewalls.
- Cone Bits: A tapered cone shape is also very useful. It allows you to work on the larger surface of the nail and is also slim enough to get closer to the cuticle area and sidewalls with more precision than a wide barrel.
Finally, consider the grit. Just like with a manual nail file, e-file bits come in different grits, from coarse to extra fine. For removing gel polish, a medium-grit bit is a good starting point. It's strong enough to remove the product efficiently but not so aggressive that it becomes difficult to control. You can then use a fine-grit bit to smooth the surface afterwards.
Finding Your Rhythm: Speed and Rotation
Controlling the speed of your e-file is paramount for safety. Most home-use e-files have adjustable speed settings, often measured in Rotations Per Minute (RPM). Always start at the lowest possible speed, typically between 5,000 and 10,000 RPM. This allows you to get a feel for the tool and the bit without overwhelming you. You should never feel like you're losing control. As you become more confident, you can slightly increase the speed, but for gel polish removal, you rarely need to go above 15,000 RPM.
The direction of rotation is another key setting. Most e-files have a 'Forward' (F) and 'Reverse' (R) switch. The correct direction depends on which hand you are working on. For a right-handed person:
- When working on your left hand, use the Forward rotation.
- When working on your right hand, switch to the Reverse rotation.
This ensures the bit files away the product smoothly rather than skipping or jumping across the nail. If you are left-handed, you would do the opposite. Working in the correct direction provides stability and much greater control.
A Step-by-Step Guide to Safe Removal
With the right bit and speed selected, you are ready to begin. Follow these steps carefully for a safe and effective removal process.
Step 1: Prepare the Nail
If your nails are long, you may want to shorten them first with a manual file. This reduces the amount of surface area you need to work on. Ensure your hands and nails are clean and completely dry.
Step 2: Start with a Light Touch
Hold the e-file handpiece like a pen for maximum control. Rest your hand on a stable surface. Gently touch the rotating bit to the nail surface. Do not apply pressure; let the speed and grit of the bit do the work for you. Start in the middle of the nail to get a feel for the process.
Step 3: Keep the Bit Moving
This is the most critical rule of e-filing. Never, ever hold the bit stationary in one spot. This will cause friction, generate heat, and can quickly file a dip or groove into your nail. Use smooth, even strokes, moving the bit across the nail, generally from the cuticle area down towards the free edge. Work across the entire nail surface in sections.
Step 4: Leave a Thin Base Layer
Your goal is to remove the shiny top coat and the layers of coloured gel polish. As you file, you will see the colour disappear. Be observant. The aim is to leave a very thin, clear layer of the base coat on the nail. This layer acts as a protective shield for your natural nail plate. Filing all the way down to the natural nail is how damage occurs. Slow down as you get closer to the base layer.
Step 5: Refine and Finish
Once the colour is removed and only a thin base layer remains, you can stop using the e-file. Use a gentle, manual buffer block (a 180 or 240 grit is suitable) to lightly smooth the entire nail surface. This will even out any minor ridges and prepare the nail for its next treatment, or simply for being left natural. Finally, cleanse the nail with an alcohol wipe to remove all dust.
Common E-File Mistakes and How to Avoid Them
Learning what not to do is just as important as learning the correct technique. Be mindful of these common pitfalls:
- Applying too much pressure: This is the fastest way to cause damage and painful heat spikes. Use a light hand and let the tool work.
- Working at a speed that's too high: High speeds reduce your control and increase the risk of filing into your skin or natural nail. Start low and go slow.
- Using an aggressive, coarse bit: For home use on natural nails, coarse bits are generally unnecessary and dangerous. Stick to fine or medium grits.
- Filing down to the natural nail: Always leave a thin layer of base coat to protect the nail plate from thinning and weakening over time.
- Holding the bit at a steep angle: Try to keep the bit as parallel to the nail plate as possible. Angling the tip downwards can easily gouge the nail.
- Neglecting safety around the cuticles: Use a safety bit and extreme caution when working near the skin. It's better to leave a small margin of product near the cuticle than to risk injury.
Patience and practice are your best friends when learning to use an e-file. By respecting the tool and your nails, you can enjoy the benefits of quick and easy gel polish removal at home.


