


The charm of retro hairstyles lies in their timeless elegance and sophisticated silhouette. Voluminous, beautifully shaped hair evokes an era of glamour that never truly goes out of style. While these looks may seem complex, recreating them today is more accessible than ever, thanks to modern styling tools. You don't need a time machine to capture the essence of vintage beauty; with a few contemporary gadgets and the right techniques, you can craft a stunning, voluminous hairstyle that pays homage to the past while fitting perfectly into the present. This guide will walk you through creating a polished, retro-inspired look, step by step.
Preparation is Key to Success
Achieving a lasting and beautifully structured retro style begins long before you pick up a curling iron. Proper preparation of your hair and gathering the right tools are fundamental steps that will ensure a smooth styling process and a flawless result. This initial phase sets the foundation for the volume and shape you want to create.
Choosing the Right Base
This type of voluminous style works best on medium to long hair, as the length provides the necessary weight and surface area for creating dramatic shapes and soft curls. If you have layers, they can be a great advantage, as they naturally help to create texture and a sense of movement, making it easier to build height. Before you begin, ensure your hair is clean and free from any product build-up. Starting with a fresh base allows products to work more effectively and helps the style to hold for longer. It's best to work with hair that is slightly damp, not soaking wet, for the initial blow-drying stage.
Essential Tools and Products
Gather your styling arsenal before you start. Having everything within reach will make the process much more efficient. You don't need professional-grade equipment, but a few key items are crucial for this look:
- A hairdryer with a nozzle: This helps to direct the airflow for precise drying and root-lifting.
- A medium to large round bristle brush: Essential for creating volume and smoothness during the blow-dry.
- A heat protectant spray: A non-negotiable product to shield your hair from potential damage.
- Volumising mousse: This is your secret weapon for building body and hold from the roots to the ends.
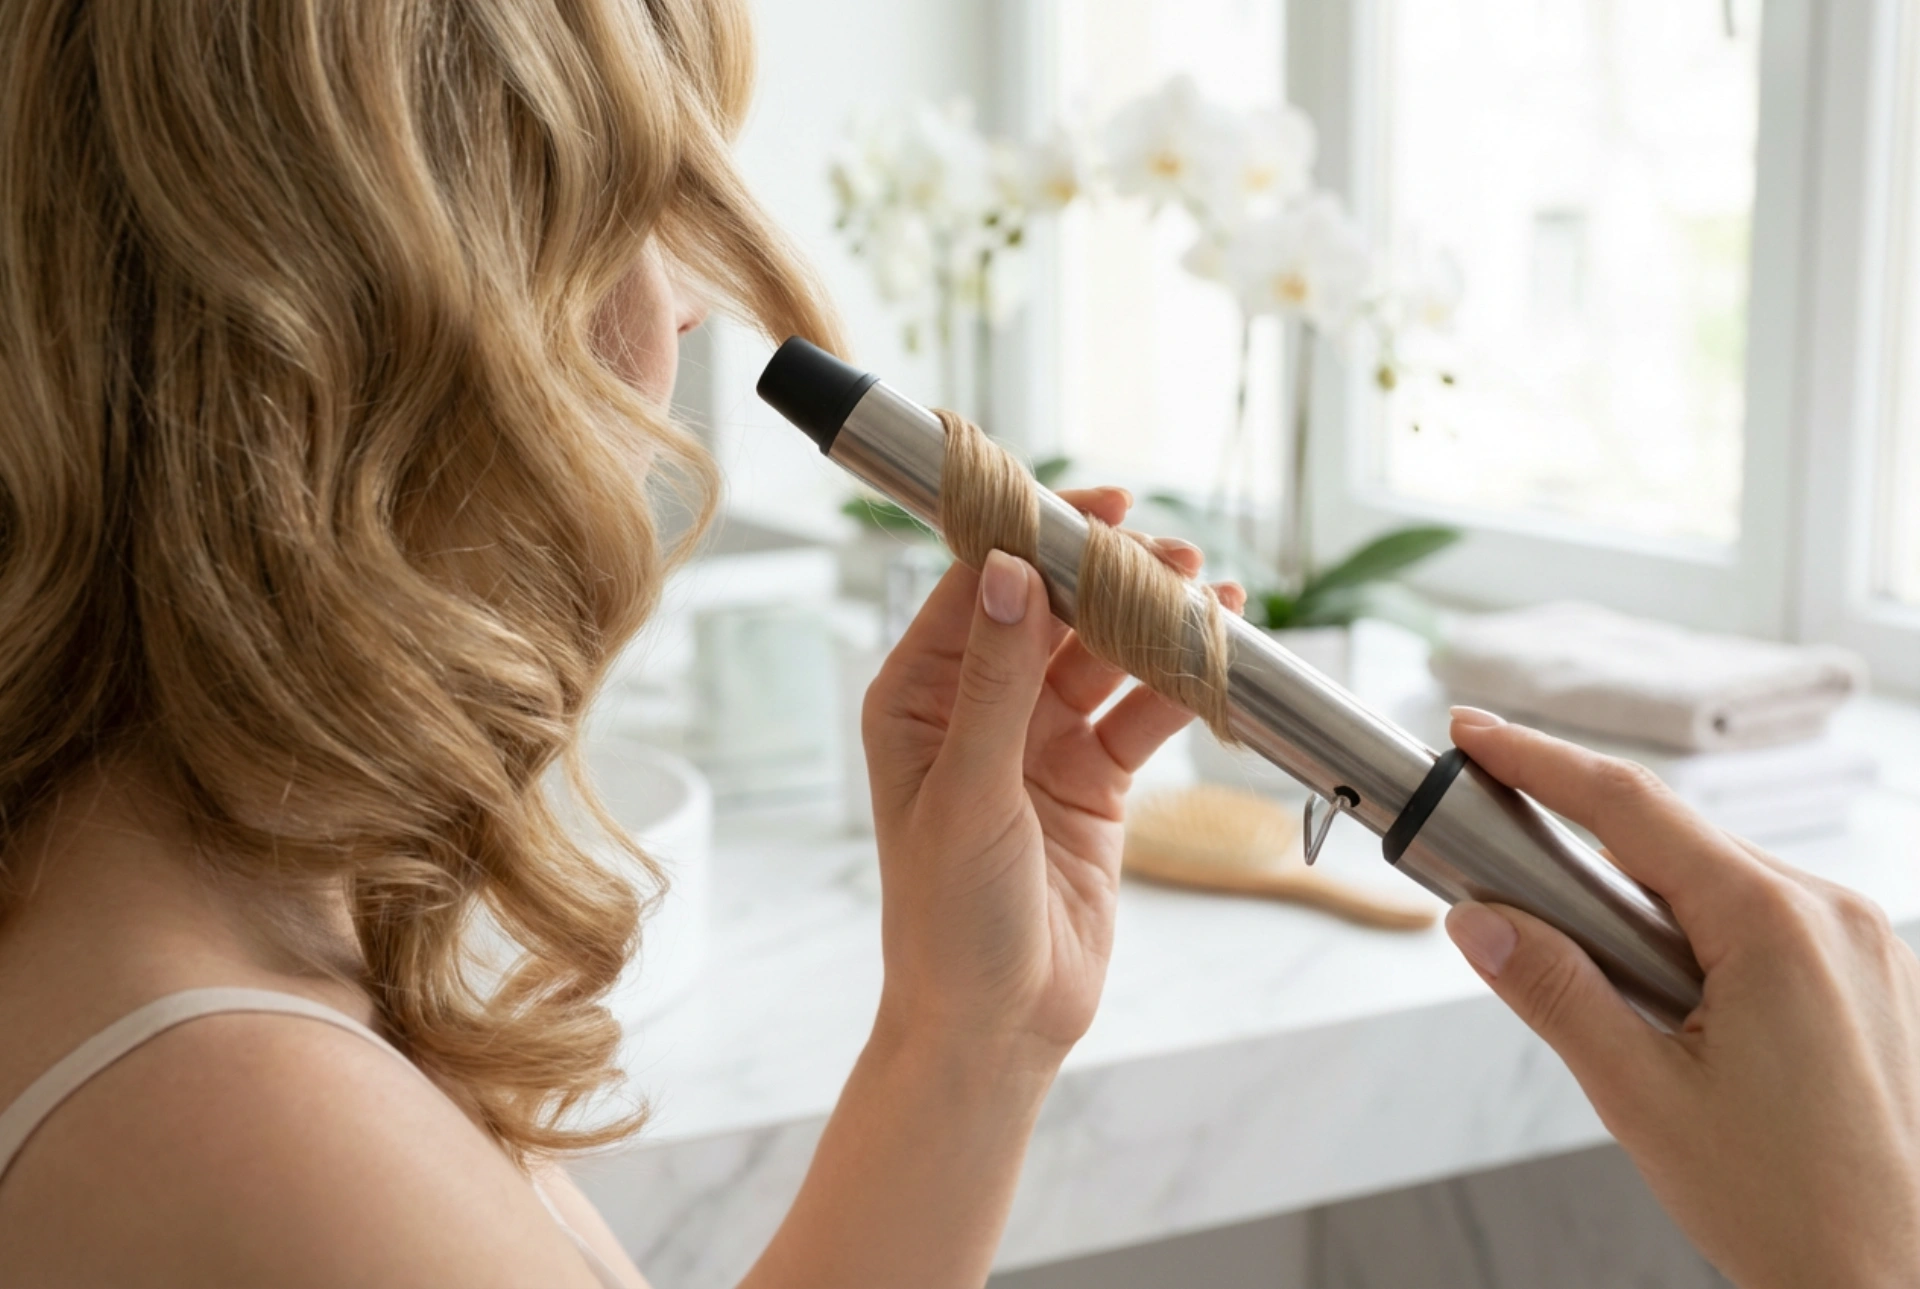
- A curling iron or hot rollers: A curling iron (around 2.5-3.5 cm in diameter) offers control, while hot rollers can create beautifully uniform, soft curls.
- Hair clips: To section your hair and keep it out of the way as you work.
- A fine-toothed comb: For gentle backcombing to create height at the crown.
- A soft bristle brush: For smoothing over the backcombed sections for a polished finish.
- A strong-hold hairspray: To lock your finished style in place all day or night.
Creating the Volume: Step-by-Step Guide
With your hair prepped and tools ready, it's time to start building the style. This process is methodical, focusing on creating a strong, voluminous foundation before moving on to the detailed shaping. Patience is key, so take your time with each step to ensure the best possible outcome.
Step 1: Prep and Blow-Dry for Body
Begin by applying a generous amount of volumising mousse to your damp hair, concentrating on the roots and working it through to the ends. Follow this with a thorough spritz of heat protectant spray. Next, section your hair. Using your hairdryer and a round brush, start blow-drying section by section. The key technique here is to lift the hair at the roots, pulling it upwards and away from the scalp as you dry. Point the hairdryer nozzle downwards along the hair shaft to smooth the cuticles and add shine. Focus on creating as much lift at the crown as possible. Dry your hair completely; any remaining dampness will cause the style to fall flat.
Step 2: Building the Curls
Once your hair is dry and voluminous, it's time to add the characteristic retro curls. Section your hair again using clips. Working with one section at a time (about 2-3 cm wide), wrap the hair around your curling iron. For this particular style, you want to curl the ends of the hair inwards, towards your face or neck, creating a soft, rounded finish. Hold for a few seconds, then release. For the sections around your face, you can curl them slightly away to open up your features. If you are using hot rollers, roll the hair under and secure them firmly. Let them cool down completely before removing them, as this is what sets the curl.
Styling and Finishing Touches
The final stage is where the hairstyle truly takes its iconic shape. This involves strategic backcombing for height, smoothing for a polished look, and setting the style for longevity. These finishing touches transform the voluminous curls into a cohesive and glamorous retro statement.
The Art of Gentle Backcombing
To get that signature height at the crown, you'll need to do some light backcombing, also known as teasing. Take a section of hair at the crown, hold it straight up, and use a fine-toothed comb to gently push the hair down towards the scalp. Only use two or three short strokes per section. The goal is to create a soft cushion of hair at the roots, not a tangled mess. Be gentle to avoid damage. Repeat this for a few sections across the crown area to build the desired volume.
Smoothing and Shaping
After creating the volume at the crown, take your soft bristle brush and very gently smooth over the top layer of the backcombed hair. The aim is to hide the teased texture and create a sleek, uniform surface without pressing down and losing the volume you just created. Use your fingers to arrange the curled ends into a cohesive shape. You can gently brush through the curls to soften them into waves if you prefer a less defined look.
Setting the Style
The final, crucial step is to lock in your hard work. Hold a can of strong-hold hairspray about 30 cm away from your head and mist it all over your hair. This will provide hold without making your hair feel stiff or crunchy. For extra security, you can lightly spray the backcombed area from underneath. A tiny drop of shine serum warmed between your palms and lightly smoothed over the surface can add a final touch of gloss and tame any flyaways.


