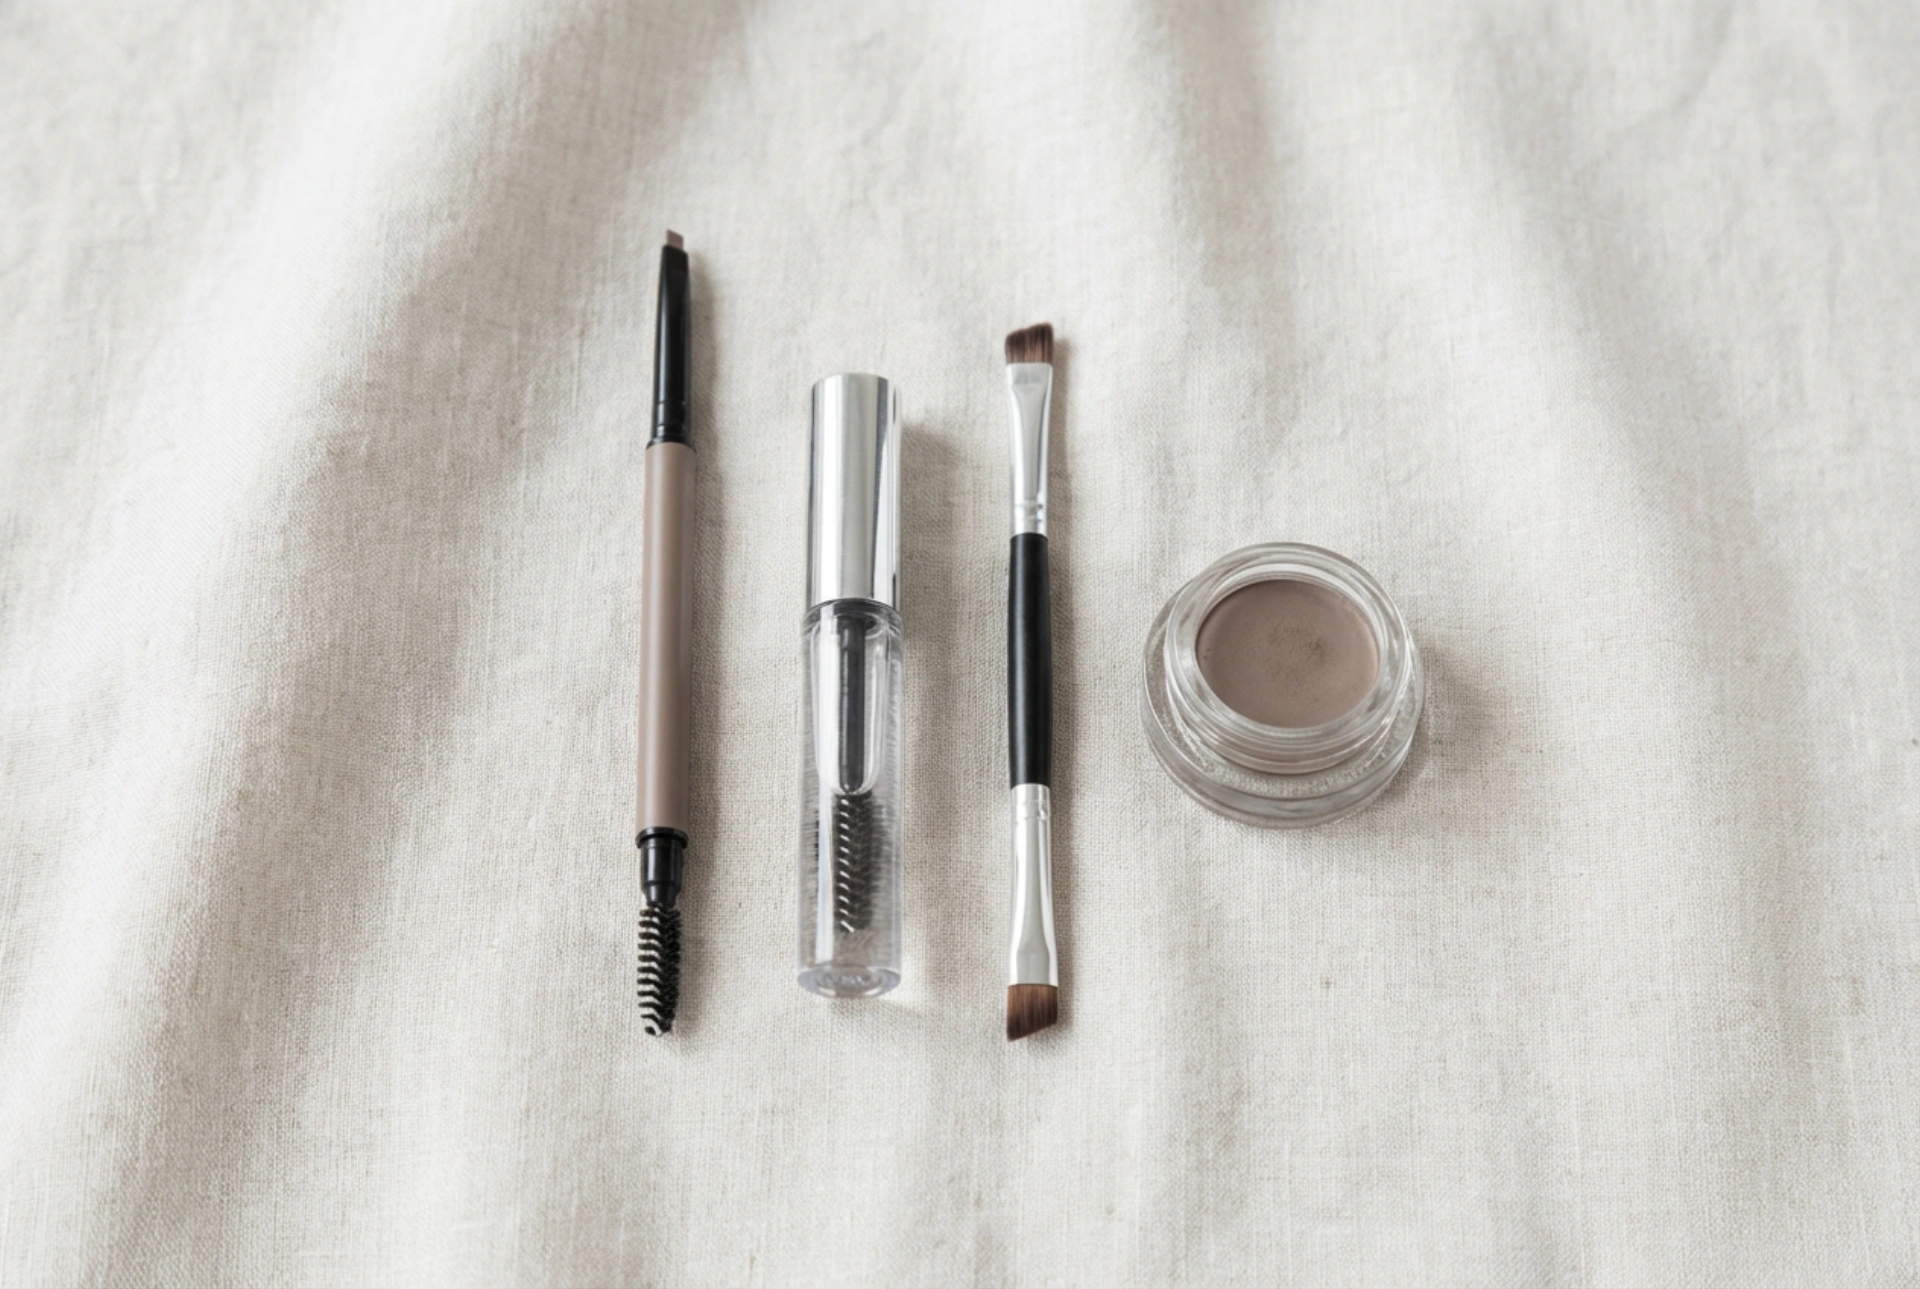


A beautifully curated flatlay of essential grooming tools resting on soft, natural linen fabric evokes a sense of calm and organisation. Having a dedicated eyebrow routine is one of the simplest yet most transformative aspects of daily makeup. To achieve natural-looking, defined brows, you do not need an overwhelming array of cosmetics. Instead, a carefully selected kit containing a few versatile items, such as a precise brow pencil, a clear brow gel, an angled brush, and a soft brow powder, is all it takes to enhance your features effortlessly.
Understanding the Basics of Brow Styling
Eyebrows play a fundamental role in framing the face and bringing balance to your overall look. Historically, brow trends have shifted from ultra-thin lines to bold, bushy shapes, but the most enduring style is always the one that complements your natural bone structure. Rather than trying to completely reshape what you have, modern grooming focuses on subtle enhancement, filling in sparse areas, and keeping the hairs neatly in place throughout the day.
Building a personal kit allows you to customise your routine according to your specific hair pattern and density. Some days might require a quick sweep of gel, while others call for more definition using a pencil or powder. Knowing how to select these products and use them in synergy is the key to achieving a polished, natural finish without looking overdone.
The Core Elements of an Eyebrow Kit
To create a versatile brow routine, you only need a handful of reliable products. Each serves a specific purpose, working together to add depth, structure, and hold.
The Classic Brow Pencil
A fine-tipped eyebrow pencil is the ultimate tool for precision. It allows you to draw tiny, hair-like strokes in areas where your natural brow might be sparse or uneven. When choosing a pencil, opt for a formula that is firm yet pigmented enough to glide smoothly without tugging the skin. Micro-pencils are particularly useful for defining the tail of the brow and adding realistic texture to the inner corners.
Eyebrow Powder and Angled Brush
For a softer, more diffused look, eyebrow powder is an excellent choice. It works wonderfully to fill in larger gaps and add a gentle shadow behind the existing hairs, giving the illusion of natural density. To apply it correctly, a high-quality angled brush with firm synthetic bristles is essential. The angle of the brush helps in placing the powder precisely along the natural arch, while a spoolie on the opposite end helps blend the colour seamlessly.
Clear Brow Gel for Setting
Once you have added colour and definition, keeping the hairs in place is crucial. A clear brow gel is a universal must-have that acts like a lightweight hairspray for your brows. It grooms unruly hairs, lifts them slightly for a modern, feathered effect, and sets the underlying products so they last all day. Clear gels are ideal because they never deposit excess pigment, ensuring your brows remain soft and natural-looking.
Step-by-Step Guide to Using Your Brow Kit
Achieving perfectly styled brows is easy when you follow a structured, step-by-step approach. Here is how to use your new kit to its full potential:
- Step 1: Prep and Brush: Start by brushing your brow hairs upwards and outwards with a clean spoolie. This reveals the natural shape of your arch and highlights any gaps that need filling.
- Step 2: Map the Shape: Gently hold your pencil vertically against the side of your nose to find where your brow should begin. Next, angle the pencil from the edge of your nose through the pupil to find the arch. Finally, point it from the nose to the outer corner of the eye to find where the brow should end.
- Step 3: Define with Pencil: Using very light pressure, use the pencil to draw delicate strokes in the areas that lack fullness. Focus primarily on the arch and the tail, keeping the front of the brow softer and lighter.
- Step 4: Soften with Powder: Dip your angled brush into a small amount of brow powder. Sweep it gently through the middle section of the brow to blend the pencil lines and add soft dimension.
- Step 5: Set with Gel: Finish the routine by brushing a clear gel through the hairs in an upward motion. This locks the shape in place and adds a healthy, subtle sheen.
Tips for a Natural and Long-Lasting Finish
The most common mistake in brow grooming is applying too much product too quickly. To keep your look fresh and modern, always build up the colour gradually. It is much easier to add more product than to remove excess pigment once it has been applied.
Additionally, pay close attention to your shade selection. As a general rule, those with dark hair should choose a shade or two lighter than their hair colour to prevent the brows from looking too harsh. Conversely, those with lighter hair should select a shade that matches the deepest undertones of their hair to provide adequate definition. Neutral and cool-toned ash shades generally look the most natural on almost all hair colours.